Author:
Clyde Lopez
Date Of Creation:
22 June 2021
Update Date:
1 July 2024

Content
Oil painting is a great way to paint on canvas. Classical paintings such as Mona Lisa were painted in oils, along with beautiful impressionist paintings by Monet or Van Gogh.
Steps
 1 Buy good quality materials for your oil painting, the best you can afford. If you're just starting out, you can find many of these things by looking at gift baskets that include all or most of them, sometimes in a pretty wooden box or on an easel. The minimum you need:
 - The stretched canvas size of the painting you want to paint. It would also be a good idea to get some small tarpaulin boards for practice and preliminary research. You can also use tarpaulin paper or canvas, which is on the spacer and is suitable for oil painting and for sculpting. Try to choose a small board with the exact proportions of your stretched canvas, but if there isn't one, get a large piece to fit your canvas.
- Oil paint pipes in the main palette. If you buy a set, it probably has all the colors you need most. The simplest palette has colors like red, blue, yellow, burnt sienna and a large tube of white paint. If it's Winsor & Newton, you can get lemon yellow, permanent red, ultramarine or French ultramarine (they are chemically close.) If you initially choose a large palette of colors, use dark red alizarin or more purple, red, but not orange red. You can do without burnt sienna, but besides mixing, there are other reasons here. If your palette does not have this color, use a reddish brown.
- Buy oil and thinner. Linseed oil is a traditional oil used by artists. Some artists think nutty is better. If you want your painting to dry faster, choose a product such as Winsor & Newton's "Liquin", which will make the oil dry faster.You also need regular or odorless turpentine, sometimes referred to as turpenoid or white spirit. It is a liquid that has a strong or weak aroma. It is a paint thinner in the opposite environment. Odorless thinners such as the Weber Turpenoid or Gamsol are generally considered healthier to use, but proper ventilation must always be provided to allow some of the components to air out. The oil paint itself is non-toxic, like turpentine, which does not emit toxic fumes. But some oil paints contain toxic ingredients like cadmium and cobalt that can be quite harmful if swallowed, so never eat, drink or smoke while using oil paint.
- Buy a varnish for coating, something like Damar designed for oil paintings. The varnish probably contains some toxic fumes and should be applied outdoors or in a well-ventilated area. A removable art varnish should definitely be chosen. Varnish should be added after the oil painting is completely dry and unable to alter the chemical composition of the painting. At this point, a removable varnish can be applied to give the painting a nice glossy finish and protect the paint layer. Every 25 to 30 years, the varnish should be removed (either by the artist or the owner of the painting) with a varnish remover and reapplied, as varnishes turn yellow over time and should not be permanently on the painting. This is why very old oil paintings turn brown. They often just need cleaning and a new clear coat to look bright as if they were painted last year. You do not need to buy varnish before the painting is finished, as you will not use it until the painting is ready and completely dry. "Retouch" can only be used when the painting is dry to the touch. This will not damage the paint layer, but the painting must be completely dry and you must wait a full month before using the varnish. If you want to sell the painting sooner, you can apply a temporary cover.
- Buy brushes. Preferably hard. Bristle brushes are less expensive, but good white synthetic fibers that are quite stiff, like bristles, can also be great choices. Some oil painters also use soft long-handled sable brushes for a variety of effects. You can use large, small and sparse brushes, depending on the areas, shapes and objects you want to depict in great detail, if you like detailed realism. Soft "rigger" brushes with very long fine soft hairs are well suited for depicting boat rigs, cat whiskers and other long linear details. For this, very thin paints are used, which can also be used to write your name on a painting or for long, flowing lines. A beginner is advised to try different sets of brushes or synthetic brushes of different shapes and sizes to understand what style each one conveys.
- A palette knife, painting knife, or a non-serrated butter knife can be used to mix paint. Palette knives are pretty cheap if they are made of plastic. Metallic good because they do not stain and can last for many years if kept clean. Painting knives come in a variety of shapes, from scoops to corners, each with different effects, and you can use them in place of brushes.
- Charcoal or purple pastel pencil to draw on canvas.
- The palette will be needed so that there is where to put the oil paints during their use. It can be a palette with small holes, or you can improvise with cheap plain ceramics, glass, or melamine plate. Something that might hinder turpentine.Many artists prefer a gray palette because colors reflect best on gray. If you use a flat piece of glass on your desk (very cheap if you get it from a cheap photo frame), you can place gray paper under it for a gray, easy-to-clean palette at all times.
- Two small cups for oil (or Liquin) and diluent. Some kits come with a "double bucket" so they can be attached to the palette. If so, then your kit probably has a palette as well.
- Rags for painting. This can be any kind of clean rags. Heavyweight paper towels will work too, but the fabric is reusable if washed. The fabric of used baby diapers, if washed, even worn out and dyed, will do just fine. Paper towels wear out quickly, so it's best to use old clothes that are soft like old T-shirts and the like. Try to use rags that you don't mind spilling paint on, as this can destroy the fabric pattern on the painted areas. Use rags that are on the verge of being useful if you don't want to wash them and keep using them over and over again.
- An easel for work, either a desk easel or a standing easel. It doesn't have to be expensive. The cheapest "viewing easel" for which any reasonably sized canvas will do on a comfortable working corner, and its legs must adjust to different heights depending on whether you are sitting or standing. If your age does not bother you (as well as illness or injury limiting the amount of time you can stay on your feet), it is much better to stand at your easel. This will also allow you to look from the side after every few strokes to see how the painting looks, which is definitely better for painting. You can also lean the painting on a chair or other support, or improvise something similar. A picture horse is a bench with a board sticking out at the end, which you sort of saddle up and support the canvas in the groove.
- You must decide on the tools. Than you will make sketches, with a pencil or charcoal, on a sketchbook or a drawing paper, and maybe even on used paper. They don't have to be archived, but if you like your sketches, you can create a sketchbook out of them and use a soft pencil / pen / marker for this. These are just sketches to draw something, something to choose from. Your regular sketchbook and your favorite painting tools.
- A dust-free safe place so that your painting can dry, where nothing happens to damage the paint on the canvas. Drying times for oil paintings vary from a few days to several months. Some types of oil painting will take a full year to dry before they can be varnished.
 2 Sketch notan of the painting in your sketchbook or on paper with a gray or black pencil or pen, using the pencil as the gray. If it's a square, it's a square. If it is a rectangular or oval painting, decide whether it will be a vertical "portrait" or a horizontal "landscape". Make the notan very small just to place the light, dark and middle areas of the painting. They can range from the size of a large postage stamp to the size of a business card. The idea is to see the painting in miniature. Make several variations until you find the best design without worrying about the details.
  3 Use charcoal or pencil to draw in your sketchbook. It can be quite detailed and carefully shaded, or simple to show you shadows and highlights. It depends, in part, on how detailed and realistic you want the painting to be. A freer painting style may have a more sketchy sketch, but should still have one with a more "white, medium and black" hue, so that you can tell where there are at least five meanings - white accents, light, medium , dark, black accents. Some artists, in order not to use pure black and white colors, simply use “light, medium light, medium, medium dark, dark” for five views. It depends on the desired effect. If you don't like the sketch, keep trying different versions until you get what you like.
 - In your sketch, make sure that the light striking a person, object or landscape element is in the same direction. Pay attention to where the shadows are coming from. They should all go in the same direction and be shorter if the sun or light is high, and larger if the sun (or the lamp from which the light comes) is low. The direction of illumination makes all objects appear more three-dimensional. Draw the shapes of the shadow carefully and most of your subjects will look three-dimensional at this point. This is good for Impressionism or Realism.
- If you want to abstract, sketch out with a pencil and decide where you want specific effects such as splattering or strong texture strokes. Or you can skip the sketching step on paper and move on to the next one.
- Draw the object on a tarp, tarp paper, or canvas pad. Use charcoal or purple pastel pencil. Mark out the exact proportions of the canvas on the board if they are not exactly the same shape, so do it as in the sketches. Make a clear outline. You can detail the markings for the eyes, mouth, all the important shapes on it, or you can just stick to only the basic shapes and basic shadow shapes. In any case, it should look like the paints in the sketch. If you make mistakes, wipe off the charcoal or pastel pencil with a damp cloth, let the canvas dry, and do it again. It is quite possible to correct this.
 4 Squeeze some paint onto a palette and mix colors. Spread out the yellow, blue, red, and large brushstrokes of white at some distance from each other. Additionally, use burnt sienna. Leave all other colors in the box if it was a gift set.
  5 Explore the alla prima paint. Just paint directly on the sketch in the area of each color. Since it doesn't need to be detailed, you can try painting a color study with a palette knife or a painting knife. If you don't like any of your color choices, use a palette knife to scrape off the ugly brushstroke and set unnecessary paint aside in case you need a messy brown. Putting all three primaries together will blend in the painting and thus the mixed paint can be separated and mixed a little more to turn into pale browns or dark browns and grays. No waste with a simple basic palette. Keep playing with color exploration until you enjoy a simple, bold painting done with a fairly large brush with little detail. If necessary, do more than one of these until you decide which mixes you like. You are doing this little painting with paint straight from the pipe. She does not need thinner or oil for this technique. If you like the way your test painting looks, you can do a larger one the same way, only with a palette knife and pipe paint with bold strokes on the canvas. No extra paint and no extra coat. This style of painting is fast and powerful.
  6 Draw the outline using a soft pencil or thin stick of charcoal. For landscape painting, use a purple pastel pencil. It will be a good choice because it works well with all landscape colors without darkening or staining light colors in the same way as black. Charcoal and purple pastel pencil are both easily corrected with a damp cloth or rag, so don't worry about making changes to your sketch! Draw, and if you do it wrong, wipe it off and try again.
  7 Prepare some oil in one cup and solvent in another. Wipe down the brushes and palette knife. Rinse the brush if you have used it for color research using a turpenoid: simply dip it in solvent and wipe with a rag.
  8 Apply a small amount of burnt sienna to your palette. Or, if there is no white or a lot of white in the tricolor mixture, use a thin layer of brown. Dip the brush in solvent, turpentine / turpenoid / Sansodor (the Winsor & Newton brand is especially good). Dip a wet brush in a small amount of paint until you have a very thin, transparent paint. It's easy. Use a little more paint, medium light and consistently dark areas with burnt sienna, still thinning it down until it becomes the texture of the ink. Even dark areas should have a fair amount of color. The thinner you use, the faster this transparent burnt sienna layer will dry.
 - Wow! A transparent painting in burnt sienna usually looks pretty cool at this stage. It's still easy to change if your color is too dark or too light. Take a rag and wipe off the part of the paint you don't like and repeat with the desired color. Or erase everything and reshape. Gee, did you think oil painting should be perfect? No, everything here is very easy to fix and make changes. This stage will dry out pretty quickly, from a few minutes to half an hour. The finest details may be dry to the touch by the time you finish the other corner. It is only necessary that the paint is dry to the touch.
 9 Remember the "oil on a slope" rule. The first coat you apply can be very runny, almost one turpentine and very little oil. Just a little oil in the paint and it will look different. It can almost look like paper with a thin layer of watercolors. You can wash sequentially in different colors if you want to have fun by applying a layer of "wash". The next coat is alla prima or paint straight from the tube, as you did in the color study. It is a kind of medium fat layer, not too fat and not too weak. After that, especially after the oil or Liquin that you added to the paint, the structure becomes fatter. Oil tilt problem - The oil layer takes the longest to dry, so there should be a quick-drying paint underneath. Otherwise, the outside will dry out, and a closed, soft, not dry layer will remain inside.
 - In the worst case, a painting that has a slope can slip off the canvas on a hot day, losing the mix of colors.
- Never use oil pastels under oil paint because their oil formula includes mineral oil that never dries out. Optionally, add oil pastels to the last layer of your oil painting when it is dry to the touch.
 10 Block out the colors for the main areas, and then add a little more paint to make the details lighter or darker, redder, yellower or blue. Mix half the colors on the palette, half on the canvas. Start with the main directions of light and shadow, with the correct general colors, then add paint to change them. Shade slowly and mix gently. Where you want the paint to be smooth, don't brush too much. Apply a lot of strokes where you want a strong texture, like in impressionist painting, or use a knife to create strokes to make bold textures. By contrasting the smooth and bold textures so that some parts of the painting rise up, the thick overprint structure helps all parts to paint very thoroughly quickly. Therefore, the amount of "alla prima" texture that you applied is changed. Mix some of the oil into the paint if you want to apply thin and polished strokes to keep the texture smooth. While it is still wet, you can mix more oil or more paint to make this layer thicker or thinner. But if it starts to dry or tighten, do not add anything else that does not contain fat.
 - If you don't want to make an ugly special effect like in a zombie face, apply a thick layer of grease to the brush, then leave it to dry improperly, then tear off a piece so that the skin of the paint hangs down, and a lump of brownish-red oily paint is airborne and dry, and maybe it froze in the form of drops. Almost any mistake can be turned into a special effect when you know how it works.
 11 Oil paints stay wet for days! This means you can paint all day, fool around with them, go to bed, put an empty box on the palette so your cat doesn't walk over it, and start over tomorrow and make adjustments while the painting is wet. You can use a palette knife to scrape off entire areas before they dry and start over. The slow drying time of the oil paint allows you to make many changes before deciding on the final version and only then letting the paint dry.
  12 Leave the painting to dry. This will take at least two weeks if you haven't used Liquin as a base. Liquin dries faster than tube paints, so use at least some of it in the paint so it adheres well. This is not fat, but oil straight from the tube. You can also add alkyd oils that have alkyds (the main ingredients in liquin media) directly to the tube paint. In this case, the painting can dry only from a couple of days to a week, depending on the thickness of the paint.
  13 One of the traditional techniques of the old masters is not to rely too much on the texture of the brush. Start as described here by lightly burnt sienna with tube paint and scrubbing it thoroughly, making realistic black and white with all the details of your subject, simply using ivory black paint and titanium white. Let this "grisaille" or "dead layer" dry completely. It will look like a black and white photograph, in great detail. After that, start mixing the oil with all your colors, using them in a very thin layer, and start applying them to the grisaille layer. Covering the black and white painting with various transparent colors will allow the light to flow back and forth within the dried layers and give the painting a unique range of light. Only the slow, layered use of colored pencil comes close to this effect. This is one of the things that oil painting is famous for.
 - You can try this method if you have a long time to wait for one layer to dry before doing the next. But, if you don't want to wait that long, just let the grisaille dry, add some oil, paint in the right colors and add one final coat of glaze when the paint is dry. You can use both complex and simple oil painting options.
 14 When you're done with your painting session, clean the brushes by dipping them in solvent and then use a rag to squeeze the paint out of them. Repeat several times until almost all of the paint is on the rag, otherwise it will require more solvent. Keep rags and consumables away from open flames / electrical circuits / heaters / that could cause a fire. Place them in a metal jar if you have one on hand. If you store the wrung out palette in the refrigerator, it will slow down the drying process and you can use the squeezed paint longer. But don't let anyone eat it!
  15 Store wet paintings in a safe, dust-free, dark and cool place if possible. You can make a vertical dryer in a cabinet of your own design, where you place the pegs a few tens of centimeters apart from each other so that you can lean over the picture. If you paint a lot of oil paintings, a garage is more suitable for drying.Since you are creating thinner vapors, it is a good idea to use a garage and other areas where people do not spend much time or have very good ventilation. Storing these materials in vertical slots will reduce the amount of dust that falls on the paintings themselves while they dry. Dust will accumulate on the top end, not on the paintings themselves.
  16 On canvas "gallery", which has a depth of 3.8 cm, it is not worth painting in oil. Just paint the sides, or wrap the painting / paint black / do something fun with it. You don't need to buy the frame, sell it to the gallery, or donate it. It is ready to hang when dry and varnished.
 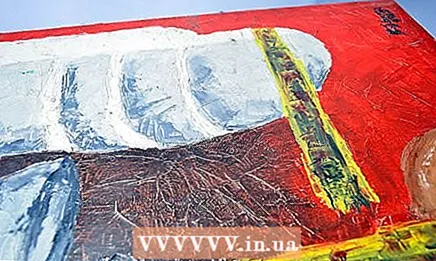 17 Wait at least a month after the painting is dry to the touch, then use touch-up varnish to give the painting a temporary shiny and finished look. Some varnishes dry a matte surface, shiny ones can fade if varnish is applied to them. Wait another eleven months to apply dammara polish or any other replacement polish and allow it to dry for a few days. Your painting will now last longer than yourself.
Tips
- Burnt Sienna is a good color base for mixing tones that convey skin color as long as it is not too black and has a bluish tint like African ebony black. It will look especially special if you add a little yellow ocher to it, which can betray most skin tones, including a little earthy one. Add some red and you can get red or brownish hair.
- Oil paint is much denser in texture than regular oil. In the student version of the paint, there is more liquid, since it has more oil and less pigment. Thus, paint in a tube, if you like painting with thin liquid paints, will last you much longer than student paint of the same volume, because you add linseed oil there so that the paint is liquid and oil so that it is cheap. Pigments are better in professional oil paints, so they are more concentrated. You can save money by buying paint or impasto medium if you like to apply thick with a knife and don't want to spend a fortune using clean, expensive Grade pipe paints.
- Flaxseed oil is an edible vegetable oil, but flaxseed oil from mainstream and health food stores is not suitable for painting. Different types of painting oils have specific properties. Experiment if you like the environment.
- Apprentice oil paints are very liquid and a small amount of paint can cover large areas.
- Don't buy large pipes if you don't need them.
- Once you're used to painting a lot, buy a large tube of ultramarine and a super giant tube of white paint. Ultramarine is used in much higher quantities than other colors. Unless in portraits, burnt sienna can also be used often.
- Always buy a large tube of white paint because you will be using and mixing the most often. If this is a mini kit where all pipes are the same size, buy an extra tube of white paint.
- When you paint well enough and other people are willing to pay real money for your paintings, in general, people will pay more for oil than for other textures, even if they are equally strong and beautiful. People think of oil painting as something extremely valuable and permanent.
- Use an easel if possible.
- Do not soak brushes, nap down, in a solvent can. The hairs will be permanently bent and the brush will be destroyed. Hold the brush upside down so that the hairs of the brush do not bend and are in a free state without touching anything (this is what the spring wire is for to keep the brushes in an upright position upside down without touching the bottom) or simply lay the brush flat, where excess liquid can come out of it. Some small pebbles or something more subtle can allow you to do this.
- If you have an inexpensive liquid paint student kit, use inexpensive brushes and work a little at a time.Examine the texture and try using thinner for the "lean" layer before painting with an opaque color and then a glaze with a subtle transparent color. Practice on tarpaulin boards and spacers until you're ready for more expensive canvases and paints, or use a liquid texture to paint with a subtle smooth regular look on a stretched canvas. When you don't have the materials listed as such, use what you have.
- Water-soluble oils are another new type of paint. They come with water soluble linseed oil and water soluble thinner. They can also be diluted with plain water, but this sometimes changes color a little or makes them a little cloudy. Use a water-soluble thinner to make a wash on canvas and water to purify a water-soluble oil. Use only water-soluble media with water-soluble oils.
- Alkyd oils are made with the addition of an alkyd resin mixed with an oil medium. They are designed to dry quickly to the touch in a day or two rather than a week or two. Liquin medium can be mixed to turn regular oil paint into something that dries faster, like alkyd paint, and can be used with it. Do not cover the oily layer like Liquin.
- Gypsum is a primer for oil painting. You can take a canvas that has not been initiated, buy a gesso, prepare and stretch it yourself to get the desired canvas dimensions. Or you can use gypsum to cover wood or particle board panels, use it on the wall to make oil painting as a mural. Plaster has many uses. It will usually not be included in the starter kit. It is sold in black as well as white and other light colors if you want to show the canvas color.
- For easy cleaning, if you are working with alla prima, try choosing the largest brush you can complete the painting with and using only that one. This saves a ton of cleaning hassle. Paintings painted with one brush tend to have consistency of texture and color, even if you create different textures with the same brush.
Warnings
- Do not smoke, use torches, open flames, or heaters near oily paint rags, containers of solvent, or flammable oil materials.
- Do not pour sticky liquids, used solvent, or old dirty paint down the toilet. The liquid will be released into the environment and may be toxic. Worse, it can stick to your plumbing when dry and cause big problems. If you live with your parents, this can get you into a lot of trouble. If you rent an apartment - the same thing. If you have your own home, you have to fork out for plumbing. So no matter how you look at it, the toilet is not the place to dispose of toxic paint! Use it on organic waste and spoiled food.
- Use adequate ventilation. If the smell of the thinner is annoying, it is probably dangerous. Odorless thinners are somewhat safer, but still not very good if you dry your paintings in the same room you sleep in without an exhaust fan. Oil painting painted with spray paint is very dangerous - toxic fumes can ignite!
- If you paint outdoors, be careful not to pour used solvent or paint onto the grass. It can be toxic to the environment. Recycle your diluent with water and store dirty water in a bottle. Throw it out where toxic waste can be left in your city. Sometimes, if you are using very little thinner, soak it up with paper towels and clean with as little liquid as possible so that toxic solids can be sealed and disposed of properly instead of having to deal with throwing out a lot of sticky things.
What do you need
- Linseed oil (from an art workshop) or Liquin, or another medium. Water-soluble linseed oil if using water-soluble oil paints.
- Thinner - turpentine, odorless white spirit, Sansodor, turpenoid or water-soluble thinner
- Oil paint, minimal white titanium, lemon yellow, permanent red or alizarin crimson, ultramarine and burnt sienna
- Easel (optional)
- Brushes (optional if you want to try a painting knife)
- Palette knife for mixing (can be improvised with a spoon or butter knife), optional painting knives of various shapes
- Palette / flat piece of glass / disposable paper
- Rags
- Brush washer or solvent can, small cup or double ladle
- Sketchbook plus pencil and pen, additional gray and black markers
- Tarpaulin canvas or cheap canvas boards for preliminary color studies and texture testing
- A safe place to dry wet paintings for weeks or months. Once they are dry, they can be scrubbed
- Removable varnish, eg Damar, for the final varnishing after the painting has dried for one year. Even an alkyd painting should dry within a year.
- Additional touch-up varnish as a temporary coating. It is used after the painting has dried for only a month (if you want to sell the painting faster or urgently hang it on the wall)


