Author:
Ellen Moore
Date Of Creation:
18 January 2021
Update Date:
1 July 2024

Content
Have you ever got annoyed while trying to make a brochure or flyer in Microsoft Word? This article provides 4 simple steps to make your job a lot easier. To create compelling marketing materials using Microsoft Word and Publisher, start with a template to give yourself a head start. In the Links section, you will find several sites where you can find good templates.
Steps
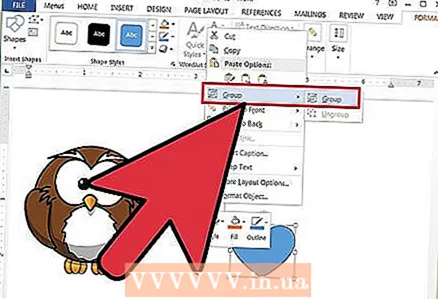 1 Ungroup objects - text and graphics can be grouped.
- To ungroup objects:
- Word:
- Select an object. On the toolbar, click the Draw button and then click Ungroup.
- Publisher:
- Select an object. On the Organize menu, click Ungroup or press Ctrl + Shift + G.
- Word:
- To group objects:
- Word:
- Select the objects you want to group. Use Shift + Mouse Click to select multiple objects. On the toolbar, click the Draw button and then click Group.
- Select the objects you want to group. Use Shift + Mouse Click to select multiple objects. On the toolbar, click the Draw button and then click Group.
- Publisher:
- Select objects. In the "Organize" menu, click on "Group" or press "Ctrl + Shift + G".
- Word:
- To ungroup objects:
 2 Resize the image
 - Select the photo you want to resize.
- Hover over any of the dimension elements.
- Drag the point until the object is in the shape and size you want. To maintain the proportions of the object, drag one of the corner points.
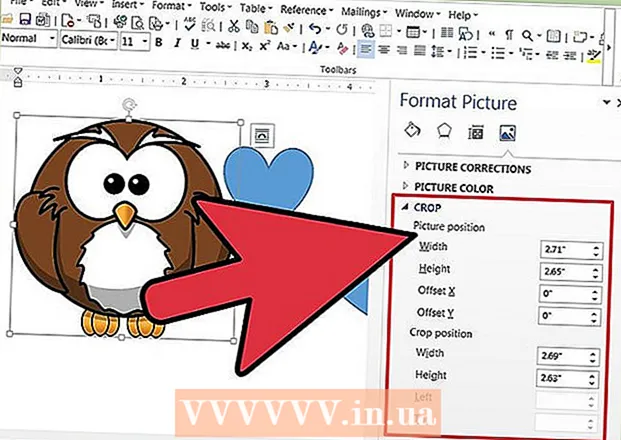 3 Crop the shot
 - Select the photo you want to crop.
- On the toolbar, click Trim.
- Position the clipping tool over one of the points and drag the clipping point inward until you clipped what you want.
- 4 Edit images or graphics. You can resize, crop and adjust brightness and contrast, make the image black and white, or give it grayscale. To change certain colors, you need a painting or image editing program. Drawn objects can be changed, you can rotate them, flip them and change the color. You can also add borders, patterns and other effects. The formatting options change depending on the type of image being edited.
- Select the image or graphic you want to edit.
- Select the editing option you would like to use from the Images toolbar or the Draw toolbar.
- Set the exact size or position of the object: From the Format menu, choose Picture or Shapes. Then enter the parameters in the dialog box.
- Select the image or graphic you want to edit.


