Author:
Sara Rhodes
Date Of Creation:
10 February 2021
Update Date:
1 July 2024

Content
- Steps
- Method 1 of 3: Use a regular stapler and cardboard
- Method 2 of 3: Use a regular stapler and two books
- Method 3 of 3: Use a dedicated stapler
- Tips
- Warnings
- What do you need
Have you made a booklet at home and need to flash it? Reaching the spine of a booklet with a regular stapler can be overwhelming, but just like the two pens you have on your stapler, there are at least two ways to do it using household tools. If you are stitching a large number of booklets or a very thin booklet, you will probably want to save time by purchasing the special stapler discussed below.
Steps
Method 1 of 3: Use a regular stapler and cardboard
 1 Place a layer of corrugated cardboard or other protective material underneath. This method involves stitching the booklet through soft material and then manually stitching the booklet with staples. You can use corrugated cardboard, foam, or any other material that's soft enough for the staples to slide freely without being attached. Use only the material that you are not sorry to ruin.
 - If you have a lot of booklets to staple, you may prefer the dedicated stapler method.
- And if you don't have any suitable materials and have a thin booklet, try the two-book method.
 2 Place your booklet face down on the cardboard. Make sure all pages are in order and in line. The top should not be the inner pages, but the cover, otherwise it will be difficult for you to fold the booklet after stitching.
 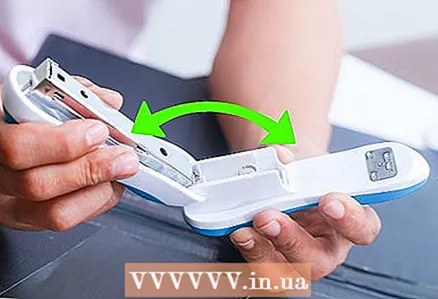 3 Pull the two stapler handles in opposite directions. Clamp the upper arm at the seam, not the head releasing the staples. Use your other hand to support the base and move your hand forward. The two parts of the stapler should separate.
  4 Place the stapler in the center of the booklet. There should be 2-4 evenly spaced staples in the center of the booklet to form the spine - this depends on the size of the booklet and how sturdy you want the booklet to be. Each staple should run in the same direction as the spine (vertical when the finished booklet is readable) so that you can fold the sheets of paper in half around the staples without tearing the pages. Position your stapler according to the directions given.
 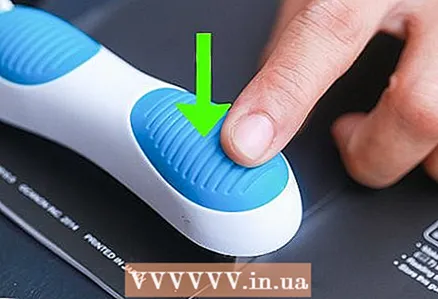 5 Press down on the stapler head to release the staples. Since you are stitching paper through corrugated cardboard or other soft material, you may not hear the characteristic stapler sound you are used to. Press firmly, then release and raise the stapler handle.
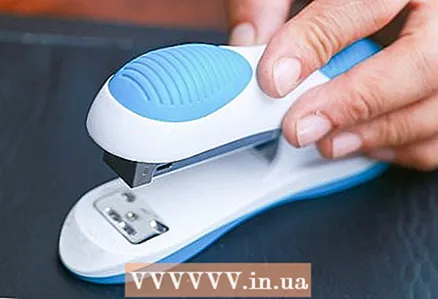
  6 Carefully lift up the booklet and carefully inspect the staples. Most likely, the staples are partially attached to the bottom of the cardboard. Slowly lift the booklet up, gently pulling out the two prongs of the staple that are stuck in the cardboard, but you may need to bend the staple back with your finger before pulling it out.
 - If the bracket is firmly attached to the material, the material is too narrow for this purpose. Remove the staple with a staple remover, then try with thicker corrugated cardboard.
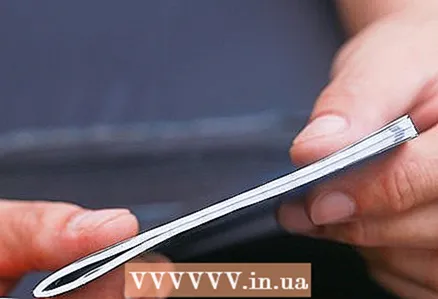
 7 Thread the teeth of the staples through the paper. After removing the staple from the bedding, you should see two prongs sticking through the paper, but not folded. Bend them towards each other along the length of the spine. You can use your fingers, being careful not to bump into the sharp end, or spread the paper out on a flat surface and gently hammer it in with any hard object.
  8 Do the same for the remaining staples. Reposition the booklet on the cardboard and prepare the stapler for stitching the next section of the spine. Try to line up the staples as evenly as possible.
Method 2 of 3: Use a regular stapler and two books
 1 Use this method for stitching thin booklets. This method does not require any special materials, but it is only suitable for thin booklets made from multiple sheets of paper. Your stapler should be powerful enough to release the staple through the booklet when there is no supporting surface behind it, so do not use a rusty or easily seizing stapler.
 - If you have a lot of booklets to staple, you may want to save energy by using the dedicated stapler method.
 2 Place two large books next to each other. Pick two books that are exactly the same height as they lie horizontally on the table. Place them on a table or other hard surface, leaving a tiny gap between them. The slot should be just wide enough to fit the booklet and the staples should not touch the book; 1.25-2.5 cm (1/2 or 1 inch) should be sufficient.
  3 Place your stack of paper face down on top of the books with the center above the spacing. Make sure all pages are in order and in line, then place the stack of paper on top of two books. The center of the cover should be right above the spacing.
 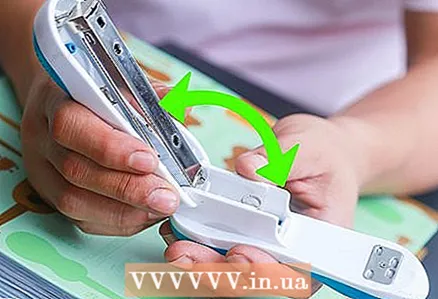 4 Pull the two stapler levers in opposite directions. Pull the two levers in opposite directions. If the cover comes off (opening the staples), reattach it and try again, holding it tighter with the lever around the edges.
  5 Hold the paper in place and point the upper stapler lever towards the spine. Support the paper with your hands or with a heavy object on top of each side. Rotate the stapler so the head is toward the center of the booklet where you want to insert the first staple. Depending on the size of the booklet, you may need 2 to 4 staples evenly spaced along the spine.
 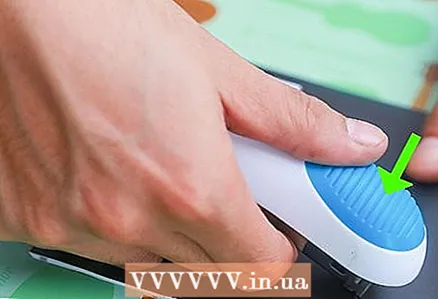 6 Press down quickly on the stapler head. Since there is nothing but air under the spine, you will have to quickly push down on the stapler to release the staples. Hold the paper to be sure the stapler does not pull on it. Do not press too hard, otherwise the paper will tear; you should act with strong but quick movements.
  7 Bend the prongs of the brackets. Take a stack of paper and see if the staples go through the paper. If so, then all you have to do is bend the teeth of the staples towards each other. You can do this with your fingers to avoid hitting the sharp end, or you can gently hammer them in with any hard object.
 - If the staples have not pierced the entire stack of paper, you may not have as powerful a stapler, or you may not have pressed hard enough. Try again by pressing the books together and making sure the paper is clamped firmly when you poke through it with the staples.
 8 Do the same for the remaining staples. Continue until there are enough staples in the spine to hold the paper tightly as you fold it to make a booklet. Usually 3 is sufficient, but extra thick and long booklets may require 4 or more staples.
Method 3 of 3: Use a dedicated stapler
 1 Buy a stapler with an axial or rotary head. If you frequently stitch booklets, you should definitely invest in one of these types of staplers. Axial staplers are ordinary oversized staplers that can reach the spine of a booklet by placing the staples in the desired direction. Rotating head staplers are shorter but have a lever that can be rotated to release the staples in the correct direction. Both types are suitable for brochures.
 - Axial staplers are sometimes called booklet staplers or long overhang staplers.
- Make sure the “Drilled Hole Depth” is the full width of your booklet page (for axial staplers).
- Check the maximum number of pages this device can flash. Remember to count the number of sheets of paper, not the numbered pages of the bound booklet.
 2 Collect your booklet. Make sure all pages are in order and on the same line before flashing.
 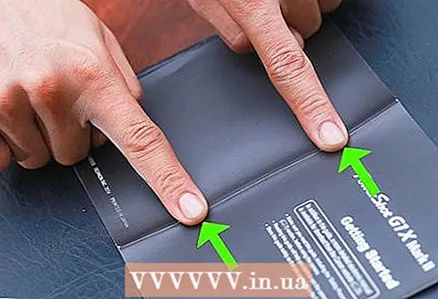 3 Determine how many brackets to insert into the spine of the booklet. Usually two will suffice (this is the standard), but depending on the size of your brochure, one may suffice, or you may need three or four. If you need more than one or two staples, to make it easier, you can make small marks with a pencil where you want to stitch. As you gain experience, it will become easier for you.
  4 Place your booklet with the cover on top. Place it in the special stapler so that its middle part is in line with the stapler and so that there are equal margins on both sides of the stapler.
 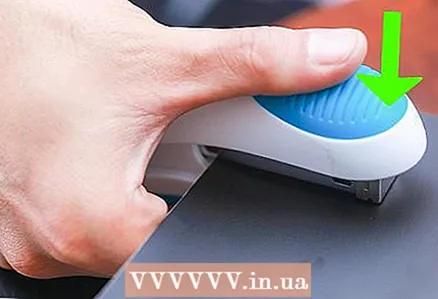 5 Press down on the stapler lever in the area of the spine where you want to release the staples. When the stapler arm is level, push down on the end of the top handle of the stapler until you hear the staples slide through the paper. Do the same, working the entire length of the spine with a stapler, and sew it with the number of staples you need. Usually two or three staples are enough.
  6 Make sure all staples are correct and level. If any of them do not pierce the paper or are uneven, pull them out and reinsert. To do this, carefully bend each end of the staple so that it becomes even, then pull it out through the hole made by the stapler.
Tips
- If the pages are uneven, you can use a tool or utility knife to cut them.
- The axial stapler can be used to stitch large items such as address books, gift baskets, wallets, and more. Consider this if you are not sure which stapler to use.
- Some office machines can print and staple booklets; if you need to make many copies, you can purchase a model with a professional DIY function (D-I-Y).
- If you are producing a large number of booklets, it may be better to use a copy shop to print and stitch them. To do this professionally, find a printing press with a document stitching machine.
Warnings
- Do not grasp the stapler by the head when the handles are separated. Take it by the joint located between the two levers.
What do you need
- Stapler (regular or axial)
- Staples
- Paper
To work with a regular stapler:
- Two big books
- Corrugated board, foam or other soft material


