Author:
Gregory Harris
Date Of Creation:
10 August 2021
Update Date:
1 July 2024

Content
- Steps
- Part 1 of 6: Planning
- Part 2 of 6: Cleaning the bathroom and toilet
- Part 3 of 6: Cleaning the Kitchen
- Part 4 of 6: Cleaning the Bedroom
- Part 5 of 6: Cleaning All Living Areas
- Part 6 of 6: Finish cleaning
- Tips
- Warnings
- What do you need
Cleaning your home seems simple and straightforward, but if you think about it, you might have a ton of questions. For example, how do you clean the toilet? In this article, you will find a step-by-step guide on what to do and how to do it. You just need to start cleaning, and you will not want to leave the process until your whole house shines with cleanliness.
Steps
Part 1 of 6: Planning
 1 Decide how much cleaning you would like to do and how much time you are willing to devote to it. This will help you come up with a cleaning plan. Be honest with yourself about what you have the strength, time, and motivation to do.
 - Try to move from top to bottom whenever possible. You should not first vacuum the floor and then contaminate it again by dusting furniture and other interior items. If you're short on time, clean up the clutter first and then get on with the bigger things.
- It is better for the average working person to clean up a little every day to keep things from piling up, and to do a more thorough cleaning several times a month. Choose a method that is more convenient for you (of course, if you do not live alone, it should be coordinated with other household members).
- Watch out for areas in the kitchen where grease and dirt easily accumulate and therefore require regular, albeit less frequent cleaning, such as the hood and top of the wall cabinets. They are high and easy to miss when cleaning, but greasy build-up attracts dust and insects.
 2 Make a cleaning plan and a list of things to do. Determine which room you will start cleaning from and where you will end it (it is usually best to move towards the front door). This will allow you to speed up the process and not repeat the same steps, especially if several people are involved in the cleaning.
 - You can use our article as a sequential plan. In this case, you already have a list of tasks.
- Make a plan so that you can vacuum, mop, and wipe all rooms at the same time (without the hot water having enough time to cool down) so you don't have to move from one activity to the next.
 3 Try to distribute tasks. If someone else lives with you, you should do the cleaning together. You may need to take overall leadership by scheduling or assigning responsibilities, but that is better than taking on all the work.
 - Make sure the tasks are age appropriate for the participants: for example, young children can remove toys from the floor, teenagers can clean up the closet or bathroom, and so on. Also, try to distribute things fairly - tidying up the coffee table is much easier than cleaning the toilet.
Part 2 of 6: Cleaning the bathroom and toilet
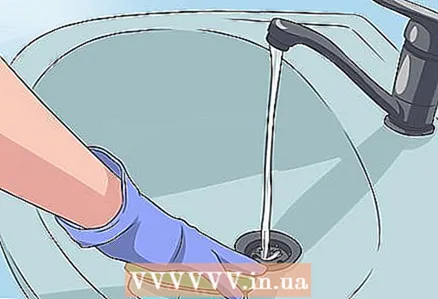
 1 Flush the toilet. What is there to do? No one likes to wash the toilet, so it's best to get it over with first. Wear rubber gloves (not the ones you wash the dishes in, of course!) To keep your hands free of dirt and bacteria, and lightly wipe the outside of the toilet with a sponge dipped in hot water. Let it soak, working on the inner surface for now.
 - Squeeze the toilet cleaner into the bowl and under the rim. Leave it on for a minute, then scrub with a brush. When done, drain the toilet.
- After cleaning the toilet bowl, return to its outer surface. Spray it with disinfectant and dry it with a rag or paper towel.
 2 Clean your shower or bath. Showers are known for their ability to get dirty quickly. A shower stall cleaner, a bristle brush and a little physical strength will help you. If you don't have a dedicated shower cleaner, liquid dishwashing detergent will remove plaque from your shower tray as well as grease from dishes. Then clean the cab with lysol or another antibacterial cleaner.
 - To keep your shower clean longer, lubricate the walls (but not the bottom, or you might slip) with a car wax polish. To clean the glass, add half a glass of ammonia and 8 drops of dishwashing detergent to 4 liters of water.
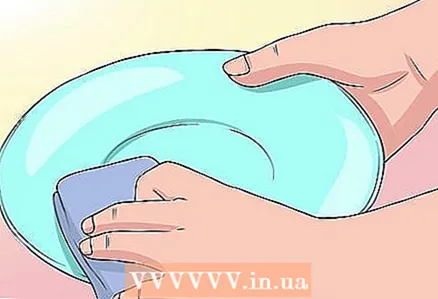
 3 Clean your sink. In most cases, this is a pretty daunting task. Before using the cleaning agent, check if it is suitable for the material of the sink.Once you're convinced of this, sprinkle it on the sink. Wait a minute for the product to attack bacteria and mold, then scrub the sink thoroughly with a firm sponge. When you see that the sink is shiny, rinse it with warm water and dry it with a clean rag or paper towel.
 - To get rid of stubborn stains, scrub well with a brush. You can use a wire bristle brush (which you use to clean the shower).
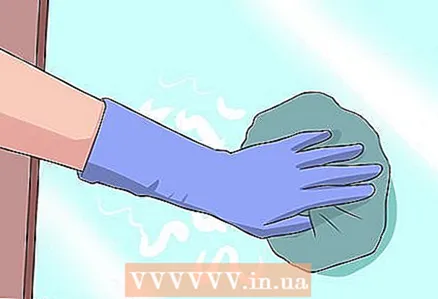 4 Wash glass and mirrors. It is believed that special glass cleaners are best. It doesn't actually clean the glass, it just adds shine to it. When it comes to cleaning, especially if the mirror is visibly dirty, nothing beats soapy water. Windows and mirrors should be cleaned as follows:
 - First, wash the glass with warm or hot water and dishwashing detergent using a cloth, sponge or rubber scraper. This non-scratch powder is ideal for cleaning mirrors, glass, ceramics and metal to remove dirt and moisture without scratching the smooth surface. Then wipe the surface with a dry, lint-free cloth or lint-free paper towels.
- If you want to use environmentally friendly products, clean the glass with an aqueous vinegar solution, wipe it with a dry, lint-free cloth, and wipe it off with newsprint. No divorces will remain! Rub the glass with enough force, otherwise it will not clean properly.
- You can also spray glass cleaner on a paper towel and wipe the glass surface with it. This protects the surface from stains and dust and makes them easier to remove. However, if used incorrectly, it can leave streaks on the glass. After washing the glass, you can also wipe it down with old newspapers: you will get rid of streaks and at the same time usefully dispose of unnecessary newspapers.
Part 3 of 6: Cleaning the Kitchen
 1 Wash the dishes. By organizing the process correctly, you will save a lot of time and effort. The most efficient way to use a dishwasher is to load it completely and start immediately after loading.
 - Large items such as pots and pans are usually best hand washed as they do not fit well in the dishwasher.
- When washed in a dishwasher, the plates wear out faster, since the detergent used in it has an abrasive effect. Heirloom china, thin glass goblets and other fragile items should be carefully washed by hand.
 2 Try washing dishes by hand too. It is much easier to wash off immediately after use. In this case, you do not have to soak or scrub the dishes for a long time, since the fat does not have time to dry and harden yet. Moisten a sponge or brush with hot water, drip some dish detergent onto it, wipe each item (both sides!), Then rinse in hot water.
 - If you are going to soak dishes, just imagine the following picture: a bucket of water, brown with grease, sauce, food debris and millions of bacteria rinsed from your dirty dishes. Disgusting (and unsanitary) sight. If you need to wash the burnt remains from the pan, it is quite possible to soak it for 10-15 minutes, but it is better to wash ordinary dishes immediately after use, without leaving them to soak for a long time.
 3 Dry the dishes. If dishes and cups are not dried properly, damp spots may remain on them. In addition, various bacteria easily multiply in the water. After washing by hand, rinse the dishes thoroughly and place them in a clean dryer to air dry completely.
 - The dishbrush, sponge and towel should dry after every wash to prevent bacteria from growing in them.
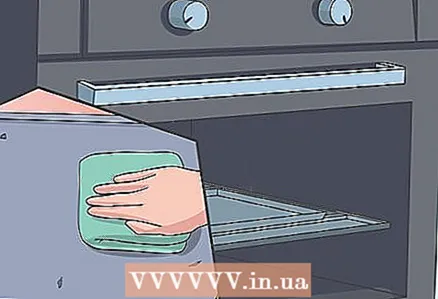 4 Clean oven and microwave oven. This is another not very pleasant job, especially if you do not wash them very often (they are easy to forget about).However, after doing this, you will really feel the improvement - when cooking, the smell in the kitchen will be much nicer, as you clean the oven and microwave of old food debris. Proceed as follows:
 - Check if the oven has a self-cleaning function. In this case, your task will be greatly simplified. If the oven has this function, remove the wire racks from the oven and soak them in soapy water, start the cleaning cycle, and after completing it, remove the carbon deposits that have fallen to the bottom of the oven and wash it with a damp cloth and detergent. If the oven is not equipped with a self-cleaning function, remove and wash the grates in the same way, spray the inside of the oven with a cleaning solution, wait for it to work, then clean the oven with a scraper and a sponge.
- To clean the microwave, you can use a cup of vinegar, lemon juice in water, dish or window cleaner. Simply put the cup in the oven, turn it on for a few minutes, then wipe the inside of the oven with a rag. This way you can easily remove any dirt that has accumulated on the walls and the oven will look like new.
- The kitchen sink can be cleaned in the same way as the bathroom sink. A sink is a sink - just make sure the cleaning agent is suitable for its material.
 5 Organize your closets. After you've completed the hardest part of the job, grab the kitchen cabinets. This part is up to you and how to you it is more convenient to store utensils and food. Try to organize your storage so that there is some kind of system in it and everything you need is at hand.
 - It so happens that it is easier to get everything out of the cabinet, and then put it back together, than trying to rearrange its contents without removing it from there.
- When the cabinet is empty, wipe the inside of it. With a damp cloth, dry or damp at first, and then dry - the main thing is to keep it clean.
- Arrange items in place. Cups for cups, glasses for glasses, spices for spices and so on. Also, try to keep the items you use the most within easy reach.
- If there are items in the kitchen that are not necessary, consider where to store them. To make your life easier, throw away everything you don't need. Do not store your trash, however, do not get rid of the necessary things in the heat of cleaning.
Part 4 of 6: Cleaning the Bedroom
 1 Get organized. In this case, it is also better to move from top to bottom. When cleaning any room, get rid of unnecessary junk first and put things in their designated areas. Are there unnecessary pieces of paper scattered on the floor? Throw them away. Are there clothes on the bed? Place it in the closet. After that you can start the main part of the cleaning.
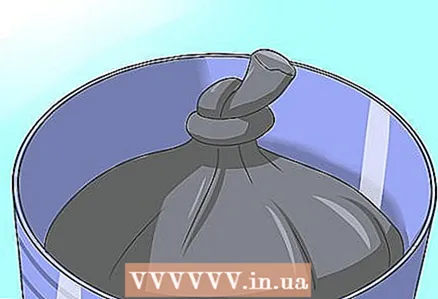
 - Walk around the house while cleaning, bringing your trash bag and laundry bag with you. Collect all rubbish and clothes to be washed in them.
 2 Make your bed. Of course, this may seem superfluous, because in the evening, when you go to bed, you will spread it again; however, you will see how the bedroom will change and how nicer will be in it. After that, you just want to clean up to the end to make the room look neat.
 - Of course, you may want to wash your bedding, and only then make the bed. Wash the sheet, pillowcases, and duvet cover, and the duvet itself if it can be washed. It is pleasant to go to bed in the evening after a hard day, but at the same time it is clean the bed is much nicer.
 3 Organize your wardrobe. Generally, it should be maintained on a daily basis, but quite often it gets out of hand. Imagine your wardrobe: where is there a place for trousers, shirts, underwear, accessories? Lay out and hang everything in appropriate places, trying to place similar items together, and what you use most often at the top (if things are in piles).
 - It's also a good idea to sort out the clothes in the closet and decide what to get rid of (this also applies to things that are not clothes, but somehow ended up in the wardrobe). Surely there are several things that you no longer wear, which are wasting space in your closet. It is not necessary to throw them away: you can make rags out of them or hand them over for recycling, and high-quality and almost unworn items can be sent to a collection point for things for the poor.
 4 Wipe off dust, vacuum or mop the floor, and spray an air freshener in the room. Dust and debris accumulate on bedside tables, shelves, and other nooks (not to mention the space under and behind beds). Wipe them first with a damp soft cloth and then with a disinfectant wipe (or spray with a dust spray). After wiping everything, including corners and baseboards, vacuum or mop the floor.
 - Handle items such as lampshades and curtains with care. You can gently blow off the dust with a hair dryer.
- Once you've finished cleaning your bedroom, you can spray a pleasantly scented air freshener (like lemon or lavender) if you want.
Part 5 of 6: Cleaning All Living Areas
 1 Clean the floor. It all depends on the type of floor: wood, tiles, linoleum and carpet should be cleaned differently. Which method is right for your gender?
 - Vacuuming is the best way to pick up dust and debris from your carpet. Moreover, it is practically necessary to do this on a daily basis if you have shedding pets.
- Wood or tiled floors can be wiped with a dry cleaning mop (preferably a microfiber brush). Carpet can be cleaned with a carpet brush. It may sometimes be more convenient to resort to these methods than to reach the vacuum cleaner, and they will help keep the floor clean for longer from one vacuuming to the next.
 2 Wash the floor. While some new floor cleaning products can be used, they will not replace a good wet rag with which you can wash off any dirt that has stuck to the floor. In the kitchen and in some other places it is necessary to wash the floor to a shine. No other product will help remove dirt from tile joints or other crevices.
 - There is a wide selection of materials for cleaning the floor. A rag mop head scrub better and lasts longer than a sponge head. By properly wiping the floor with a mop and a good rag, you can be sure it will look amazing with a little effort on your part. Use hot water and a cleaner suitable for your floor (read the label carefully).
 3 If you have pets, fight fleas. The best way is to use a vacuum cleaner and no carpets. Carpets serve as a convenient refuge for fleas (not to mention how much of your pet's fur is stuffed in them). Vacuum daily if you have pets. This will prevent fleas from breeding, which require pet or human dander.
 - To get rid of fleas without using poison, spray borax on them each time you vacuum the carpets, letting it soak into the base of the carpet. If you do this regularly, you will never have fleas in your house. Borax can be purchased at a hardware store, drug store, or jeweler's store.
 4 Dust off furniture. Tiny dust mites live almost everywhere, and if we could see them, we would dust them around the clock, seven days a week. They can be found throughout the home and can cause sneezing, coughing and asthma. In addition to wiping off dust, it is also useful to vacuum up upholstered furniture.
 - To remove dust from furniture, take a damp cloth or dust-collecting mitten and run it over the surfaces. Wipe the surface in a continuous motion so you don't miss anything, and move around the room in one direction. You can also use a scented furniture spray.
 5 Polish wood furniture. Like glass polish, furniture polish does not clean furniture. However, his can use for cleaning. In this case, it follows carefully read the directions on the packaging to determine which product works best for you.
 - Some furniture is water resistant and can be washed with soapy water. After that, you should quickly wipe the washed surfaces dry.
- Apply the recommended amount of furniture polish and rub in as directed. This will prevent dust from sticking to furniture.
 6 Be careful with all-purpose cleaners. Remember, they are not necessarily suitable for every purpose that can come to your mind. Before purchasing such a product, carefully read the instructions for use on the packaging to make sure that it is right for you. It will be a shame if you ruin good furniture.
 - Another rule of thumb is to never mix different cleaning agents. This can be very dangerous. Use the products one at a time following the directions on the packaging.
 7 Arrange the little things in their places and beat the pillows. After cleaning the surfaces, including the floor, it remains to do the little things. Fluff up pillows, straighten blankets and bedspreads, and make the room look like you are listing your home for sale or photographing for social media. If too many small things come into view, put some of them in a box, sign it (so you don't forget what is in it) and hide it in a closet or desk drawer.
 - After cleaning the room, spray an air freshener if you want, sit down and admire your handiwork. Have you missed anything? Are the door hinges lubricated? Are the walls cleaned? Have burned out light bulbs been replaced?
Part 6 of 6: Finish cleaning
 1 If you live in a private house, be sure to clean the yard. A well-kept garden is just as important as a well-kept home, although it is often neglected. Rake up fallen leaves to prevent mold growth, which often happens in humid climates. It will also help to reduce the number of insects in the garden and make it cleaner and tidier. What's more, grass that is not covered by leaves and plant debris receives more sunlight and grows faster and denser.
 - Don't you have a rake, or is it hard for you to work with them? In this case, use a garden vacuum cleaner to blow off the fallen leaves, which will speed up your work.
- Pruning plants near your home (hedges, rose bushes, and so on) will keep the outside walls cleaner by keeping out water and dirt.
 2 Wash manually or in the washing machine. What to do with dirty clothes collected in the bedroom? Naturally, wash. Here's a general guide to using your washing machine:
 - Select the desired program / temperature according to the type of fabric.
- Measure out the correct amount of detergent or liquid detergent and pour into the appropriate compartment.
- If you are using fabric softener, pour it into the required compartment or into special balls that are placed in the machine drum in front of the clothes.
 3 Dry the rubbed items. How you load your clothes into the tumble dryer determines how you take them out. After completing a full wash cycle, remove the clothes from the washing machine, shake them, straightening the wrinkles, and only then put into tumble dryer. This will dry your clothes faster and prevent large wrinkles from forming.
 - It is best to remove clothes from the tumble dryer while they are still warm. In addition to the fact that she will wrinkle less, it is very pleasant to hold a stack of clean, warm clothes in her hands.
 4 Walk around the house and add finishing touches as needed. While the above list is quite long, it is by no means exhaustive. For example, the following tasks are not mentioned in this list:
 - taking out the trash;
- cleaning the kitchen table;
- change of bed linen (sheets, pillowcases and duvet cover);
- cleaning walls;
- washing the refrigerator
Tips
- If your friends want to help you, this will speed up the process, and you will have someone to talk to while cleaning.
- Throw away any rotten or moldy food from the refrigerator.
- If you are short on time, do the most important things first. For example, washing dishes is more important than cleaning desk drawers.
- Washing powder can be used not only for washing clothes and bed linen, but also for many other purposes. For example, it can be used to clean the oven, removing grease and surfaces in the bathroom, since it is less abrasive and has a pleasant fresh smell.
- To remove odors from the refrigerator, wash it with a baking soda solution.
- Many people prefer to wipe glasses with crumpled newspapers rather than paper towels.
- Do not dry the used sponge together with the dishes. The sponge is saturated with bacteria and harmful microorganisms. If you are using a dishwasher, load sponges with the dishes. Change your dishwashing sponges more often. Do not forget rinse them in hot water after squeezing. Sterilize the sponge by placing it in the microwave for one minute. Be sure to wet the sponge before placing it in the microwave! Otherwise, it may catch on fire.
- Old socks or T-shirts work well as rags. This will save you money.
- If you are expecting guests, you may need to clean the living room first, as visitors see it first and only then the rest of the room.
- Carry all your cleaning supplies in a plastic box or basket so you don't have to run after them all the time.
- Sprinkle baking soda on the carpet for 15 minutes or longer. As a result, the carpet will acquire a pleasant smell, only then do not forget to vacuum it.
- Listen to music while you work and do the cleaning effortlessly.
Warnings
- Some cleaning products can damage linoleum, wood and many other materials and are not safe for your skin. Again: read the instructions carefully... It only takes a few minutes to do this, thanks to which you can possibly save a significant amount. If, after reading the instructions, you are still not sure, test the product first on an inconspicuous area.
- When placing the sponge in the microwave, keep it moist. Pull the sponge out of the oven carefully, as it will be hot!
- Do not mix cleaning products... Otherwise, you may end up with a hazardous chemical. Use each product separately, following the instructions on the package.
What do you need
- Glass cleaner
- Furniture polish
- Bath cleaner
- Dishwashing liquid
- Paper towels, rags, newspapers, or sponges
- Latex gloves
- Brushes, scrapers and the like
- Polyethylene apron


