Author:
Mark Sanchez
Date Of Creation:
6 January 2021
Update Date:
1 July 2024

Content
If you need to transfer a list or table of data from a Word document to an Excel spreadsheet, you do not need to copy and paste every single piece of information into the corresponding cell of the table. You can easily import an entire document to Excel format in a few clicks if you format your Word document correctly first.
Steps
Method 1 of 2: Convert the list
 1 First, you need to understand how the application transforms the document. When you import a document into Excel, the program determines which piece of information will be placed in a separate cell of the table using certain characters in the text. By formatting the data in the document before importing, you can control the appearance of the final table and minimize the need to manually format the document. This method is convenient when you need to import a large list from a Word document into an Excel spreadsheet.
 - This method is especially effective if you are importing a list of several items in the same format (list of addresses, phone numbers, email addresses, and so on).
 2 Check your document for formatting errors. Before starting the conversion process, make sure that all items in the list have the same formatting. If necessary, correct possible punctuation errors or rearrange items that do not match the rest. This will ensure correct data transfer.
  3 Turn on the display of formatting characters in your Word document. Showing hidden formatting marks helps you choose the best way to separate list items.To display formatting characters, click the Show All Characters button on the Home tab, or press the keyboard shortcut Ctrl+⇧ Shift+*
- Most lists will have either one paragraph mark at the end of each line, or one at the end of a line and one on a blank line between items. You will use these characters to insert characters that Excel uses to distribute data across table cells.
 4 Remove paragraph marks between elements to get rid of blank lines. Excel uses blank lines between list items to identify individual lines of data, but they need to be removed for the formatting process to proceed correctly. Don't worry, you'll add them again a little later. This method is appropriate when there is one paragraph mark at the end of a list item and one on a blank line between paragraphs (two per line).
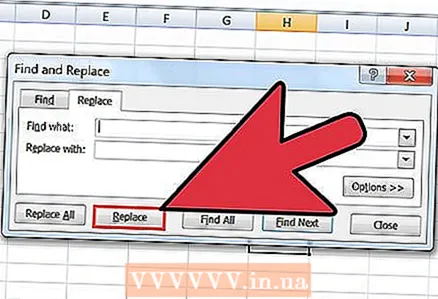
 - Click on Ctrl+H to open the Find and Replace window.
- Enter in the search box ^ p ^ p... This is the code for two paragraph characters per line. If each list item consists of one solid line, and there are no blank lines between the items, use the command ^ p.
- In the Replace box, enter a separation character. This mark should not be repeated anywhere else in this document. For example, you can use the sign ~.
- Click the Replace All button. You will notice that all the elements of the list have merged together, but don't worry, because there are delimiters in the appropriate places (after each element).
 5 Select each item in a separate box. Now that the list items are separated so that they are displayed in sequential lines, we need to indicate what data will be displayed in each field. For example, if the first line of each item contains the name, the second contains the address, and the third contains the region and postal code, you can
 - Click Ctrl+H to open the Find and Replace window.
- Remove one of the characters ^ p in the Find box.
- Change the character in the field Replace with a comma ,.
- Click the Replace All button. The remaining paragraph marks will be replaced with commas, which will separate each line into a separate field.
 6 Replace the separators to complete the formatting process. When you follow the above two search and replace steps, your list no longer looks like a list. All information will be presented in one continuous line, and its fragments will be separated by commas. The last find and replace operation will return your data to a list view, with the individual fragments separated by commas.
 - Click on Ctrl+H to open the Find and Replace window.
- In the Find box, enter the character ~ (or another character you selected earlier).
- In the Replace box, enter ^ p.
- Click the Replace All button. All items in your list will be broken down into separate groups separated by commas.
 7 Save your document as a simple text file. Now that formatting is complete, you can save your document as a text file. This will allow Excel to read and analyze the data and place each chunk in the appropriate field.
 - Go to the File tab and select "Save As".
- Open the dropdown menu "Files of type" and select "Plain Text".
- Enter a name for your file and click the Save button.
- If the Convert File window appears, just click OK.
 8 Open the file with Excel application. Now that you have saved the file as plain text, you can open it with Excel.
 - Go to the File tab and select Open.
- Open the All Excel Files drop-down menu and select Text Files.
- In the Text Wizard (Import) window, click Next>.
- In the Delimiters list, select Comma. In the preview window, you will see how your list items will be split in the table. Click Next>.
- Select a data format for each column and click Finish.
Method 2 of 2: Convert the table
 1 Create a table with data in a Word document. If you have a list of data in your document, you can convert it to a table in Word and then quickly copy that table to Excel. If your data is already in the form of a table, proceed to the next step.
 - Select all the text that you want to format in a table.
- Go to the Insert tab and click the Table button.
- Select "Convert to Table".
- In the Number of Columns field, specify the number of rows in the record. If records are separated by blank lines, add one line to the total.
- Click OK.
 2 Check the formatting of the table. Word will create a table based on your settings. Check carefully that all data is in place.
  3 Click the little "+" button that appears in the upper left corner of the table. It appears when you hover your mouse over the table. By clicking on this button, you will select all the data in the table.
  4 Click.Ctrl+Cto copy the selected data... This can also be done by clicking the "Copy" button on the Home tab.
  5 Open Excel application. Once you have copied the selected data, you can open Excel. If you want to insert data into an already prepared Excel spreadsheet, open it. Hover your cursor over the cell where you want to paste the top-left cell of the copied table.
  6 Click.Ctrl+Vto paste the copied data... Individual table cells from the Word document will be placed in the corresponding cells in the Excel table.
  7 Divide the remaining columns. Depending on the type of data you are importing, you may need to make additional formatting adjustments. For example, if you are importing addresses, then the city name, state, and postal code can all fall into the same cell. You can have Excel split them automatically.
 - Select the entire column you want to split by clicking on its header
- Go to the Data tab and click the "Text by Columns" button.
- Click Next> and select Comma from the Separator Characters menu. In the case of our example, the city name will be separated from the area abbreviation and zip code.
- Click Finish to save your changes.
- Select the column that you also want to separate, and repeat the same steps, using "Space" instead of a comma as a separator. This will separate the area abbreviation from the zip code.


