Author:
Florence Bailey
Date Of Creation:
19 March 2021
Update Date:
1 July 2024
Content
- Steps
- Method 1 of 2: Chilling the cake in the refrigerator
- Method 2 of 2: Chill the cake on a rack
- Tips
- Warnings
- What do you need
There are several things to consider when making a cake, depending on the type of product you are making and the time you are going to spend chilling it. The cake can break or become damp if you break the cooling technology. The fastest way is to chill in the refrigerator, but you can also do it right on the table or in the oven. You can place your cake on a wire rack, chill it in a baking dish, or even turn it upside down. Follow the advice in our article to be able to chill your cake quickly and efficiently.
Steps
Method 1 of 2: Chilling the cake in the refrigerator
 1 Find out how much time you have at your disposal. Depending on the type of cake, it will only take a couple of hours to chill in the refrigerator. Here are some things to consider when doing this:
 - Cooling angel biscuits, muffins, biscuits and other light, airy desserts in the refrigerator will take approximately 1-2 hours.
- This method is not suitable for chilling cheesecakes, as sudden changes in temperature will cause it to crack. It can take up to 4 hours to cool down cream cakes, which are served cold.
- When making a traditional cake, the cooling process will take about 2-3 hours.
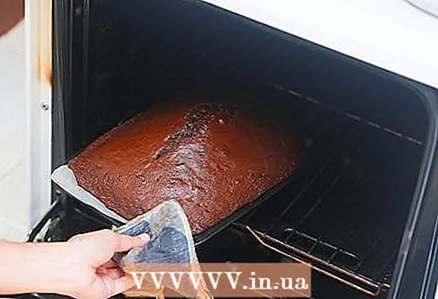 2 Remove the cake from the oven. Once your cake is ready, put on oven mitts, carefully remove it from the oven and place it on the table. Let the cake stand for 5-10 minutes. Here are some guidelines to consider:
 - If you are making cheesecake or cream cake, then it is recommended that you turn off the oven and let the product cool for 1 hour before placing it in the refrigerator. If you do not have time for this, then immediately put the cake in the refrigerator, however, in this case, it may crack a little.
- When baking cheesecake, you need to walk the butter knife along the edge of the baking sheet to prevent the product from sticking to the mold.
- You can place the cake on a wooden surface, such as a cutting board, to protect your countertop from heat.
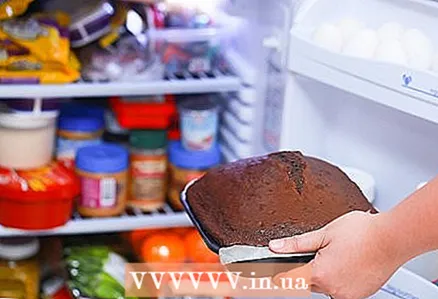 3 Place the cake in the refrigerator. After a short cooling down on the table, you need to put the cake in the refrigerator for 5-10 minutes. This will speed up the cooling process, but will prevent it from drying out. After 5-10 minutes, the cake should already be cool enough to the touch. Here are some things to consider when doing this:
 - Before cooling, both regular and angelic biscuits are recommended to be turned upside down. To do this, turn the cake mold upside down and string it on the neck of a stable bottle. Chilling upside down prevents cake breakage.
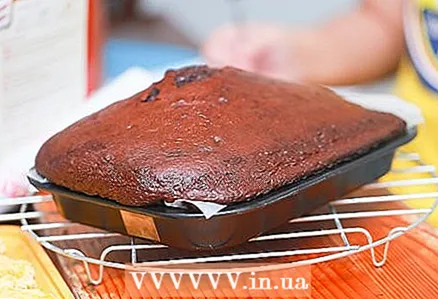
- During the preparation of the cake, remove it from the baking sheet, which will significantly reduce the cooling time. Chilling the cake directly in the pan can cause it to stick to the baking sheet and make it too wet. Transfer the cake to a wire rack and refrigerate.
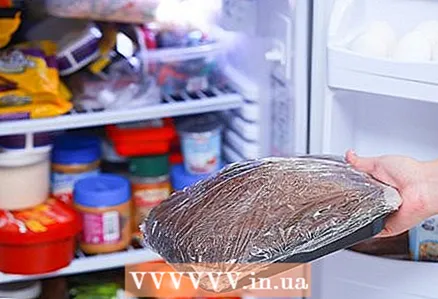
 4 Wrap the cake with cling film. Remove the cake from the refrigerator and wrap it in two layers of cling film. The airtightness will help keep the cake moist while it cools.
 - You don't need to wrap the cake in plastic if you took it out of the mold and turned it upside down.
 5 Leave the cake in the refrigerator for another 1-2 hours. You may need an extra hour to chill an angel biscuit or muffin. You only need 2 hours to chill the cheesecake.
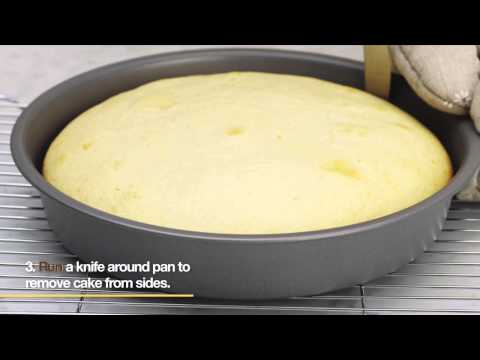
  6 Separate the cake from the sides of the mold. Use a sharp knife or butter knife to work around the edges of the mold.
 - The knife should be kept strictly vertical so as not to accidentally cut the cake.
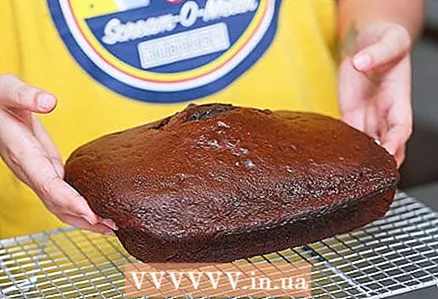
 7 Remove the cake from the mold. Place a large plate over the cake. Keep the plate and baking dish tightly pressed together and turn the baking dish upside down. Shake the baking sheet and transfer the cake to a plate.
 - If your cake has a very delicate texture, then lightly tap the bottom of the pan several times until the cake is completely loose.
- Now that your cake is cold, you can frost it over and decorate as you like!
Method 2 of 2: Chill the cake on a rack
 1 Choose a suitable cooling grate. Make sure you use a wire rack that matches the size of your baking dish. The 25cm baking pan is the largest of the standard sizes (it is used for bundt muffins and round cakes), so a 25cm grid should be ideal for baking this size. Cooling grates are a very important tool for any baker as they help to cool baked goods quickly and evenly. Here are some things to consider when doing this:
 - Choose a rack that fits easily into the dishwasher and storage cabinet.
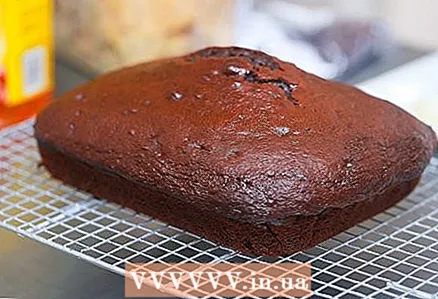
- The cooling process on the wire rack is due to the air circulation under the cake. This prevents condensation from forming, which makes the bottom of the cake moist.
 2 Remove the cake from the oven. Once your cake is ready, put on oven mitts, carefully remove it from the oven and place it on the wire rack.
 - To cool the cheesecake, you just need to turn off the oven and let it cool for 1 hour. This will allow the delicate texture of the cake to cool slowly without cracking.
 3 Let the cake cool. Now is the time to check the recommendations for the cooling time of your cake. Cooling time may vary depending on the type of baked product. Typically, the cake needs to be chilled for 10-15 minutes.
 - Place the cake on a wire rack to allow air to circulate underneath.
 4 Separate the cake from the baking sheet. Remove the cake from the wire rack and place it on the table. Use a sharp knife or butter knife to run around the edges of the baking sheet.
 - The knife should be kept strictly vertical so as not to accidentally cut the cake. Run your knife around the edges of the baking sheet a couple of times to separate the cake.
 5 Lubricate the wire rack with vegetable oil or special baking oil spray. Before placing the cake on the wire rack, grease its surface with oil.
 - The butter will keep the still warm cake from sticking to the wire rack.
 6 Place your cake directly on the wire rack (optional). Place the wire rack directly under the baking sheet and gently turn the dish upside down. Press down gently on the bottom of the baking sheet to remove the cake. Remove the pan slowly and place the cake on the wire rack. When flipping a cake, consider the following factors:
 - The cooked cheesecake should not be placed on the wire rack. It is very fragile and can crumble.
- The cooled cake should be taken out of the mold as soon as possible after cooking, otherwise it may be soggy later.
- When cooling the Angel Biscuit, you may not need to use the wire rack at all, but instead flip it directly onto the countertop. To cool the cake, turn it upside down and string it over the neck of the bottle. Turning the cake upside down will prevent it from collapsing when it cools.
- Remember to use oven mitts when grasping the baking sheet with your hands.Even a baking sheet that has been removed from the oven for a long time may still be hot.
 7 Remove the cake from the wire rack. The cake that has cooled down within 1-2 hours can be transferred to a plate or dish, covered with icing and decorated to your liking.
Tips
- The angel cake should be chilled for 3 hours, turning it upside down to create airiness.
- To prevent the cheesecake from cracking, separate it from the edges of the baking sheet as soon as you remove it from the oven.
- You should not refrigerate the cake in the baking sheet, but this does not mean that it needs to be removed immediately. Remove the cake from the mold after 20 minutes and refrigerate it directly on the table.
Warnings
- Always wear oven mitts when removing the pan from the oven, otherwise you could burn your hands.
- The temperature inside the oven can fluctuate constantly, so care must be taken to ensure that the cake does not burn.
- The cake may break if you try to remove the still hot food from the baking dish.
- Do not use a knife to separate your angel cake from the mold if you turn it upside down or it may fall out!
What do you need
- Baking tray
- Cooling pads
- Oven gloves for safe handling of the baking sheet
- Cling film
- Knife


