Author:
Marcus Baldwin
Date Of Creation:
21 June 2021
Update Date:
1 July 2024

Content
- Steps
- Method 1 of 2: For light paintings
- Method 2 of 2: For heavy paintings
- What do you need
- For light paintings
- For heavier paintings
Plasterboard walls often crumble and crack when trying to hammer a nail into them. In this case, a self-adhesive hook will be the best option for fixing the picture on the wall; but you can pre-drill a hole in the wall to prevent crumbling. The hanging method depends on the mass of the painting.
Steps
Method 1 of 2: For light paintings
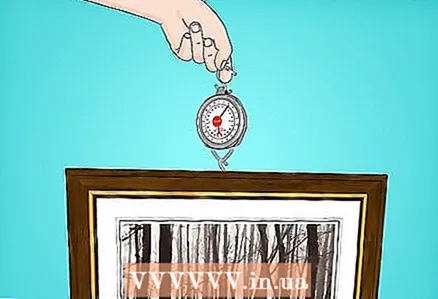 1 Weigh the picture. For this method, paintings weighing 2.25 kg or less are suitable.
 - Keep in mind the constant humidity in the room when choosing a method. If the room is humid, or the walls are often damp, this method is not well suited as the humidity weakens the adhesive layer.
 2 Clean and dry the wall. Before installing the self-adhesive hook on the wall, prepare the surface to remove all traces of oil, grease and dirt. Dry the wall thoroughly after cleaning.
 - The hook will not stick to rough, dirty or damp surfaces.
- Thorough drying of the wall surface is essential for good adhesion; in addition, mold and other problems can happen to a wet gypsum wall. Therefore, it is doubly important to dry the wall well.
- There are several different ways to clean the surface, but the easiest is to use warm water and dishwashing liquid.
- Dampen a soft cloth with warm water and add a drop of detergent to the cloth. Whip the lather on a rag.
- Using light circular motions, wipe the wall with a soapy rag.
- Rinse the cloth in warm water, then remove any remaining detergent from the wall.
- Remove excess water and moisture from the wall with a dry soft cloth. Proceed in a circular motion, wipe the wall as thoroughly as possible.
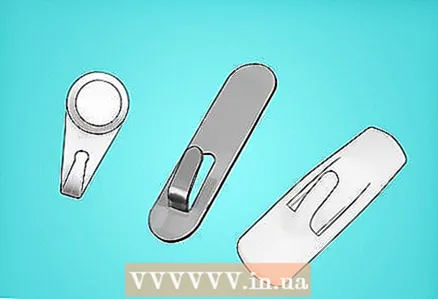 3 Choose a self-adhesive hook. The simplest hook is suitable for hanging light paintings, but you can find all kinds of shapes and sizes on sale. Check the packaging upon purchase to ensure the hook is secure enough.
 - Also make sure the shape of the painting (loop or cord) will fit this hook.
- Very light paintings can be fixed on the wall with double-sided tape. Likewise, slightly heavier paintings can be hung on glue pads instead of using a crochet hook. However, in most cases, hanging from a hook is the safest method.
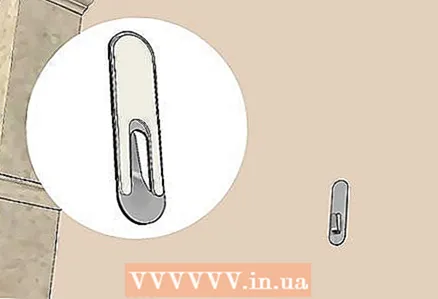 4 Glue the hook to the wall. One side of the adhesive strip should be marked as the side of the wall, the other as the side of the hook. Stick the strip to the wall, then press the hook onto the glue strip.
 - Hang the hook at a location suitable for the cord or loop of the pattern.
- If the hook is too thick to hold the painting, try using two elongated hooks that will support the painting underneath. These hooks should be placed horizontally at the same level, the distance between them should be slightly less than the width of the picture.
 5 Hang the picture. Now it remains only to put the picture on a loop on a hook, or hang it on a cord.
 - When using two hooks, place the painting on top of them as if on a shelf.
- This step should complete the process.
Method 2 of 2: For heavy paintings
 1 Choose a place to hang the painting. Determine where the wall frame goes to hang the heavy painting there. For not very heavy paintings, you can use almost any place.
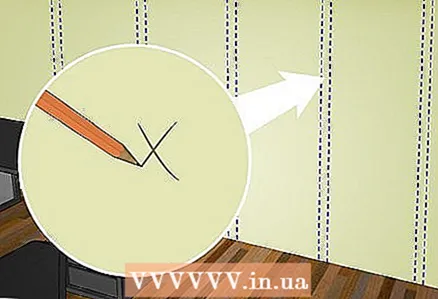
 - Measure the location for screwing in the screw with a tape measure. Measure the length of the mount, then mark the same distance on the wall.
- Place a small cross with a pencil where you attach the screw.
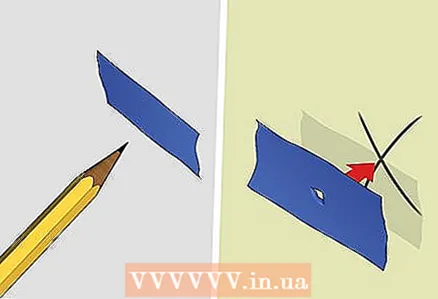 2 Place masking tape over the mark. Tear off a short strip of masking tape and make a small hole in it with the tip of a pencil. Then glue the strip to the wall so that the hole is right at the mark.
 - Masking tape will help you better hold the drill in place while you drill the hole.
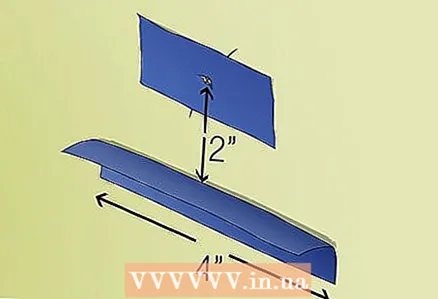 3 Place another piece of masking tape under the hole. Tear off a longer strip of duct tape, fold it along (with the adhesive layer outward). Glue this strip to the wall under the mark.
 - The other half of this strip should be approximately perpendicular to the wall, with the adhesive layer facing up. This is to ensure that less plaster chips and dust fall to the floor during drilling. Generally speaking, this is optional, but can save you a lot of work afterwards.
- The width of the strip should be about 10 cm, reinforce the strip about 5 cm below the future hole.
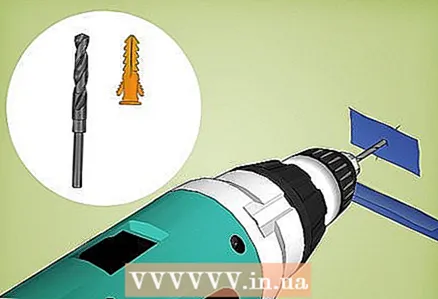 4 Drill the hole carefully. The required hole diameter can be found on the packaging of screws or anchors. Using a drill of a suitable diameter, drill the hole with the drill at the mark.
 - For small plastic dowels, a drill diameter of 5 mm is required.
- Use a drill bit less than an anchor or dowel. However, you should always check the instructions on the packaging to select the correct drill.
- The drill will stop forward motion when you reach the end of the cast. If the drill starts to advance more slowly or otherwise, you may have started drilling another layer of the wall behind the drywall. If you stop drilling right away, there won't be much damage to the wall.
- Keep the drill straight and level. The hole entry should not be larger than the drill diameter.
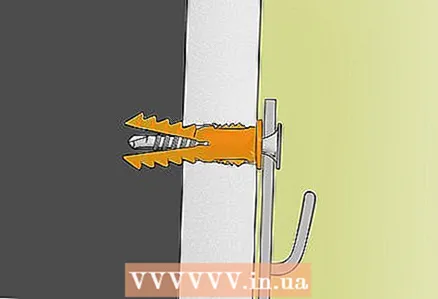
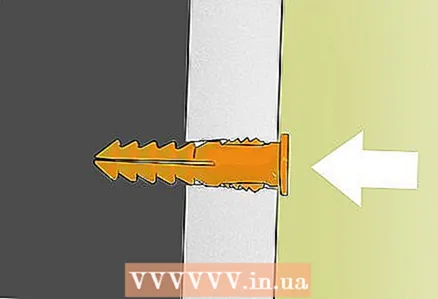 5 Drive the anchor or dowel into the wall. Place the dowel in the wall, use the minimum force to install, so as not to damage the mount and the wall.
 - Remember to remove the tape from the hole before installing the anchor or dowel.
- If the hole is not large enough, the plastic plug will bend. If the dowel begins to bend, pull it out and enlarge the hole. The anchor should fit snugly and evenly in the wall.
- The edge of the dowel should be flush with the wall.
- Dowels and anchors expand when a screw is screwed into them. As a result, the screw sits more firmly in the wall. In addition, the dowel reduces the load on the plaster.
- For this purpose, ordinary plastic anchors or dowels are suitable. Note that there are both wood and metal dowels, so you have a lot to choose from.
 6 Screw the screw into the dowel. Insert the screw into the hole in the dowel, and tighten it with a screwdriver. Do not screw in the screw all the way, let its head protrude slightly from the wall.
 - Tightening the screw will require some effort; instead of a screwdriver, you can use a drill or screwdriver. Use a bit of the correct size and operate at low speed to avoid driving the screw too deep.
- The screw should protrude about 1.25 cm from the wall.
 7 Clean up the work area. Gently fold the duct tape shelf, then remove that shelf. Sweep debris and dust off floors and walls.
 - Most of the gypsum chips and dust should be on the tape. Fold the strip inward, sealing the debris inside the adhesive. By careful handling, debris can be avoided elsewhere.
- Wipe the walls with a dry cloth, sweep or vacuum the floor.
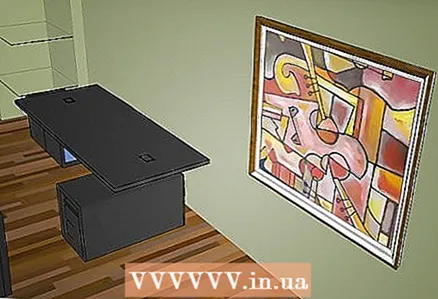 8 Hang the picture. The screw must be able to support the weight of the painting. Attach the picture cord or loop to the screw protruding from the wall.
 - That's all.
What do you need
For light paintings
- Self-adhesive hook or strong double-sided tape
- Warm water
- Dishwashing liquid
- Two soft rags
For heavier paintings
- Drill
- Drill
- Masking tape
- Dowels or anchors
- Suitable screws
- Screwdriver
- A hammer
- Pencil
- Yardstick


