Author:
Carl Weaver
Date Of Creation:
24 February 2021
Update Date:
1 July 2024
Content
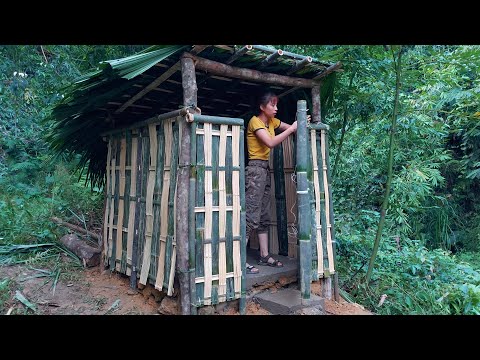
A toilet in the courtyard of a village house will never be superfluous. There are various types of such buildings and methods of their construction, and our article will help you understand this issue! Such a toilet can help with composting, and its construction is not an overwhelming task.
Steps
Part 1 of 3: Getting Started
 1 Make sure that the construction of a toilet is not prohibited. In all countries of the world, the rules for building toilets in the yard differ. Surely the construction of such a building in the city is prohibited.
 - Limitations are related to the size and distance from the water source. When building, it is best to make sure that your toilet is 6 to 30 meters away from the nearest water source.

- Limitations are related to the size and distance from the water source. When building, it is best to make sure that your toilet is 6 to 30 meters away from the nearest water source.
 2 Decide on the design. There are different types of outdoor toilet designs, simpler and more complex. Before starting construction, you need to decide on the number of seats.
 - Consider the weather in your area. A toilet with tarpaulin walls can work in warm areas, but in Alaska, it will be of little use.

- Who is the toilet built for? For example, if a small child still needs adult help, then the size of the toilet should be large enough to accommodate both.

- Most toilets are rectangular in shape, but their size and comfort can vary. Inside, there may be just a hole in the floor, over which you have to squat, or a real comfortable seat. All toilets should have ventilation and preferably wet cleaning equipment. If you provide a shelf, then it will be possible to place a roll of toilet paper, a couple of magazines and a hand sanitizer on it. Even when building a toilet, you can turn on your imagination!

- Consider the weather in your area. A toilet with tarpaulin walls can work in warm areas, but in Alaska, it will be of little use.
Part 2 of 3: Building
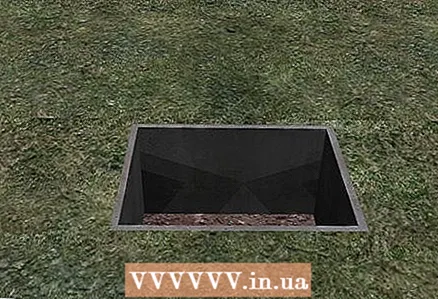
 1 Dig a hole. First of all, a hole is always dug, because after the construction of the building, it will no longer be possible to dig a hole. There are no obligatory values for width and depth, but you should not make the pit less than 60 x 60 cm.For a double toilet, the minimum dimensions are 1.2 x 1.5 m.
 - The walls of the pit should be flat, as this is important for creating the foundation.
- If the toilet is more than one-seater, then a larger pit is needed for it.

- Be sure to locate the water source and take local laws into account.

- The walls of the pit should be flat, as this is important for creating the foundation.
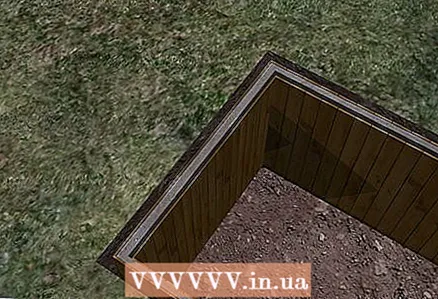
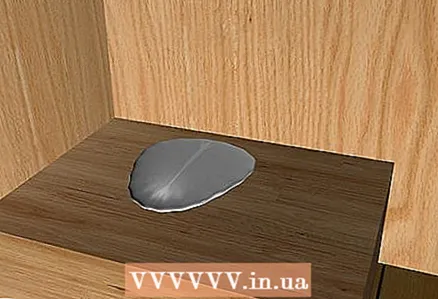
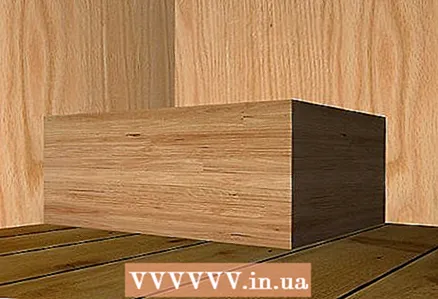
 2 Foundation construction. This structure will enter the already dug hole. The foundation always depends on the type of toilet.
 - You can cover a wooden structure (something like a box) with roofing felt and install it in a pit. This will protect the tree from moisture. After installing the box, level the ground around the perimeter of the pit and make a foundation with treated wood.Later, on this structure, you will build your toilet with walls and floors.

- When using concrete, it is necessary to make a wooden mold into which the mortar will be poured. Make shapes 10 cm thick, remembering to leave a hole in the middle; install it over the dug hole. Remember that the concrete will need to be reinforced with lugged steel rods and anchor bolts.
- The use of concrete will be more expensive, and you will also need the help of a knowledgeable person.

- You can cover a wooden structure (something like a box) with roofing felt and install it in a pit. This will protect the tree from moisture. After installing the box, level the ground around the perimeter of the pit and make a foundation with treated wood.Later, on this structure, you will build your toilet with walls and floors.
 3 Floor construction. First, a timber frame is made (according to the size of the toilet), on which a thick plywood board is then laid. You can build both directly on top of the foundation, and in another place, and then transfer the finished floor to the foundation.
 - The frame is made of wooden blocks. It is recommended to use pressure treated blocks or untreated hemlock, which is naturally resistant to degradation. You can make a simple frame of four bars, or reinforce it with additional elements.

- When using pressure treated timber, do not forget to also protect the cut plane with a protective compound.

- Finish off the floor with two (or three) plywood boards, nailing them to the frame and end-to-end. Don't forget to cut the rectangular hole for the toilet seat!

- The frame is made of wooden blocks. It is recommended to use pressure treated blocks or untreated hemlock, which is naturally resistant to degradation. You can make a simple frame of four bars, or reinforce it with additional elements.
 4 Toilet frame construction. To erect the frame, you will need bars with a size of at least 15 x 15 cm. The number of bars, their length and width are determined by the size of the future toilet.
 - To make solid corners, do not forget to nail down not only the outer corners, but also nail the corners of the outer frame to the inner one.

- The cheapest and easiest way is to build walls with 5 x 10 cm logs and cover them with plywood boards.
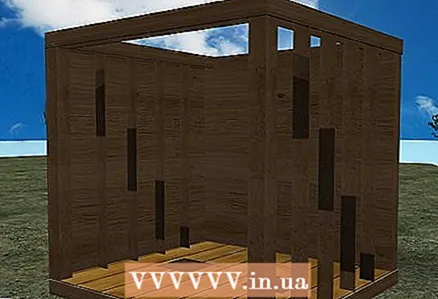
- If you plan on making a more expensive and more reliable toilet, you can make the walls thicker and use a diagonal connection. Such a toilet is more difficult to make, but it will be more durable. If you live in a cold area and plan to use the toilet all year round, then thermal insulation should be considered.

- Be sure to secure the walls to the floor.

- To make solid corners, do not forget to nail down not only the outer corners, but also nail the corners of the outer frame to the inner one.
 5 Roof construction. Lay the plywood sheets on top and nail them. The roof can now be covered with roll roofing material, bitumen tiles or metal sheets. Some people decorate roofs with ridge and other roofing elements, but this is a more difficult task.
 - Do not forget to make a canopy over the entrance to the toilet so as not to get caught in the rain right after the exit.

- Do not forget to make a canopy over the entrance to the toilet so as not to get caught in the rain right after the exit.
 6 Make a seat if desired. You can buy a ready-made seat and attach it over the rectangular cutout that is provided in the floor. You can also make a wooden seat yourself using planks or plywood.
 - The seat height depends on individual needs. If you have a child, a child seat can help your child use the toilet.
- The seat height depends on individual needs. If you have a child, a child seat can help your child use the toilet.
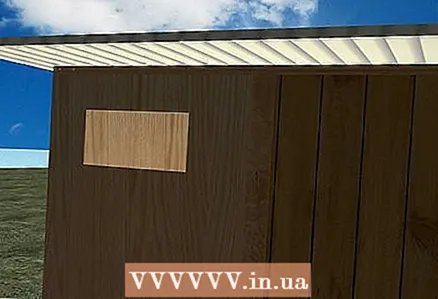 7 Ventilation. You can cut a rectangular hole in the door and close it with a mesh, or make a small crescent-shaped hole at the top of the door (like in cartoons). Ventilation is important to remove odor and moisture from the room.
 - The toilet must be protected from flies. As you know, flies flock to the contents of the toilet and can carry various diseases, so protection does not hurt.

- The toilet must be protected from flies. As you know, flies flock to the contents of the toilet and can carry various diseases, so protection does not hurt.
Part 3 of 3: Toilet Care
 1 Environmental friendliness. After use, throw a handful of wood ash, sawdust, coconut fibers or peat moss into the pit, which will aid in the decomposition process as they contain activated carbon, which absorbs liquid and creates a barrier to odors.
 - Make sure that you and your guests do not throw non-degradable personal hygiene items, such as pads or tampons, into the toilet. It is best to incinerate used toilet paper rather than throw it in a hole.

- Make sure that you and your guests do not throw non-degradable personal hygiene items, such as pads or tampons, into the toilet. It is best to incinerate used toilet paper rather than throw it in a hole.
 2 Toilet cleaning. This process is very important to prevent contamination of the site.If you used the wood ash method mentioned above, the waste will be similar to the compost used in the garden, it will not be as difficult or disgusting to empty it out.
 - Some people leave a space in the back of the toilet, which they cover with a hatch so that they can then lift it up and clean up the waste. This often requires that the toilet is built in a slope and that the entrance is at the back. The cleaned-up waste must be buried at the site, at least 10 meters away from the source of water or wastewater.

- By this point, the contents of the toilet will have turned into a kind of fertilizer that can be used if you have followed the rules for bio-composting of waste.

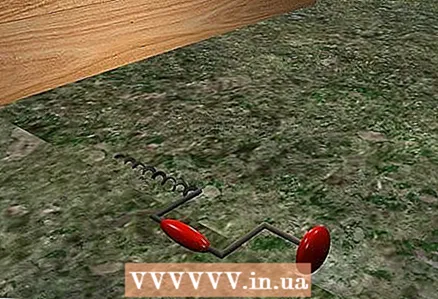
- It may be necessary to unload the waste with a shovel. To do this, remove the seat and remove the waste with a hand auger. If you don't have a drill, you can use a shovel, but if you regularly use an outdoor toilet, we still recommend that you buy such a drill.
- As a third option, you can dig a new hole for the toilet. You will need to perform the above steps, but the toilet itself will be ready for you!

- Some people leave a space in the back of the toilet, which they cover with a hatch so that they can then lift it up and clean up the waste. This often requires that the toilet is built in a slope and that the entrance is at the back. The cleaned-up waste must be buried at the site, at least 10 meters away from the source of water or wastewater.
 3 Plant flowers nearby. For more attractiveness and a pleasant smell, toilets used to be completely lined with flowers. Today, you can plant flowers only to improve the appearance.
Tips
- There is a saying that everyone is able to build a toilet, but not everyone is a good toilet.
- In the absence of construction experience, you should not complicate the structure.
Warnings
- Be careful when working with wood.


