Author:
Marcus Baldwin
Date Of Creation:
15 June 2021
Update Date:
1 July 2024
Content
- Steps
- Method 1 of 4: Site Organization
- Method 2 of 4: Building a Basic LEGO Car
- Method 3 of 4: Build a rubber band LEGO car
- Method 4 of 4: Create a Balloon-Powered LEGO Car
- Tips
- Warnings
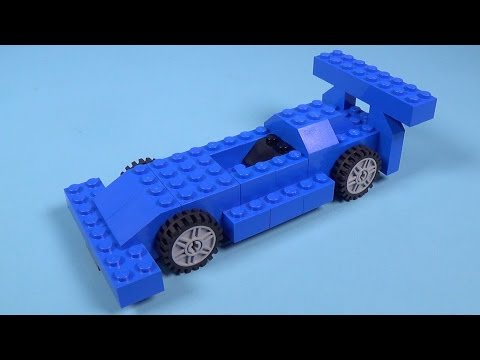
The most compelling thing about LEGO construction details is that you can design and build anything you can imagine. Building a LEGO car is a quick and easy process that will be equally fun for beginners and skilled builders alike. There are many options and ways to create a LEGO car, but the basic principles of their construction remain the same. Get started and come up with your own unique car!
Steps
Method 1 of 4: Site Organization
 1 Collect LEGO pieces. If you decide to follow the instructions of the original car building kit, make sure you have the instructions and all the parts you need for them. If you're designing your own car, then make sure you have tons of different LEGO pieces on hand so you can create whatever you want.
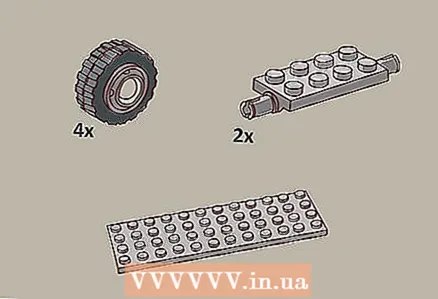
 - For the simplest LEGO car, you will need at least 4 wheels of the same size, 2 axles of the same size, and at least one long LEGO piece to connect them. You can also enjoy adding other LEGO parts to your car, such as steering wheels, seats, windshields and doors.
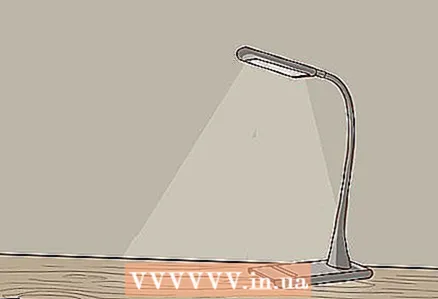 2 Choose a convenient, free place to build your toy car. A good place to build would be a desk or desk near a bright light source. You need to find a place large enough to lay out your parts (and instructions, if you are using them).
 - LEGO pieces are very small and can pose a choking hazard for pets and small children if left lying around. If left on the floor, they can be stepped on and hurt. Building on the floor is very convenient, but watch the details carefully to make sure they are in the same place.
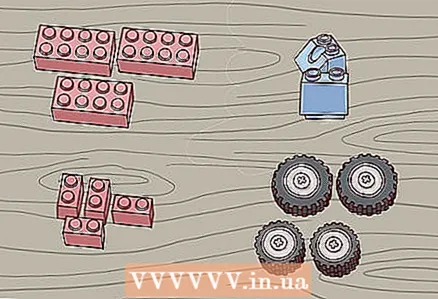 3 Spread the LEGO pieces carefully in front of you. Sort them by size and shape, so it will be easier for you to find the right ones.
 - When building with small children, be careful not to put parts in their mouths as they pose a choking hazard.
Method 2 of 4: Building a Basic LEGO Car
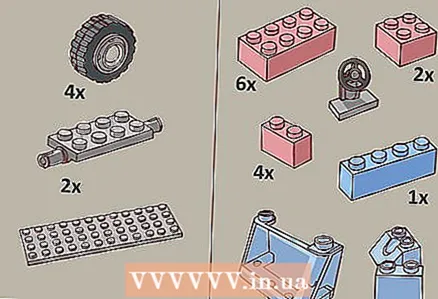 1 Get the details ready. A simple car can be built using LEGO parts that almost everyone has. You will need several different types of parts for this machine, and you can vary the parts used based on what you have. The dimensions of LEGO blocks are counted by the number of "protrusions" ("point elements" on many LEGO pieces). A block that is 2 lugs wide and 4 long is called a 2x4.
 - For the chassis, you will need 4 wheels of the same size, 2 rectangular axles of the same size, and a 4x12 thin plate (long thin LEGO piece).
- For the body, you will need 2 2x2 blocks, 6 2x4 blocks, 4 1x2 blocks, 1 1x4 block, 2 2x2 clear corner blocks, 1 LEGO windshield, and 1 LEGO steering wheel.
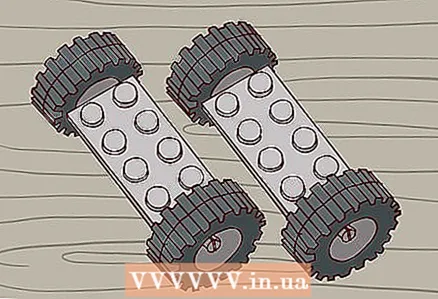 2 Attach the wheels to the axle parts. Axle parts are small squares or rectangular blocks that have teeth on both sides. Attach wheels to each of the teeth. When done, you should have two sets of wheels connected by bridges.
 - Make sure the axle parts and wheels fit snugly together. The wheels must be securely fastened, but able to rotate freely.
- Make sure the wheels are in proportion to the body. Tiny wheels will not support a large car and will slow down and impede movement.
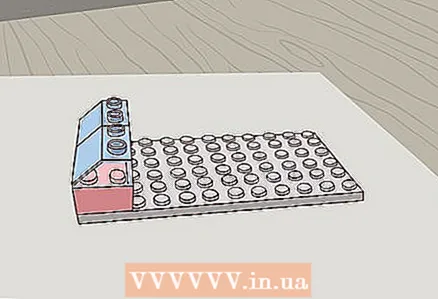 3 Build the front hood. You will need 2 2x2 blocks and two 2x2 transparent corner blocks. Otherwise, you can use one 2x4 block and two 2x2 corner transparent blocks.
 - Clip the transparent blocks to the top of the square blocks.
- Attach the parts you just made to the front of the car.
- Make sure the end of the plate is flush with the edge of the attached piece.
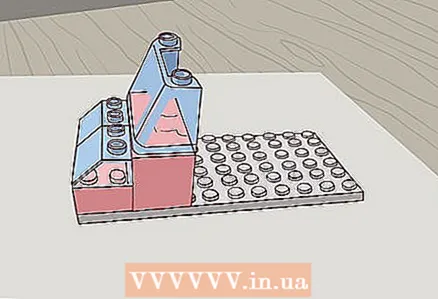 4 Build a windshield. This piece attaches directly to the back of the hood you just built. You will need 2 2x4 blocks and a 2x4 windshield piece from a LEGO set.
 - Stack the two 2x4 blocks together. Attach to the windshield part. Attach this module to the plate right behind the piece you attached in step 6.
 5 Build a cockpit. You will need 1 rectangular 2x4 piece, 2 rectangular 1x2 blocks, and a 1x2 steering wheel piece from the LEGO set.
 - Attach 1x2 blocks to both sides of a 2x4 block. When you do this, it will look a bit like a short "u".
- Place the steering wheel between the 1x2 blocks. The part should be on the back row of ribs and the steering wheel should be facing you. Press it into place.
- Attach this module to the base directly behind the windshield.
- Build a car body. You will need 1 2x4 part and 2 1x2 parts. Fasten them together in a “u” shape just like you did in step 8. Attach this module to the plate just behind the cab.
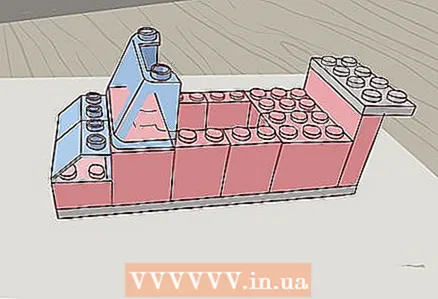 6 Build a rear end and a spoiler. You will need 2 2x4 blocks, 1 1x4 block and 1 2x4 plate (which is thinner than the blocks).
 - Fold two 2x4 blocks. Attach a 1x4 block to the back of this module.
- Press the plate onto the 1x4 block so that it hangs slightly behind the structure. It should look like a small fender at the back of a sports car.
- Attach this module to the base directly behind the body.
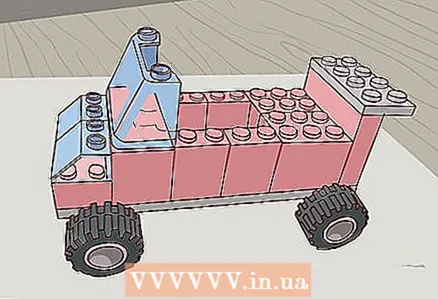 7 Press down the axle pieces on the underside of the plate. One will go under the front of the base and the other under the back.
 - The front edge of the front wheels should be approximately level with the front of the base part. The trailing edge of the rear wheels should roughly line up with the back of the base.
- If the wheels are obstructed, change the width of the base or find two longer axle pieces that fit.
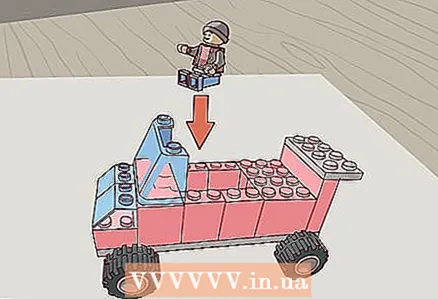 8 Select a LEGO figurine. Bend the figurine at the waist so that it is seated and place it behind the wheel.
 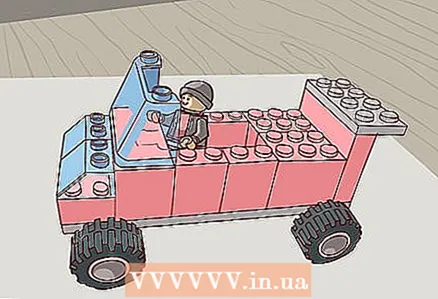 9 Have fun with your car! If it drives too slowly, the body may be too large in relation to the base and wheels. You can experiment with different designs to achieve your desired design and power.
Method 3 of 4: Build a rubber band LEGO car
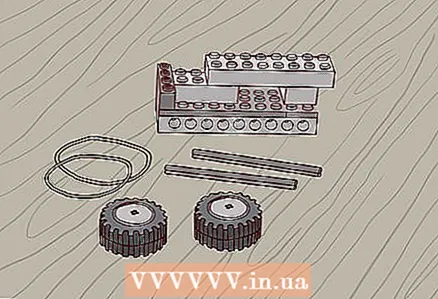 1 Select blocks. For this assembly, you will need a few special blocks, such as drilled blocks, thin rod-type axles, and separate rims and tires. They come in LEGO Technic sets or can be purchased separately from the LEGO Store or Online Store.
 - You will need 2 1x10 blocks with holes on the sides, 1 2x4 plate (thinner than a 2x4 block), 1 8x4 plate, 1 1x4 block, 1 2x4 block, 1 2x2 block, 1 2x8 block, 2 Technic axles, 4 LEGO wheels and 4 LEGO wheels. You will also need 2 rubber bands.
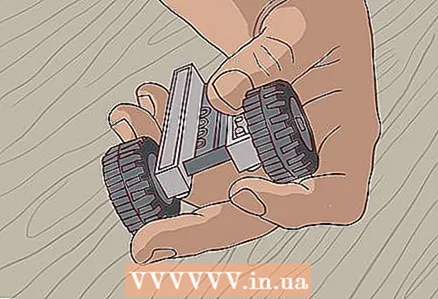
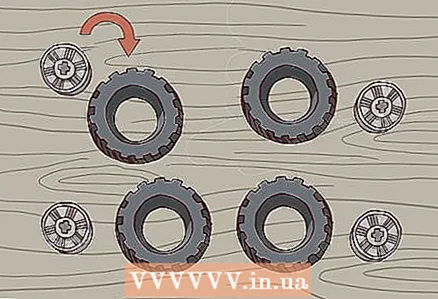 2 Attach the wheels to the rims. For optimal power transfer, you need two large wheels for the rear and two smaller wheels for the front. Set them aside for now.
 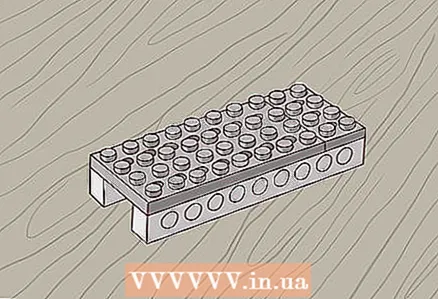 3 Build the chassis of the car. Place 1x10 blocks side by side like railroad tracks. Attach 2x4 and 8x4 plates on top of the blocks. You should now have a 4x10 chassis.
 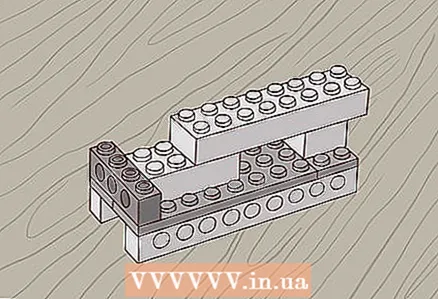 4 Build a car body. This will be the structure to which the rubber band is attached to set the machine in motion.
 - Attach the 1x4 block to the very front of the chassis.
- Attach the 2x4 block to the middle of the plate right behind the block you attached earlier, forming a "T" shape.
- Attach the 2x2 block to the very end of the chassis. Mark it in the middle of the plate so that there is 1 tab on each side.
- Attach the 2x8 block so that it covers the last 2 “T” -shaped tabs. The back of this block should hang at the rear end of the chassis.
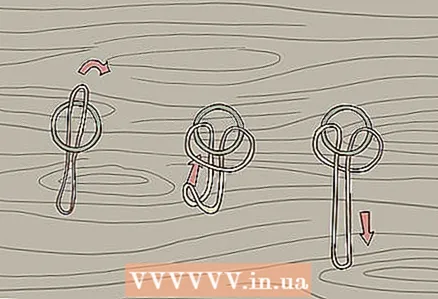 5 Tie the elastic with an eyebrow knot. This simple knot can be tied with two closed loops (like rubber bands).
 - Wrap one elastic around the index finger and thumb of your non-dominant hand.
- Thread another elastic through the center of elastic # 1 and pull it out about halfway.
- Pass one end of elastic # 2 through the loop formed by the other end and tighten to secure.
 6 Place the rear axle. Insert one axle through the last hole of the 10x1 block at the very rear of the car. Attach the wheel to both ends of the axle.
 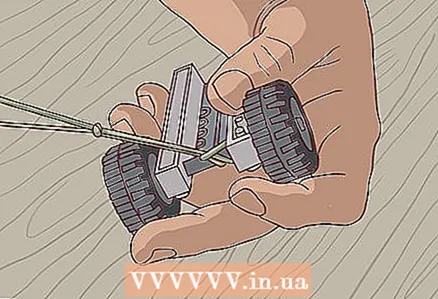 7 Attach the knotted elastic bands to the back axle. To do this, thread one end of one elastic up and under the axle to create a small loop. Insert the other end of the elastic and pull to secure.
 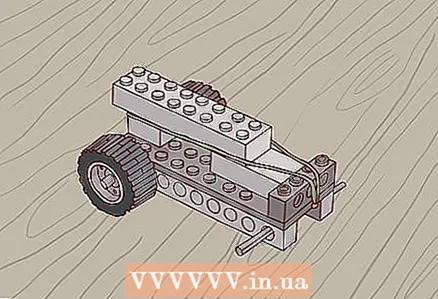 8 Pull the rubber band up and over the body of your car. The elastic should go under the chassis along its entire length. Pass the end of the elastic under the overhang of the uppermost block.
 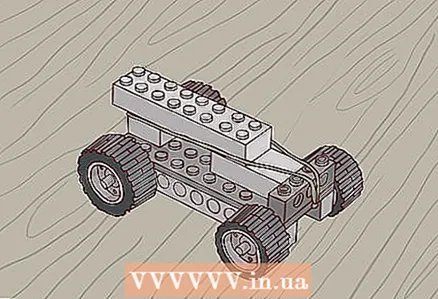 9 Place the front axle. Pass the other axle through the first hole in the 10x1 block at the very front of the vehicle. Make sure the elastic is under the axle. Attach the wheel to both sides of the axle.
 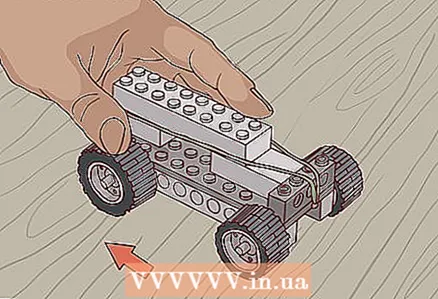 10 Make the car go. To start the car, place it on a flat, smooth surface and push it back. This will create tension in the elastic. When you release it, the car should move!
Method 4 of 4: Create a Balloon-Powered LEGO Car
 1 Build a simple LEGO car. In this step we will build a dragster racing car that is very light and has a low, stable center of gravity. You can create your own model, but try to keep it lightweight and low.
 - For this modification, you will need 2 rectangular axles, 4 wheels of the same size, 4 blocks of 2x8, 8 blocks of 2x4, 2 blocks of 1x2 and a thin plate with a minimum size of 2x4 (but longer will be even better). Also, you will need one small balloon.
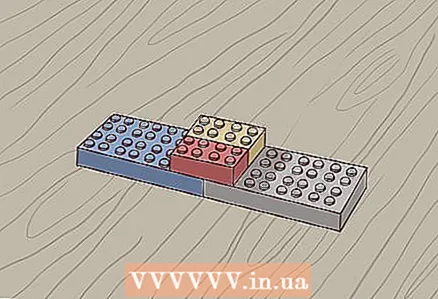 2 Lay the 2x8 blocks next to each other in two rows. Each row should now be 2x16. Attach blocks to the top of each row to connect 2x8 blocks.
 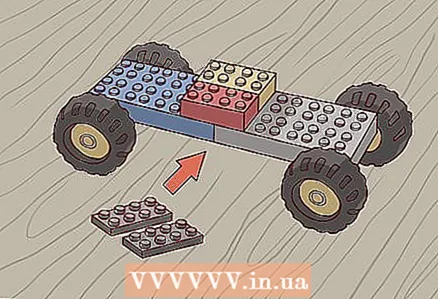 3 Flip over the connected blocks. Attach a thin plate to the bottom of the rows so that they connect.
 - Connect the wheels to the axles. Place an axle at each end of the car.
- Turn the body over. You should have a 4x16 body with two 2x4 blocks at the top and wheels at the bottom.
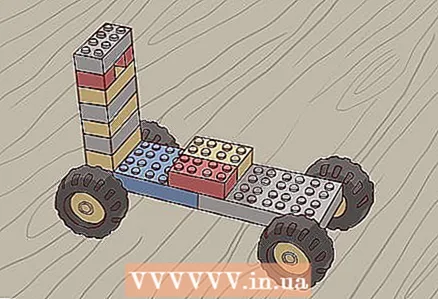 4 Stack 5 2x4 blocks together. Attach this column to the back of your vehicle body. Make sure the blocks are connected tightly, but do not press too hard, otherwise you may break the body.
 - Attach the 1x2 blocks to the top of the 2x4 column. Place one at each end to create a small cavity in the middle.
- Attach the last 2x4 block to the top of the column. You should now have a small hole in the middle of the column near the top.
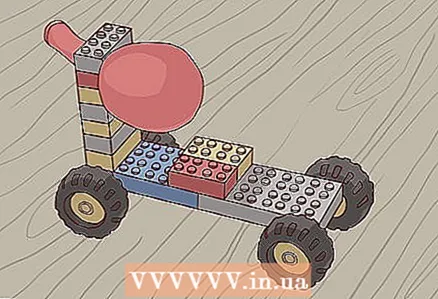 5 Insert the ball through the hole. In order to propel a car into motion, you must place a ball on its body. Pass the neck of the balloon through the hole, but do not pull it out completely.
 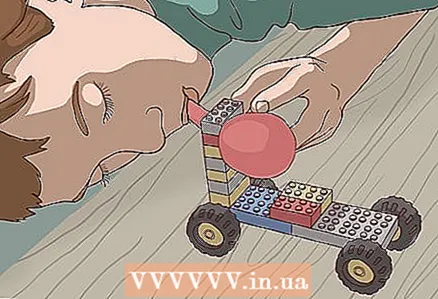 6 Inflate the balloon. When you inflate it, it will be easier for you to do this if you take the car and bring it close to your face. When inflating, pinch the hole with your fingers to trap air inside the balloon.
 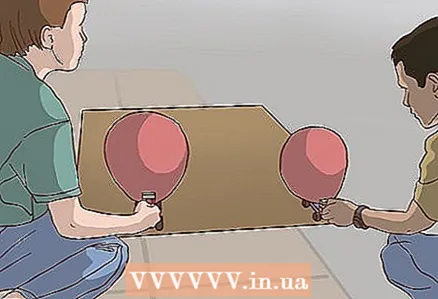 7 Place the vehicle on a flat, smooth surface. Release the neck of the balloon. The car must move away from you, as air is coming out of the balloon!
Tips
- Get creative with colors, accessories and model designs. Combine blocks used for different sides of the car and rearrange accessories to change the look of your car.
- The instructions given here are just the basics. You should definitely be interested in experimenting and creating your own models! Since you have the basic parts in the form of wheels, axles and bodywork, you can create any car you can imagine.
- Swap LEGO pieces with friends to expand your collection. Or invite your friends and your LEGO bricks to your home and you can build an awesome car!
- If you know the official name of the LEGO car you want to build, search the company's online database for the branded instructions. The LEGO company has over 3,300 instructions for ready-made LEGO toy sets, including cars, on the site.
Warnings
- Keep the kit out of the reach of small children, as small parts can pose a choking hazard.
- Once you've finished building your car, make sure all LEGO pieces are removed. Stepping on loose parts will hurt your legs, pose a strangulation hazard for pets and can ruin the vacuum cleaner.


