Author:
Gregory Harris
Date Of Creation:
15 August 2021
Update Date:
1 July 2024

Content
1 Collect all the materials you need to build the dock. 2 Examine the area near the water where you plan to build the dock, taking along the materials for construction. Position yourself as close to the water as possible, as when you finish building the dock it will be very heavy to move around.
  3 Make a square of 8 foot (2.4 m) 2x8 beams and screw them into place. Place the 2 sides of the square from the inside to form a regular 8 x 8 ft (2.54 x 2.54 m) square. To ensure accurate right angles, place 4 "x 4" (10 x 10 cm) bars inside each corner. Do not screw on parts if you make adjustments.
 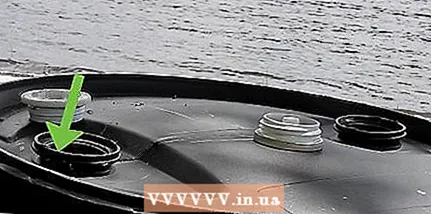 4 Prepare the barrels. To prevent leakage, make sure all caps are screwed in with a layer of silicone sealant on top and around the cap.
  5 Add guide beams to the base frame you built. Measure and find the center of the square. When you have found the center, place an 8ft (2.4m) 2x4 guide rail there.
  6 Place the 4 beams parallel to the center guide beam. Place the barrel sideways, on top of the guide rails. Move the beams to the left or right until the barrel is clamped by them on both sides, without touching the ground. Mark the points and screw 4 boards. Do this on both sides.
  7 Draw a row of guide beams on top of and perpendicular to the row you have already drawn. Place the barrels on the bottom guides and measure where they end. Place a row of two 8ft (2.4m) 2x4 beams perpendicular to the rails on top. Tighten them securely.
  8 For a more secure fit, screw on the 4 "x 4" (10 x 10 cm) sticks. Connect all the intersections of the guide rails with L-brackets.
  9 Attach the eye hooks to the bottom row of rails that hold the drums. Place two on either side of each barrel. Place all 4 barrels between the hook rails and tie them with string. Tie the end of the rope to the hook, pass it through the hook on the opposite side, pull it diagonally through the opposite hook, then across again, and finally into the last hook. Tie the final knot by securing the barrel tightly with the string. Repeat these steps for the remaining 3 barrels.
 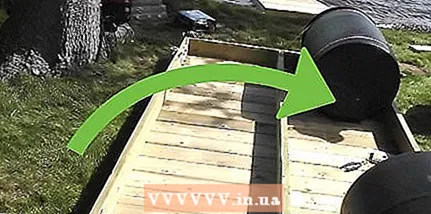 10 Flip your partially built dock.
 11 With the help of 1 or 2 people, move your dock to the water's edge and temporarily tie it to something to keep it from floating away until you finish working on it.
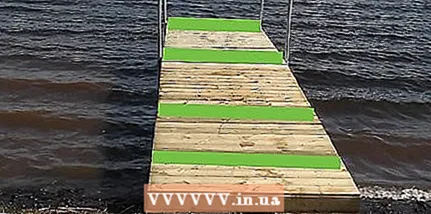 12 Make the upper deck of the floating dock. Spread out the 8ft (2.4m) 1x6 planks and make sure they are flawlessly spaced with little space between them. Do not allow the ends of the boards to protrude over the edge. Nail the boards along the edges to the guide rail base. This will give strength and make it possible to stand on them.
  13 Push your new dock all the way into the water. By increasing or decreasing the length of the rope that ties the dock, you will be able to adjust the distance at which it will be from the shore.
 Tips
- To maintain the level, build the floating dock on as flat a surface as possible.
- Ask 1 or 2 people to help you launch the dock.
What do you need
- 4 pcs, pressed lumber 2x8 inches (5x20 cm), length 8 feet (2.4 m)
- 7 pcs, 2x4 '' (5x10 cm) compressed lumber, 8 '(2.4 m) long
- 17 pcs, 1x6 '' (2.5x15cm) compressed lumber, 8ft (2.4m) long
- 4pcs, pressed bars 4x4 inches (10x10 cm), 8 inches long (20 cm)
- 4 pcs 55 gallon plastic drums
- 100 ft (30.5 m) rope
- 16 pcs, screw-in eyelet hooks
- from 10 to 20 pieces of L-shaped staples
- Galvanized screws and nails
- Drill or screwdriver
- A hammer
- Silicone sealant


