Author:
Gregory Harris
Date Of Creation:
8 August 2021
Update Date:
1 July 2024

Content
- Steps
- Method 1 of 4: Sync with iTunes
- Method 2 of 4: Listening to Music
- Method 3 of 4: Browsing the Internet
- Method 4 of 4: More Applications
- Tips
- Warnings
- What do you need
Congratulations on your purchase of the Apple iPod Touch! iPod Touch is the latest version of Apple iPod models. It has access to the Internet via a wireless network and a touch screen. This article will show you how to use your new iPod touch!
Steps
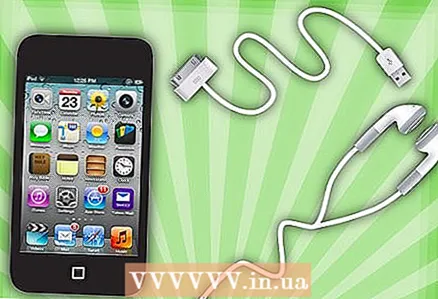 1 Unpack your purchase. iPod Touch ships with a USB cable, headphones, instructions booklet, and Apple logo stickers.
  2 Prepare a USB cable for use in the next steps. Most of the USB cable (30-pin connector) connects to the bottom of the iPod (the side with the gray icon facing forward), and the other part of the cable connects to the USB port on your computer. You will use the USB cable to sync your iPod with iTunes or to charge it. The 5th generation iPod Touch uses an 8-pin connector instead of a 30-pin connector. Insert the 8-pin connector into the iPod and the other part into the USB port of the computer.
  3 Prepare headphones for your device. Headphones are inserted into the jack from above. (For 5th generation iPod Touch, the headphone jack is on the bottom) You will notice a small white stripe on the right earpiece, with a gray plus on the top and a minus on the bottom. You can use these buttons to control the headphone volume. Also, you can see a small metal mesh on the other side of the bar - this is the microphone (older models didn't have a microphone).
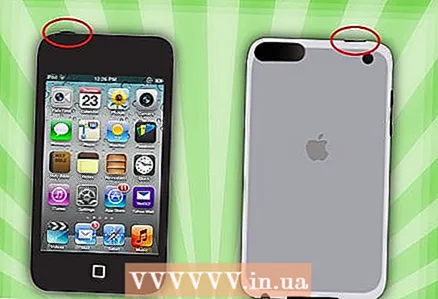
 - 4 Find out what the buttons do. The iPod Touch has three buttons. They are very easy to use once you know their purpose.
- Sleep / wake button on top. When using the iPod for the first time, press and hold this button to turn on the unit. Press once to lock the screen or put the iPod to sleep. (Note: iPod will use battery power while sleeping).
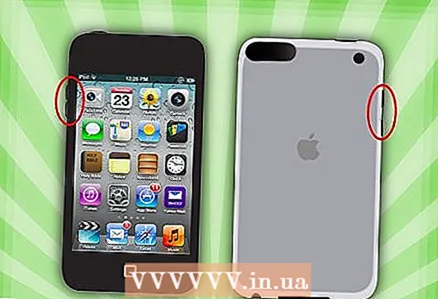
- The volume buttons on the left side of the device can be used to increase and decrease the volume.
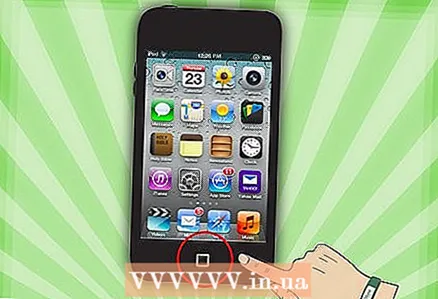
- The home button is at the bottom of the screen (gray square in a circle). The home button has two functions. Pressing once will open the main screen. Two quick taps will open the taskbar at the bottom of the screen. Tap on an app to switch to it. Keep pressing on the application until they start to shake and a minus icon appears on the right side of the corresponding icon. Click on the minus icon to close the application. This way you can conserve battery power.
- Sleep / wake button on top. When using the iPod for the first time, press and hold this button to turn on the unit. Press once to lock the screen or put the iPod to sleep. (Note: iPod will use battery power while sleeping).
- 5 Follow the onscreen instructions to fully activate your new iPod Touch.
- Choose language. English is set by default, but Spanish, French, Russian, Chinese, Japanese and others are available in the dropdown menu.

- Choose the country. Your country (eg Russia) should be selected by default, but other countries are available.

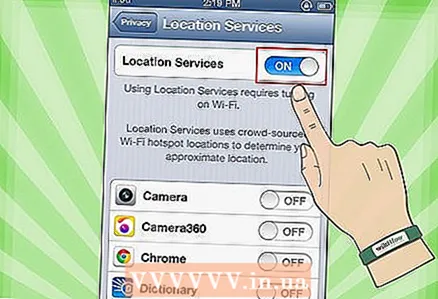
- Activate location services. This will allow the iPod to use your location for applications that require this information, and for geotagging your photos and videos. Using this service is your choice.
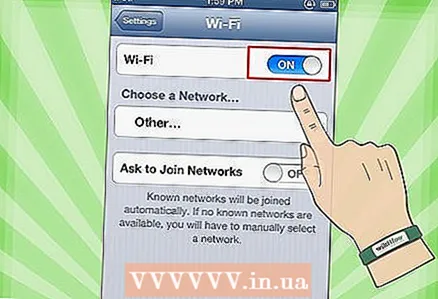
- Connect to a wireless network You may need to enter a password.
- Select iPod settings. You can set up your iPod as a new device, or sync your apps, music, photos, and other information from a previous iTunes or iCloud backup.
- If you choose "Restore from iCloud Backup" or "Restore from iTunes Backup" then your iPod should start the sync process. In this article, we assume that you are using the settings for a new device, without restoring from a backup.
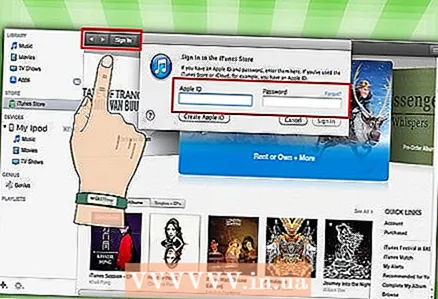
- Sign in with your Apple ID. If you are not registered, then select "Create a Free Apple ID".
- Decide if you want to use iCloud. Launched in October 2011, iCloud lets you sync apps, books, photos or videos from all Apple devices. It's a free service, but it costs a certain amount of money to buy additional space in the cloud. Again, you decide whether to use this service or not. If you want to use it, select "Use iCloud".

- Choose if you want to back up your iPod to iCloud. The backup uses your free free space in the cloud; You need a USB cable to back up to your computer (it's free).
- Decide if you want to use the Find My iPod feature. If your iPod is stolen or lost, Find My iPod can help you locate your device, remotely set a password, delete data, and more. This function is optional.
- Choose between sending the diagnostic data to Apple automatically, or not performing the corresponding data transfer at all. If your iPod crashes, it sends a crash report to Apple for analysis. If you don't want to do this, then select "Don't Send".
- Click on "Register with Apple" to officially activate your device.
- Select "Start Using iPod". Hurray, it's done!
- Choose language. English is set by default, but Spanish, French, Russian, Chinese, Japanese and others are available in the dropdown menu.
- 6 Learn how to use the touchscreen. The "buttons" on the screen can be activated with a light touch of your finger.
- To move in the list, slide your finger up or down.

- To enlarge a page or photo, place two fingers in the center of your focus and move them apart on the sides without removing them from the screen.

- To zoom out, place two fingers a short distance apart and slide them towards the center of your focus.

- To move in the list, slide your finger up or down.
Method 1 of 4: Sync with iTunes
- 1 Read the related wikiHow article on how to sync iPhone with iTunes, as the process will be the same for all Apple devices.
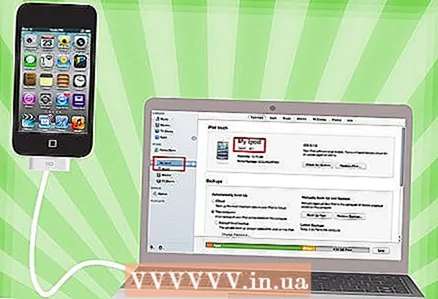
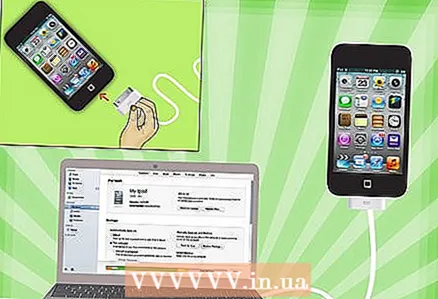 2 Using a USB cable, connect your iPod to your computer. If you have iTunes, the program will open automatically. If not, you can download the program for free.
 - When iTunes opens, you will be asked to register your iPod. You can do it now or later. Also, you will be asked to enter a name for your device, for example, “Igor's iPod”.
 3 Sync your data to iTunes using a wire. “Sync” is the process of keeping your iTunes data matched with your iPod, regardless of the amount of content. There are several ways to add files to your iPod.
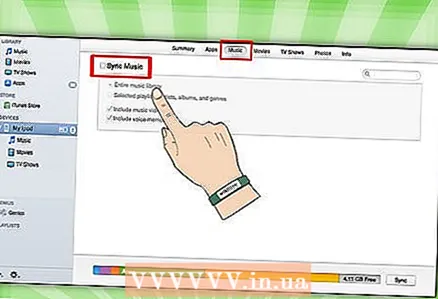
 - You can add everything from iTunes to iPod by selecting “Automatically sync songs to my iPod". You can do the same for apps and photos. If you want to add some files from your library, but not all, then do not put check the box and click "Done."
- To add individual files, find them in your iTunes library, then click and drag the selected files onto your iPod's icon in the left pane.
- Alternatively, you can click on the iPod icon, then click on the "Music" button (or any other option) at the top of the screen. Here, you can select individual artists, genres, playlists or albums to add by checking the box next to the appropriate category. (For example, if you want to add each Rolling Stones song to your iPod, find Rolling Stones under Artists, then check the box next to the title.) When you have selected the files you want, click on Sync in the lower right corner of the screen.
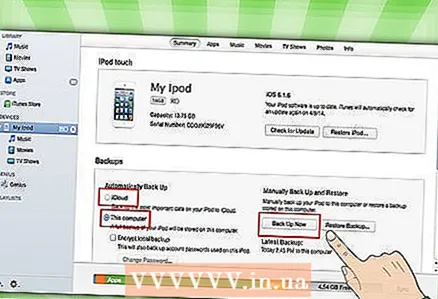
- 4 Learn how to delete songs from your device. To delete songs, you can uncheck the boxes you want to delete and then click Sync. Or, you can click on "Music" in the iPod menu on the left side of the screen, select the songs to delete and click on the Delete button.
 5 Learn how to add or remove apps on your iPod. If you've already bought apps from iTunes, click on the "Apps" button near the top of the screen in the iPod menu. Here you can sync your mail, Facebook, Twitter and other accounts using the app's data.
Method 2 of 4: Listening to Music
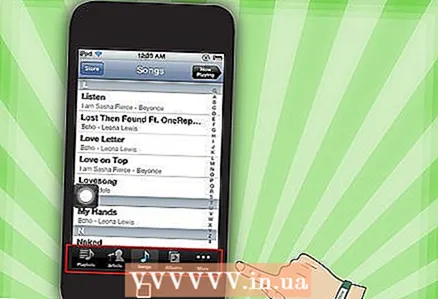 1 Click on the Music icon. You will see icons at the bottom of the screen such as Playlists, Artists, Songs, Albums, and More. They are different ways to sort the music on your iPod.
 - The More tab is where you can find iTunesU podcasts, audiobooks, and lectures. Also, in this tab you can search by Composer or Genre.
- 2 Open the Songs tab and click on a song. The Now Playing screen will open.
- At the top of the screen, you will see the artist, song title, and album title. Below them is the song status bar. You can move the slider to jump to the part of the selected melody you want.

- There are two arrow icons below the song status bar.Clicking on the left arrow will put the song in repeat mode; by clicking on the crossed arrows, you will shuffle the songs on your iPod in a random order and play them after the next song.

- At the bottom there are buttons for skipping songs, on the left and right sides, and a pause / play button in the center. Below them is the volume bar. You can move the bar to the right or left to increase or decrease the volume, respectively.

- If the song is loaded with album art, this will be displayed in the background.
- Click the star icons to rate the song. Once you rate multiple songs, you can sort them by rating.

- Clicking on the arrow in the upper left corner will take you to the lists of your music. To return to the Now Playing screen, tap on the Now Playing button in the upper right corner.

- At the top of the screen, you will see the artist, song title, and album title. Below them is the song status bar. You can move the slider to jump to the part of the selected melody you want.
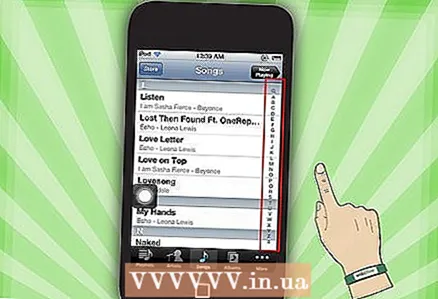 3 Navigate to different parts of your list using the alphabet bar on the right side of the screen. For example, if you want to find a song whose title starts with the letter T; click on the T to go to the corresponding part of the list.
 - Open the search function by clicking on the small magnifying glass icon at the top of the alphabet strip. Clicking on the Search field will open the QWERTY keyboard at the bottom of the screen.
 4 Create a playlist while listening to songs. This kind of playlist is a playlist created on an iPod, not iTunes. Click on the Playlist tab at the bottom of your song lists screen.
 - Click on Add Playlist. You will be asked to enter a name for the new playlist. Click on Save to continue.
- A list with all songs will open. To add a song to a playlist, click on the blue plus icon to the right of the song. The plus color will change to gray as the song is added to the playlist. When you add all the songs you want, click on the Done button in the upper right corner.
- You will be returned to the Playlists tab, where you will see the title of the new playlist. Click on it to open it. At the top, you will see the Edit, Clear or Delete playlist buttons.
 5 Press the home button to return to the home screen and open apps. You don't need to keep your song list or the Now Playing screen open to listen to music. The music will continue to play.
  6 Learn how to control your music when the iPod screen is locked. You don't need to unlock the screen; just press the home button twice. There will be buttons for skip tracks, pause / play and a volume bar, as well as song information at the top of the screen.
 - 7 Learn about ways to listen to music if you don't have headphones. You don't need to use headphones to listen to music. If you remove the headphones, music will start playing from the small speakers on the unit (on the back of the iPod).
Method 3 of 4: Browsing the Internet
- 1Learn how to use Safari on iPod by reading a similar article on iPhone, since both devices have the same browser.
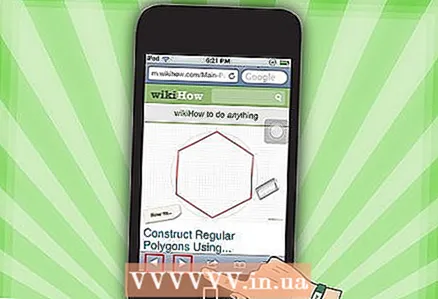
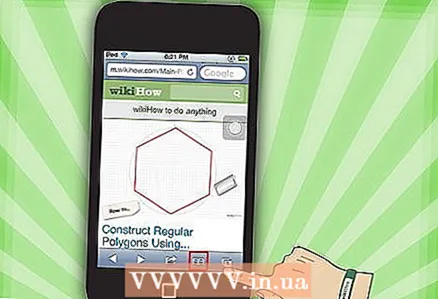
 2 Open the Safari app, located in the bar at the bottom of the screen. Safari is Apple's default browser, similar to Internet Explorer, Firefox, and Google Chrome. A menu will appear with available WiFi connections if you haven't connected your device to the network yet.
 - 3Select the desired WiFi network to connect.
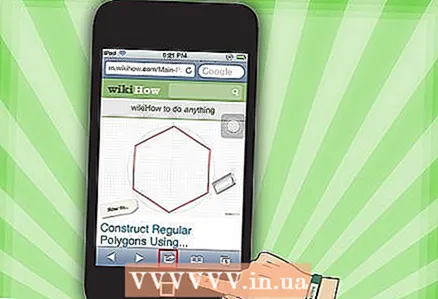
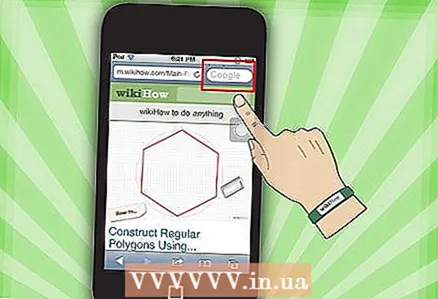 4 Use the Google bar to search; use a longer bar to enter the addresses of web pages that you know. As soon as you click on these fields, a QWERTY keyboard will appear, which will allow you to enter the letters you want.
 - 5 Learn about the buttons at the bottom of the Safari screen. Five buttons. You will use these buttons to navigate in your browser as you would on your computer.
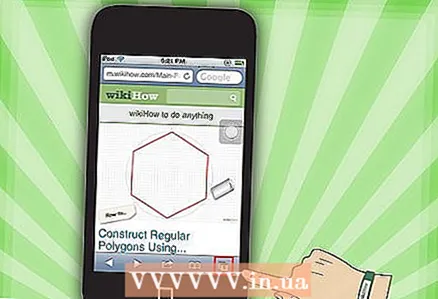
- Arrows to go back or forward on an open page. Left arrow - takes you to the previous page; Right Arrow - Moves Forward.
- The arrow emerging from the square opens a menu with options. Here, you can add tabs, mail links, tweets or print.
- The open book icon is an access to your tabs. Make tabs of your favorite pages using the menu with options.
- The layered squares on the far right side of the panel allow you to open multiple windows. If you want to open another website without closing the open windows, then just click on this button and click on New Page in the lower left corner.You can navigate the pages by swiping left or right. Close unnecessary pages by clicking on the red cross icon in the upper right corner. Click on Done when done.
- Arrows to go back or forward on an open page. Left arrow - takes you to the previous page; Right Arrow - Moves Forward.
Method 4 of 4: More Applications
- 1 Find out what an app is. An application is a program that runs on your iPod, similar to a program on your computer. iPod Touch comes with some applications installed. This includes Music + iTunes, Safari, Mail, GameCenter, Photos, iMessage, and more. At the bottom of the home screen, you'll see four apps; these are the most used applications like Music or Safari.
- You will be able to purchase media files on your iPod using the iTunes app. You can purchase apps from the App Store. Some popular apps are available for free.
- 2 Learn how to check the status of the app and if you need a WiFi connection to use it. Some applications require wireless internet access. To manually select a Wi-Fi network or hotspot, click on the Settings icon, then select WiFi to see the list. This will work if you have a trusted wireless network; iPod won't connect to unreliable networks. In Settings, you can adjust screen brightness, screen saver, security, and app settings.
 3 Learn how to send a message to another iPod touch / iPhone / iPad / iDevice, your friend / iMessage contact. iMessage lets you send free instant messages to other iPods, iPads, or iPhones wirelessly.
  4 Learn how to take a photo with your new iPod touch. To take a photo or video on your iPod, open the Camera app. To view your photos, click on the Photos icon.
Tips
- Clean your iPod screen with a lint-free microfiber cloth.
- Consider getting a case for your iPod, as the screen cracks very easily. Covers are relatively cheap and will help protect the back of your iPod from scratches and dirt. Alternatively, you can purchase a plastic cover for your screen to protect your screen from smudges and fingerprints.
- If you run out of free space, you may have problems downloading applications. Try uninstalling unused apps, photos, movies, or music. If you want to avoid these kinds of problems, then get the iPod Touch 64 GB (the most free space at the moment).
- You can use free engraving (if you buy an iPod online) and engrave your own name. Note, however, that this will cause the selling price of your iPod to drop.
- Consider buying Apple Care for your iPod. The device comes with a one-year limited warranty, but Apple Care extends the warranty to two years and provides a global repair service. Remember, the Limited Warranty does not cover accidental damage, unlike Apple Care.
- Try restarting your device if it hangs on one of the apps.
- The iPod Touch is packed with features. If you are unsure of your purchase, visit the Apple Store and try one of the demo devices.
- If your battery is close to running out, try closing unnecessary apps in the Multitasking tab and dimming your screen in Settings.
Warnings
- Be careful when buying a used iPod Touch.
- iPod Touch looks rugged, but it can break. Be careful not to drop your device.
- The shiny chrome lid of your iPod Touch is extremely vulnerable to scratches. Consider buying a case.
- Jailbreak will automatically void your warranty.
- Be careful with WiFi hotspots; they are not always protected.
What do you need
- iPod Touch (with headphones and 30-pin USB charging cord)
- Mac or PC with the latest version of iTunes.


