Author:
Gregory Harris
Date Of Creation:
13 August 2021
Update Date:
1 July 2024

Content
- Steps
- Method 1 of 4: Hand or Power Tool
- Method 2 of 4: Marking a new flower bed
- Method 3 of 4: Updating the Edges of an Existing Flower Bed
- Method 4 of 4: Expanding an existing flower bed
The lawn edger can help you create neat edging for your flower beds where they intersect with your lawn. You can also use it to expand an existing flower bed or define the edges of a new flower bed or garden beds.
Steps
Method 1 of 4: Hand or Power Tool
 1 The principle of operation of a hand tool. A hand-held lawn edger is usually a wood or metal shaft (like a rake handle) with a semicircular (or square) blade at the end. It looks like a straight hoe or a very small shovel.
 - This is a hand tool and is best applied with your foot, so choose shoes with a stiff sole.
- It is best to work with the tool when the ground is moist enough, as dry ground is more difficult to cut. Do not do this work in winter when the ground is frozen.
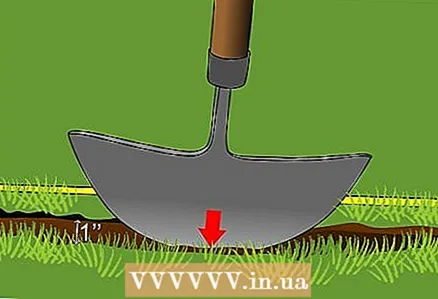
 2 Learn to work with a hand tool. To use the tool, mark where you want to make the new lawn edge. Stick the edge into the ground to a depth of about 5 cm.
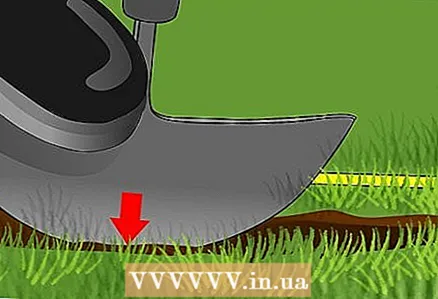
 - Place your foot on the support while holding the tool by the handle. Press down with your foot to hit the ground. To cut the turf, simply stick the tool in by hand. Push the handle back and forth slightly to separate the cut edge from the rest of the turf.
- You can also raise the cut area slightly to see the work done. Next, move the tool blade a decimeter to the side and cut the next piece. Continue pruning all over the intended area.
 3 The principle of operation of a mechanical tool. It is best to read the user manual for your specific model. In most cases, your tool has two settings: lawn mowing and edging.
 - In some cases, the depth of the cut can be adjusted. Perform setup before starting work.
- Make a clearly visible marking of the site, because you will be working with a massive tool.
Method 2 of 4: Marking a new flower bed
 1 Choose a suitable location for your flower bed. First of all, you should decide on the place.
 - Make sure there are no underground power lines or water lines at the planned location, and there is no hatch leading to sewer pipes.
- You should not break a flower bed in a swampy area, where puddles form, which do not dry out for a long time after rain. If there is poor drainage on the site, then you should improve the soil or raise the flower bed above the ground.
 2 Lay out the new flower bed. Mark with string and pegs (for square or rectangular shapes), chalk or spray paint.
 - Using the tool, trace the edges of the flower bed and prepare for digging. Start on the outside of the marked area.
- Following the instructions from the previous section, follow the edges of the new flower bed.
 3 Make a second cut about 3 cm inside the flower bed from the first. After completing one visible cut line, go back to the beginning. Make another cut, stepping back 3 cm from the previous one into the flower bed.
 - Make a second cut at a slight angle to the first. The idea is to make a thin strip of turf that is easy to move.
 4 Move the sod strip and dig in the remaining area. After making a slit along the entire length, kneel down.
 - If you have cut the sod strip well enough, you can easily move the cut out part.
- Now take a shovel and remove the rest of the turf inside the flower bed. Before planting the plants, you will need to dig up the area and perform land reclamation.
Method 3 of 4: Updating the Edges of an Existing Flower Bed
 1 Redo the edges of the flower bed only if necessary. Over time, the edges of the lawn can become unkempt. This is especially true in areas with calcareous or sandy soil, or in the case of frequent walking on the lawn.
 - If this happens, then you can update the edges of the lawn with this tool. But do not get carried away, because each time your flower bed will increase slightly in size.
- If the edges quickly become unkempt, then you can use a special material that will keep the shape.
 2 Cut a new edge about 3 cm from the original edge. Using this tool, cut a new edge about 3 cm from the old one. If the existing edge is badly damaged, then retreat a little more.
 - After making one visible cut line, go back to the beginning and cut the cut from the inside of the flower bed.
- Make a second cut at a slight angle to the first. The idea is to make a thin strip of turf that is easy to move.
 3 Move the sod strip. After making a slit along the entire length, kneel down. If you have separated the turf strip well, you can easily move the cut out and update the edges neatly.
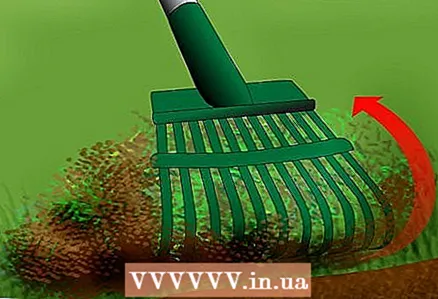
 - If you are pouring mulch into the flower bed, use a rake to spread the material to fill the slightly wider section of the flower bed you get.
Method 4 of 4: Expanding an existing flower bed
 1 Draw new edges for the flower bed. Mark the new edges of the flower bed with rope and pegs (for square or rectangular shapes), chalk, or spray paint.
 - Follow the instructions for using the tool and trim to mark the new edges of the flower bed.
 2 Make a second cut 3 cm closer to the center of the flower bed. After making one visible cut line for the new edge, go back to the beginning. Make another cut, stepping back 3 cm from the previous one into the flower bed.
 - Make a second cut at a slight angle to the first. The idea is to make a thin strip of turf that is easy to move.
 3 Move the cut strip of turf. After making a slit along the entire length, kneel down. If you have cut the sod strip well enough, you can easily move the cut out part.
  4 Remove any remaining sod between the new edge and the area of the flower bed. Now take a shovel and remove the rest of the turf inside the flower bed. This completes the expansion of the flower bed.
 - If you are pouring mulch into the flower bed, use a rake to spread the material to fill a new section of the flower bed.


