Author:
Marcus Baldwin
Date Of Creation:
22 June 2021
Update Date:
1 July 2024
Content
Painting the whole interior an apartment building can transform it from dull to inspiring! It can also add value to your property and help the sale move forward. Getting the paint process right takes a lot of planning, but the results are worth it for many reasons.
Steps
 1 Develop a design vision. As you walk around the house, write down your thoughts on color, taking into account natural light, window positions, gloss, and finishes.
 - Light colors are suitable for any option, while dark colors require rooms with lots of windows and natural light. Painting a basement dark blue may seem like a tempting idea, but it can turn a room into a dungeon!
- If you're preparing a home for sale, opt for neutral tones that would match any decor or furniture.
- If you are computer savvy enough, take digital photos of the rooms of interest and play with colors in your preferred photo editing software. This will let you and all interested parties know exactlyhow the room will look.
- If you are transforming the house for yourself, allow yourself to indulge in a flight of interior fantasy. Do you like the color? Go for it. If you don't like the outcome, what do you think? You can recolor everything. Feeling artistic? Plan your mural. This is your a place. The only person who should like the outcome is you (and the people who live with you!).
- Complementary colors work well when adjoining rooms are open to each other (try two shades of the same color for a neat effect). You can make a bold distinction when crossing a barrier (like a door).
- Consider the gloss level carefully. Shiny gloss paints are easy to wash, but at the same time, such a coating draws attention to all the flaws in the wall. Matte paints will help mask wall imperfections, but are difficult to clean. Typically, gloss paints are used where there is a lot of steam, in kitchens and places with heavy traffic. Matt paints are preferred for large walls and ceilings.
- To make things easier, consult a professional home decorator.
 2 Come to an agreement. Chances are, you have a number of people who also have a personal interest in your home. Come to a common denominator.
  3 Make very educated guess. Estimate the area you will need to cover. Measure the height and width of each wall. To find the area of a given wall, simply multiply the height by the width.
 - Keep a detailed list that is clear to both you and others, for example, "hall - west wall 10 square meters."
- Remember to subtract windows and doors from the calculation.
- In the process of calculations, make a margin in the big direction. Better to have excess paint than hers
unexpected flaw. - Determine the coverage area for each color and estimate the amount of paint. For custom walls with sloped ceilings, make as accurate an assumption as possible. When in doubt, simply measure the wall at the highest point and multiply by its width. Then subtract the minimum from the maximum height, multiplying this number by the width, then divide the result in half and, finally, subtract the resulting number from the original height by width. This will give you the area of the wall you are interested in.
Formulas:.
Main wall: Area = Width x Height
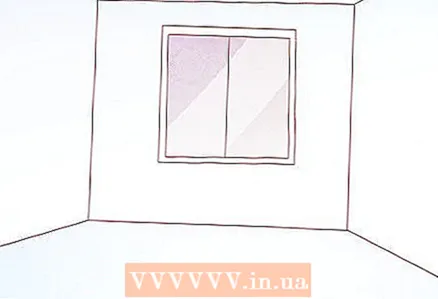
Wall with windows: Area = Width x Height - (Window Width x Window Height)
Walls with multiple windows: Area = Width x Height - [(Window Width 1 x Window Height 1) + (Window Width 2 x Window Height 2) ...]
Wall with sloped ceilings:
Large Height x Width = A
(High Height - Lowest Height) x Width = N
Area = A - N / 2
Wall with sloped ceilings and a window: (A - N / 2) - (Window width x Window height)
 4 Plan your budget. Costs will vary greatly depending on price and quality.When choosing from medium to expensive paint, get ready to pay around 12 thousand rubles for 185 square meters of the house. Add another around 3 thousand rubles for brushes, rollers and other materials. Don't forget about food if you plan to feed your workers. When it comes to materials, not all colors are created equal. Some do cover the surface in one layer, while others only state it on the label. Applying two coats of paint will double your cost, so buying a cheaper paint can turn out to be a more expensive option in the long run. Trust (to some extent) a professional paint salesperson to figure out the best choice for you. Typically, you can save on primer and coating costs, but you will have to fork out for topcoats.
  5 Plan your schedule. Decide on the time it will take to complete the project. Consider the movement of furniture, the preparation of the walls, the painting process itself, meals breaks and do not forget to clean and arrange furniture when finished. In the planning process, err on the side of caution. Unforeseen events will slow down the course of action, so make a reserve for those. Remember this multi-day project ... Don't try to cram too many surgeries into one day. If you are progressing much faster than planned, great!
  6 Plan your workforce. If you not intend to hire a professional team, you will need a lot of help. To be done a bunch of works. First comes the movement of furniture, then the preparation of walls and floor coverings, the collection and preparation of materials, cleaning, and food as an integral part of the process. Painting a 180 square meter home can take at least 10 days and 5 workers. Engage as many people as possible. If some of them can only come for one or two days, good. Maybe others will be able to replace them. Make sure that you planned all members of the working team. They will need a significant amount of time outside of the workflow. Identify a few key employees:
 - Incisors. Someone with meticulous attention to detail and a steady hand should be assigned to paint straight edges where needed, such as along a wall where the ceiling needs to be free of paint. There are many products available that can simplify the task, but nothing replaces a skilled person. Make sure the person is a specialist (ask them to show you their work). Sloppy, jagged, wavy lines will haunt you for years afterwards. Why do you need not one but several incisors? This work is quite nervous and after a few days it causes pain in the hands and forearm. You should give this person a break after working on multiple walls.
- Trimmers. Assign a few people to work on decorative enamel on baseboards, windows, and door frames. They also require close attention.
- Coordinator. This person will take care of the needs of the rest of the work team, provide them with drinks and food, make runs to the store for unexpected needs, make phone calls, receive instructions, wash brushes, etc. Don't underestimate the need for this key person! In free moments, he can also take part in the painting.
- Rollers. You will need a small number of members of this group as they can cover a large area quite quickly.
- Putty putters. Putty and fixing holes are important work to be done before starting the painting process (taking into account sufficient drying and sanding time).
 7 Take out the furniture. Well really, just free the room. Just moving everything to the middle of the room is not a very good step. Rent a storage space and spend one day filling it.Leave tables and items on which to put paint cans, but everything else should leave the house.
  8 Prepare your home. Wash walls, remove wallpaper and surface stains, dry and sand before start painting. Now is also the time to glue masking tape on the necessary areas, get work clothes, etc. You can also buy paint at this time. Don't wait until the last minute. Mixing multiple liters of paint can take several hours. Be aware of the large number of people in hardware stores on weekends. Get everything you need on a weekday, if possible.
  9 Open windows. Ventilation will help dry out faster and provide fresh air for your workers. If there is a lot of dust or other small particles in the air, consider a different ventilation system.
  10 Prime surfaces. Dark colors, stains and previously unpainted surfaces (drywall, putty, etc.) will require a primer, usually white. Note: Many paint shops offer (free of charge) a selection of a paint-like primer that eliminates the need for two coats of primer. Although not all surfaces require primers, skip this step only at your own peril and risk! Dark colors will likely start to show through the first - or even first pair - a layer of paint. Sealants and unpainted surfaces such as putties will absorb or release moisture in the top layer somewhat differently from the areas surrounding it. Applying a good primer will eliminate these differences. The primer levels the wall to a uniform surface. It is like erasing the canvas before painting a new picture. Although some people would dare to argue, as a rule, buying a primer does not require huge funds. 20 liters of cheap, plain white paint will usually do the trick. Allow the primer to dry completely (follow package directions) before topcoating.
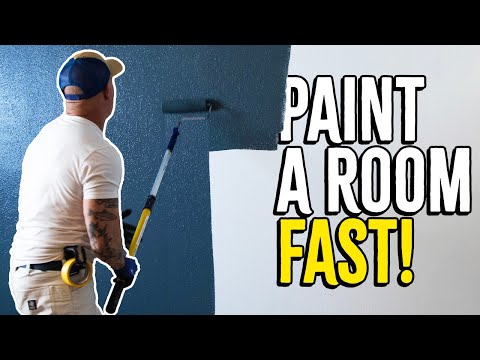
  11 Get started! Start with the largest or most complex room. Putting it off until the last moment will only increase your fear of gradually approaching it.
  12 Clean up! Make sure all of your materials are washed.
  13 Work on the floors after walls. If you are planning to remodel your floors, do so after walls. In the process of painting, you will stain the whole house. You don't want paint stains on your new carpet, do you?
  14 Reward your employees. Especially if they are a self-nominated workforce. Choose your reward as you see fit, but err on the side of generosity.
Tips
- Masking tape DO NOT! replaces the correct frames. Excess paint collecting on adhesive tape, especially on horizontal surfaces, will cause smudging and very undesirable results. Masking tape can be used to correct small mistakes, but don't rely on it for neat, clean lines.
- Zippered plastic bags can prevent the brush from drying out during your lunch break. You can also place the roller and brush in the bag in the refrigerator. They will remain moist for the entire period of being there.
- Prepare plenty of rags and clean water for minor or major blemishes.
- Don't overdo it at the start. Plan accordingly and maintain a steady pace to complete the plan. Painting a room is a race, painting an entire house is a marathon.
- When painting a carpeted room, keep in mind that paint will seep through the protective fabrics. This is especially true for cheaper, lighter fabrics. It is recommended to cover the required surfaces with masking paper before installing the protection. Tuck the edges of the fabric under the paper to help keep it clean. You can also purchase a manual camouflage machine - it gets the job done much faster.Even after taking these precautions, be sure to clean out the large droplets before they leak and you step on them!
Warnings
- During the painting process, you will create a huge mess. Do not be afraid of this, just prepare in advance for it accordingly.
What do you need
- Protective fabric
- Brushes (various sizes, multiple inset brushes)
- Dye
- Stepladder chair / ladder
- Rags
- Small buckets for water
- Surface cleaner
- Paint trays
- Agitators
- Jaws for insertion
- Rubber pouring cap / gate / bucket - well worth it
- Sandpaper / sanding blocks
- Grinding machine
- Rollers
- Extra long roller stick
- Putty
- Sealant
- Masking tape
- Drywall hammer


