Author:
Eric Farmer
Date Of Creation:
10 March 2021
Update Date:
1 July 2024

Content
- Part 2 of 3: Sterilizing the blade
- Part 3 of 3: Storing and maintaining your shaver
- Tips
- Warnings
- What do you need
- Hot water removes dried dirt better than cold water.
- A simple rinse is usually enough to get the shaver to a usable condition.
 2 Tap the edge of the sink with your razor. A few quick hits will shake off trapped debris. Remember to tap the sink occasionally with the razor while rinsing. Do not knock too hard to avoid breaking the head or frame of the shaver.
 - Continue tapping and rinsing the razor until there is no dirt on and around the blade.
- Never knock the blade in hand or touch it. One inattentive movement is enough to cut yourself.
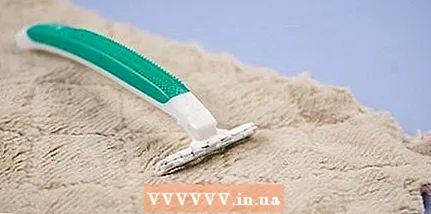
3 Remove remaining debris with a brush. If the blades cannot be cleaned with water alone, use a razor brush. Smoothly brush over the blade from top to bottom. The hairs in the brush can penetrate deep between the blades and clean out dirt that cannot otherwise be reached. - Razor brushes are available at most drug stores, supermarkets, and hygiene stores.
- If you don't have a dedicated razor brush, a regular, unused toothbrush will do. Make sure the brush is clean before you use it to clean the blade.
 4 Wait for the blades to dry completely. After you've removed most of the dirt, set the shaver aside and wait for it to dry. Place it in a well-ventilated area with a constant flow of air. The shaver can then be stowed away where you would normally store it.
 - Prolonged exposure to moisture can cause the blades to rust. Because of this, shaving with such a razor will become dangerous, and the quality of shaving will significantly decrease.
- Mold can even form on wet blades.
- Speed up the drying process by blotting the blade dry with an absorbent microfiber towel or blowing dry at low power.
Part 2 of 3: Sterilizing the blade
- 1 Take a shallow container and pour isopropyl alcohol into it. The natural antimicrobial properties of regular alcohol make it very useful for sterilizing personal care appliances such as blades. Pour in enough rubbing alcohol to completely submerge the shaver head.
- For best results, use a 70% isopropyl alcohol solution.
- The most convenient option is isopropyl alcohol, which you can buy almost anywhere. If you want to sanitize your razor, you don't have to go beyond your pharmacy cabinet.
- If you don't have any alcohol on hand, replace it with distilled white vinegar or hydrogen peroxide.
- 2 Submerge the shaver head in rubbing alcohol. Rinse the blade quickly with rubbing alcohol. A few seconds should be enough to remove most of the harmful bacteria from the blade.
- Rinsing the blades with rubbing alcohol will remove any remaining dirt.
 3 Leave the shaver to soak for 5-10 minutes. If it has been a long time since you last cleaned the shaver, or if it has a lot of dirt on it, you may need to clean it more thoroughly. The longer the blade is soaked, the better the alcohol will break down larger dirt particles.
 - The entire razor can be soaked in alcohol, vinegar and peroxide. This will remove dirt around the handle and at the base of the blades for a more thorough cleaning.
- 4 Dry your razor. After soaking in alcohol, the razor does not need to be rinsed. Instead, shake off the alcohol from the battle and lay it on an open surface to dry. It won't take too long. Since isopropyl alcohol evaporates very quickly, the shaver will be dry soon.
- Unlike water, alcohol prevents the formation of rust on metal.
- Store the shaver in a safe place to avoid accidents.
Part 3 of 3: Storing and maintaining your shaver
 1 Clean your shaver regularly. Get in the habit of rinsing your blades after each use. This will help prevent hair build-up, soap suds and other debris.
 - Regular cleaning can extend the life of even a disposable razor.
- Sterilize your razor about once a week by soaking it in rubbing alcohol.
- 2 Store your shaver in a clean, dry area. Razor blades are best kept in a sealed box or some container with a tight lid. The shaver you are currently using can be placed on the stand or placed upright in the cup to drain off the water. Wait for the razor to dry and then put it in a safe place where neither she nor anyone else will be in danger.
- Avoid leaving your razor on the edge of a sink or in a dirty shower niche, where soap suds and bacteria can get on it.
- These areas are very humid, which increases the likelihood of rust on the blades.
- 3 Replace dull or rusty blades. To understand the condition of your shaver, evaluate the quality of your shave. If the razor no longer provides a close shave, or if you feel friction, irritation, or the razor pulling on hairs, it's time to throw it away. Blade life is usually a few weeks, after which you will need to buy new blades or cartridges.
- Some hygiene experts advise buying replacement blades after every 6-8 uses.
- Even reusable blades need to be refurbished or replaced when signs of wear appear.
Tips
- When the shaver is dry, store it in a cabinet or box for safekeeping.
- Storing the blades in a thin layer of mineral oil will keep them sharp for longer.
- Buy some blades to keep a couple in reserve if the first one suddenly breaks or becomes dull.
Warnings
- Use extreme caution when handling your razor, especially if it has a removable or movable head. Improper handling can result in serious injury.
What do you need
- Water
- Isopropyl alcohol
- Razor brush
- Shaver locker or container
- Absorbent towel or hair dryer (optional)
- Mineral oil (optional)


