Author:
Joan Hall
Date Of Creation:
27 July 2021
Update Date:
1 July 2024

Content
- Steps
- Method 1 of 3: Sewing on an oversized sweatshirt
- Method 2 of 3: Convert a hoodie to a classic-necked sweatshirt
- Method 3 of 3: Converting a sweatshirt into a hooded vest with an open back
- Tips
- What do you need
Old, worn hooded sweatshirts are comfortable enough to wear, but often already ill-fitting. But the thing you love can be given a second life if you skillfully use scissors and a sewing machine. For example, you can sew on a stretched sweatshirt, remove the hood and create a classic neckline, or turn the sweatshirt into a hooded vest.
Steps
Method 1 of 3: Sewing on an oversized sweatshirt
 1 Take a sweatshirt that is too loose for you. This method is suitable for both men's and women's sweatshirts, and will help to sew them in to the shape.
  2 If the sweatshirt has a zipper, zip it up. Then turn the garment over to the wrong side.
  3 Try on a sweatshirt. Look in the mirror to gauge the fit, or even ask someone to help you with this part of the job.
  4 Use tailor's pins to pin the excess material in your armpits. Stick a pin where you want to create a new seam. Do not pull the fabric too tight, otherwise the sweatshirt will severely restrict hand movements.
 - Follow this step with both armpits before starting to remove excess material from the sides and sleeves.Use a ruler to measure the distance from the old seam to the pin in the first armpit and pin the pin in the second armpit in the same way to keep the sweatshirt symmetrical.
 5 Remove excess material from the sides. Starting at the right armpit, work your way down the side seam, pinning the excess material with pins every 5 cm until you reach the lower waist cuff. Then do the same for the left side.
 - Measure how much excess material you choose to remove from each side. If you find large discrepancies between the right and left sides, you will need to redo everything to sew the sweatshirt evenly.
- Stick the pins in the tailor's pins with the point down to avoid injury.
 6 Return to the armpits again and remove excess material from the sleeves. Pin it along the old seam every 5 cm. Continue until you reach the cuffs.
 - Remember to reduce the width of both sleeves symmetrically.
 7 Consider whether you need to shorten the sweatshirt itself and its sleeves. In this case, cut off the lower waist cuff as well as the sleeve cuffs directly along the stitching seams.
  8 Spread your arms out to the sides to figure out how much to shorten the garment and its sleeves. When deciding, keep in mind that you will later re-sew the previously cut cuffs into place. Use tailor's pins to mark the extra length you want to cut.
  9 Take off your sweatshirt. Leave it on the wrong side. Spread the item out on your desk.
  10 Cut off excess material, not forgetting the seam allowances. To do this, you need to follow the steps below.
 - Use a ruler to mark an even horizontal line along the bottom of the sweatshirt to shorten the length of the garment.
- Also, use a ruler to mark straight lines along the bottom of the sleeves to shorten them.
- Cut off excess material a little further than the marked lines and pins to allow for allowances of about 1 cm wide. At the sides, cut the fabric from the bottom of the garment and further up to the armpits.
- In your armpits, remember to twist the scissors to continue removing excess material from the sleeves.
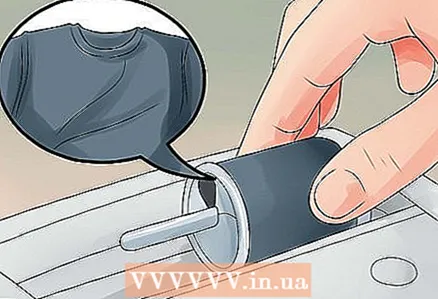
 11 Thread the sewing machine to match the fabric of the sweatshirt. The sewing machine threading diagram will be indicated either directly on its body, or in the instructions for it.
  12 Place new side seams along the pins stuck into the fabric, starting from the bottom edge of the sweatshirt, going through the armpits to the ends of the sleeves. Make sure the stitching goes through the double layer of fabric. Sew both side seams.
  13 Place the sleeve cuffs in place. Leave the cuffs right-side out and tuck into the sleeves of the inside-out sweatshirt, aligning the cuts. After you sew them on, the cuffs can be folded down.
  14 Attach the waist cuff in the same way as the sleeve cuffs. Be sure to line up the raw fabric sections together. Pin the pieces with pins about 1 cm from the fabric cuts so that you can comfortably sew a stitch next to them.
 - The belt will be too big, so start pinning it in a circle from the side seam, and then cut off the excess material, leaving allowances for the connecting seam.
 15 Sew the cuff-belt over the sweatshirt. Make sure that the stitching is sure to connect the two parts. Then place a vertical joining seam on the waistband so that the seam allowances are on the wrong side of the sweatshirt.
  16 Sew on the cuffs of both sleeves. If necessary, temporarily secure the cuffs in their new location with tailor's pins, and then stitch. If you need to reduce the width of the cuffs, do so before you are going to grind them to the sleeves.
 - Make sure the seam on each cuff is aligned with the seam on the sleeve.
 17 If necessary, trim off excess seam allowances. Turn the sweatshirt right over and try it on.
Method 2 of 3: Convert a hoodie to a classic-necked sweatshirt
 1 Find an old hoodie. Only non-zipped hoodies will work for this project.
  2 Lay the sweatshirt out on your desktop. Spread out the material.
  3 Cut the hood off the sweatshirt just above the seam. Start cutting from the middle of the front and work in a circle until the hood is completely detached.
 - If you want to trim the neckline later, leave about 1cm of fabric above the seam in reserve when you trim the hood.
- If you want the neckline to look raw and frayed, cut the hood as close to the seam as possible.
- If you want a sweatshirt with a deep and wide neckline, cut the hood below the joining seam. In this case, the cut line can be lowered by about 2.5 cm. If necessary, you can then cut more material if you want to wear the sweatshirt down from one shoulder.
 4 Tuck the fabric over for a cleaner look. Turn the sweatshirt inside out. Unscrew the previously made allowance down, thus covering the allowance of the old seam from the hood.
 - Secure the fabric with pins. Do this around the entire circumference of the neckline.
 5 Thread the sewing machine to match the fabric of the sweatshirt. The sewing machine threading diagram will be indicated either directly on its body, or in the instructions for it.
  6 Run a stitch around the neckline, approx. 6 mm from the edge. Remove the pins gradually as you sew.
 - Make sure that nothing superfluous gets under the sewing machine foot, otherwise there is a risk of accidentally sewing other parts of the sweatshirt to the neckline.
 7 Turn the sweatshirt right over. Try on the product. If the sweatshirt is too baggy, use the first method to sew it to size.
Method 3 of 3: Converting a sweatshirt into a hooded vest with an open back
 1 Find an old or just an inexpensive hoodie. This method requires a zip-up hoodie that fits your size. This method allows you to create a feminine hooded vest.
  2 Lay the sweatshirt out on a work surface with the front facing up.
 3 Mark the line of the armhole of the vest, stepping back from the seam of stitching the sleeve into the depth of the shelf by 5 cm. Use a disappearing tailor's marker and ruler to mark some guidelines on the fabric.
  4 Repeat with the other armhole.
 5 Cut the sleeves along the marked lines through both layers of fabric at once. This will remove both sleeves. They can be thrown away or kept for other crafts in the future.
 - If you need a regular vest with a hood, you can stop at this step.
 6 Flip the vest over to the other side. Spread it out on the table.
  7 Use a tailor's marker to mark the back of the waistcoat with a straight line connecting the bottom of the armholes. It should run straight across the back from the bottom of one armhole to the other.
 - A slit along this line will allow you to create an open back vest. Its lower part at the back will simply sag.
- Be careful: you only need to cut the back of the vest along the marked line.
 8 Trim off excess material from the back below the hood. The cut line should be a smooth curve from the top of one armhole behind the hood to the other armhole. Discard the fabric cut from the back. Hem raw fabric sections if desired.
  9 Try on a hooded vest. Unbutton it, put your hands in the armholes and close the zipper. This vest can be worn on the naked body or worn over an additional layer of clothing.
Tips
- To add some extra touch to your sweatshirt, cut the appliqué into the shape you want from any knit fabric. Attach the hot melt backing to it. Then glue the resulting decal onto the back, sleeve, or front of the sweatshirt. If you want to create an intricate appliqué, use the template.
What do you need
- Fabric scissors
- Old hooded sweatshirt
- Tailor's pins
- Sewing machine
- Mirror
- Ruler
- Disappearing Tailor's Marker
- Desktop


