Author:
Janice Evans
Date Of Creation:
3 July 2021
Update Date:
1 July 2024
Content
- Steps
- Part 1 of 2: Connecting to a Mail Server Using Telnet
- Part 2 of 2: Sending a message
- Tips
- Warnings
- What do you need
Email clients like Thunderbird and Outlook make the process of sending emails a lot easier. In any case, until your letter is lost on the network. Want to know what happens when you click Submit? Then use Telnet, a small utility that integrates into the system and sends test requests from your mail service server. In this case, you will find out about an error that your email client did not report.
Steps
Part 1 of 2: Connecting to a Mail Server Using Telnet
 1 Activate Telnet. If you are using Mac OS or Windows XP, Telnet is ready to go. If you are using Windows Vista, 2008 Server, 7, 8.1 or 10, you need to activate Telnet.
 - In Windows Vista, 2008 Server, 7 and 8.1, click Start - Control Panel - Programs - Turn Windows features on or off. A list of Windows components will open. Scroll down the list and check the box next to "Telnet Client". Click OK.
- In Windows 10, right-click on "Start" and select "Programs and Features." On the left menu, click Turn Windows features on or off. In the list that opens, check the box next to "Telnet Client". Click OK.
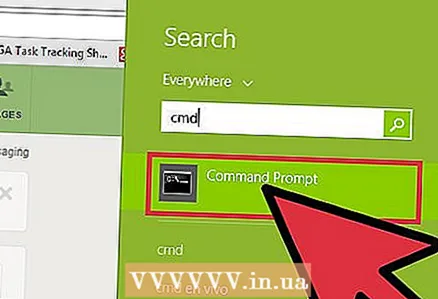
- 2 Open a terminal window. This is done differently on Windows and Mac OS.
- In any version of Windows, click ⊞ Win+R, type cmd and then press ↵ Enter.
- On Mac OS, in Finder, click Applications - Utilities. Double click on the "Terminal" icon. You can also open a terminal by entering terminal and clicking on it in Launchpad.
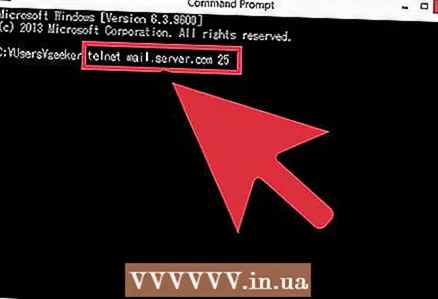 3 Create a Telnet connection. Enter telnet mail.server.com 25, where mail.server.com is the name of the Simple Mail Transfer Protocol (SMTP) of your mail service (for example, smtp-server.austin.rr.com), and 25 is the port number used by the SMTP service.
 - The screen displays something similar to "220 mail.server.com".
- Most mail servers use port 25, but in some cases port 465 (secure port) or 587 (for Microsoft Outlook) is used. To find out the port number, contact your system administrator or check your account information.
- If you receive an error message, such as that it was not possible to connect on port 25, and you are sure that 25 is the correct port number, then the mail server is malfunctioning.
Part 2 of 2: Sending a message
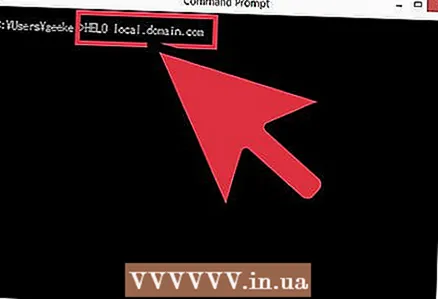 1 Say hello to the server. The method described here works on any operating system. Enter HELO yourdomain.com, where yourdomain.com is the name of the domain you are sending emails from. Note that there is only one l in the helo command. Click on ↵ Enter.
 - The screen displays "250 mail.server.com Hello yourdomain.com pleased to meet you." (250 mail.server.com Hello, yourdomain.com welcomes you).
- If you receive an error or no message, enter EHLO instead of the HELO command. Some servers recognize this command.
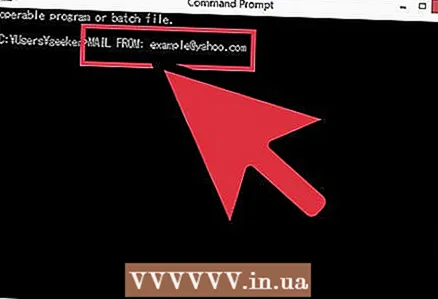 2 Enter the sender's email address. Enter mail from: [email protected], where replace [email protected] with your email address. Make sure you enter a space after mail from:. Click on ↵ Enter.
 - The screen displays "250 Sender OK".
- If you receive an error, please make sure that the domain name of your email address is the same as the domain name of the server. Your mail service server will not allow you to send a message if you enter your email address on another mail service, such as yahoo.com.
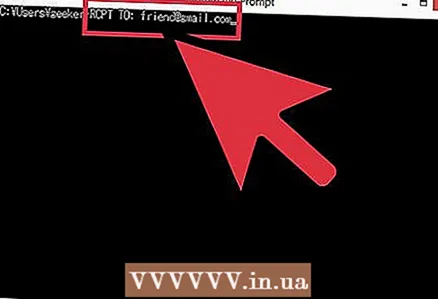 3 Enter the recipient's email address. Enter rcpt to: [email protected] where replace [email protected] with the recipient's email address. Click on ↵ Enter.
 - The message "250 OK - MAIL FROM [email protected]" will be displayed on the screen.
- If you receive an error message, the recipient's email address may be blocked.
 4 Enter your message text. Several commands are required to format and send the message.
 - Enter data and click ↵ Enter.
- On the next line, enter subject: test and double-click ↵ Enter... Replace "test" with the subject of the message.
- Enter your message text. Then press ↵ Enter.
- Press once .to end the message, then press ↵ Enter... The system will notify you that your message has been added to the sending queue.
- If you receive an error message, write it down and contact your postal service representative.
 5 Enter quit to close Telnet. Click on ↵ Enter.
Tips
- The Telnet commands described work on any system, including Linux.
- Some email clients put emails sent in this way into a spam folder. If you are using this method to test your account, check the spam folder in the recipient's mailbox.
- Some email services (like Hotmail) do not allow users to send emails via Telnet.
- You can also check your mail using Telnet.
Warnings
- If you use the described method to send illegal messages, you will be easily identified. System administrators monitor outgoing messages from their respective mail servers.
What do you need
- Telnet client
- Mail server address that is able to forward letters
- Active email address


