Author:
Sara Rhodes
Date Of Creation:
13 February 2021
Update Date:
1 July 2024

Content
- Part 2 of 3: Shutting Down
- Part 3 of 3: Ensuring a quick, high-quality brush cleanse
- Tips
- Warnings
- What do you need
- Pinch the base of the brush bristles through a rag with your fingers.
- Run your fingers over the bristles from the base to the ends, keeping the same pressure.
- Repeat the procedure as many times as necessary on new, clean areas of the rag until the paint stops peeling off the brush.
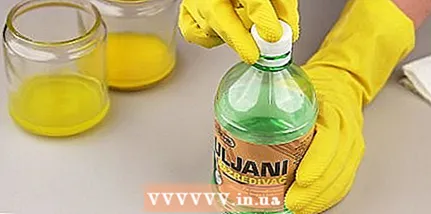
 2 Dissolve the remaining paint on the brush. First, pour the solvent or safflower oil into the prepared container. Fill the container just enough to completely submerge the brush head in the liquid. Then proceed as follows.
 - Dip the brush into the container and start simulating strokes along the bottom to force the paint out of the bristles.
- Remove the brush from the liquid.
- Squeeze the remaining paint out of the bristles in the same way as before. You can also gently wipe the brush on the edge of the container if the paint doesn't seem to dissolve very well. But don't rinse your brush too hard with solvent.
- Be careful as paint residues will now be thinner. Also try to keep the solvent transparent when you soak your brush in it.
3 Repeat the procedure if necessary. Prepare a couple more containers to get the best possible cleaning from your brush. Also fill them with solvent to the required level. Dissolve the remaining paint on the brush in a second container and wipe it off the bristles with a rag as before. Then repeat the operation with the third container. Note that in each subsequent container, the solvent will become less cloudy from the ink than in the previous one. The third container should remain nearly clean. - Note that even after these procedures, the brush will still look stained. This is fine.
4 Wash the brush with dish soap. First, squeeze some dish soap into your palm. Take the brush in your other hand. Place the tip of the brush against the soap in your palm and start brushing as if you were painting it. Then follow the steps below. - From this point on, you can dip the brush into the water. However, remember that water is not a corrosive chemical solvent. Also, make sure the water is not too hot, as the heat can melt the adhesive holding the bristles inside the metal band and damage the brush.
- Continue to “paint” the soap on your hand until lather forms on the brush.
- Stop when the foam turns to the color of the paint.
- Rinse your brush and palm under warm running water.
- Repeat the procedure until the foam no longer stains.
Part 2 of 3: Shutting Down
- 1 Squeeze out the brush bristles again. Use a clean rag or similar material as before. Wrap the material around the metal band of the brush and slide it towards the tips of the bristles while removing any soap or paint residue. If it turns out that a considerable amount of soap is still present in the bristles, rinse the brush thoroughly and repeat the spin cycle. If paint is still present, wash the brush again and rinse.
- Even after this step, the brush bristles may still be colored. This is to be expected and does not mean that the brush is dirty.
 2 Dry your brush. Lay the brush to dry on a horizontal surface so that nothing touches its bristles. If the brush is flat or fan-shaped, place it on the flat side, parallel to the floor. If the brush is not very large or heavy and holds the bristle well, extend its tip over the edge of the flat surface straight up to the metal band.
 - Drying your brush properly will prevent it from becoming moldy. To do this, it is usually sufficient to wipe the brush a few times, unless you are working with a thick watercolor brush. However, if you have purchased a fairly expensive and thick pointed watercolor brush, it will last significantly longer if you only work with watercolors with it. Otherwise, you may need an additional seventh step with waste disposal.
- If you're in a hurry, blow dry with a fan. The brush should dry quickly enough, unless the head is wider than 4 cm. Continue squeezing and blotting the bristles with clean rags or similar materials to remove any excess moisture. Use a new area of the rag, or even other rags each time, so that you can assess the degree of moisture after contact with the brush. Continue working until the rag is no longer wet from the brush.
- 3 Give the brush bristles their original shape. Using your fingers, gently squeeze the brush bristles at the base. Give it its original shape. Be sure to work from the base of the bristle to the tips so as not to deform the brush.
- 4 Conditioner the bristles of the brush if necessary. If the brush is old enough, evaluate the condition of the bristles as you re-shape them and see how dry and rough they are. If you find the brush bristles are already quite fragile, wet them again. Then use your fingers to rub a small drop of hair conditioner into the bristles. Next, erase the brush and give it its original shape.
- Use this technique only when necessary. Regular use of conditioner after washing the brush will deform the bristles.
- If you want your brushes to be dry and not oily (or greasy) to the touch by the time you paint, you can skip this step. However, occasional conditioning of your brushes should prolong the life of your brushes.
- Alternatively, brushes can be treated with mineral oil or a specialty paint from an art supply store. Do not trust conventional hardware stores with brush refurbishers, as they will simply destroy your brushes to the ground. These tools are intended for paint brushes, but not for art brushes. Of course, you will never return your brush to its original condition, but the gentle cleaning process will still help you keep it looking its best.
 5 Store your brushes properly. If possible, use a container with a lid to protect natural brush bristles from moths. Store brushes upright with bristles facing up to prevent deformation. If you store multiple brushes in the same container, make sure you can remove any of them without disturbing the bristles of other brushes. Use more storage containers as needed to meet this requirement.
  6 Store used solvent. Cap the solvent container and let sit overnight. Wait for the paint to settle to the bottom. Then pour the clean solvent from the top into another container. Cap and label both solvent containers. Store them in a safe place out of the reach of children and pets. Remember that solvents are extremely flammable, so keep them away from sources of fire, heating, and extremely high temperatures.
 - In the future, continue to add dirty solvent to the solvent container with paint residues.
- Wait for the paint to settle and drain the clean solvent from the top back into the container of clean solvent.
- Repeat this process until the solvent container with paint residues is full of paint.
 7 Dispose of paints and varnishes properly. Check with your local environmental office to find out if there are hazardous waste recycling facilities in your area, including solvents and paints. It is possible that there may be a collection point for such waste somewhere. Try not to pour toxic waste into drains, drains, or simply onto the ground.
 - If proper disposal of toxic waste is difficult, safflower oil (edible oil that can be safely disposed of down the drain) can be an excellent substitute for chemical solvents.
Part 3 of 3: Ensuring a quick, high-quality brush cleanse
 1 Don't hesitate to cleanse your brushes. Be prepared to wash your brushes immediately after use. Do this even if you plan to return to drawing again soon. Be sure to wash your brush quickly so that it can be done efficiently and with minimal damage to the bristles.
 - If you are going to return to painting soon, do not leave the brush soak in solvent instead of washing it off. Over time, the solvent begins to corrode the glue that holds the bristles in place.
- Although oil paints dry more slowly than other paints, it is best to try to wash your brushes before the paint has a chance to dry.
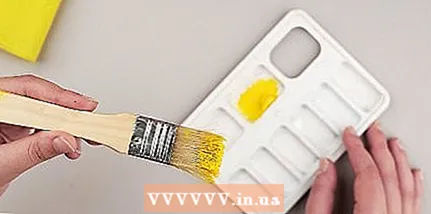
 2 Protect yourself and your surroundings before handling paints. Prepare everything for easy cleaning before you start drawing. Keep household gloves and safety goggles handy to protect yourself from chemicals. Cover surfaces that might accidentally be damaged by paint with newspapers, old towels and protective covers to keep them clean.
  3 Prepare cleaning materials in advance. Collect these materials before you start painting. Everything you need must be in stock before you need it. This ensures quick and easy cleaning as you don't have to look for cleaning products while the paint continues to dry on the brushes. At a minimum, you will need the following:
 - rags, newspapers, paper towels or similar materials;
- one container with a sealed lid;
- paint thinner (white spirit or turpentine, depending on the type of oil paint) or safflower oil;
- soap (preferably a special detergent for artistic brushes, otherwise it is permissible to use dish detergent or shampoo).
Tips
- There is no need to rinse the brush for a long time in solvent! Try to get rid of this habit, as it only wastes excess solvent and spoils the glue that holds the brush bristles in place under the metal band. In addition, the solvent itself evaporates and you breathe in vapors. So just dip the brush into the solvent and then wipe it off. Repeat these steps as needed.
- Use the correct solvent for the type of paint you have chosen. If you are not sure which solvent to use, read the information on the suitable solvent on the paint label. Usually you need to make a choice between white spirit (odorless or with it) and turpentine.
- Store used solvent in glass jars with a lid (in most cases, plastic containers will gradually dissolve and begin to leak). Prepare two cans, one for the solvent used today and the other for the solvent you will use next time. After washing the brushes, close the container with the solvent that was used this time.The next day the paint will settle to the bottom of the can and you can drain the top of the clean solvent for reuse. Note that some types of turpentine and white spirit will settle faster from the paint. Generally, the less contaminated the solvent, the better. If you just dip the brush into it and wipe it on a rag, then no problem should arise.
- Use paint sparingly, especially at the beginning of your painting. Do not let the brushes sink deeper than half the length of the bristle.
- It will take you about 15 minutes or more to clean the brushes. If you paint on a daily basis, to shorten this time, try to concentrate more on deep cleansing the brushes that you use when glazing and painting with the dry brush technique. If you paint with a wet brush on a wet base, you have a little more freedom. And if funds allow you and in your work you use only one type of brushes, then you can take an example from Lucian Freud, who simply put the already used brushes on the chair, and next time he took new brushes for work.
- To wash your hands after painting, buy a pumice soap to help remove oil paint from your skin. First, dry your hands with a paper towel, then use a pumice-based soap, and then wash your hands with soap and water. Be prepared to use lotion afterward. Oil paints are bad for the skin. Repeat the procedures as needed, and use a brush to wash your nails so as not to scare anyone with the condition if you decide to show up at a buffet party and treat yourself to any of the dishes. But be aware that in some cases, especially when using transparent pigments, for example, Prussian blue or phthalocyanine blue, and the presence of calluses on the delicate hands of the artist (for example, when you are engaged in painting and sculpting sculptures), it is better for you to keep your hands in your pockets. since the paints will not come off the skin until you soak them in harsh chemicals (but don't actually do it).
Warnings
- Do not dry your brushes to speed up the process with a hot hairdryer if you have washed them with acetone, otherwise you risk burning your house.
- Do not empty used solvent down the drain. Dispose of hazardous waste properly.
- If you are using lead-based pigments (snow white or white lead) and are pregnant, you may want to avoid using them. Use titanium white or zinc white. These pigments will have a stronger effect on the tones of the paints you mix, but they will not harm your unborn child.
- Search Google for safety measures that educational institutions take when painting with oil paints to protect the health of students. Follow the same requirements. Remember that working with oil paints, solvents and pigments is a harsh chemical. Also, be aware that these are extremely flammable chemicals if you haven’t read the information on the labels of the products you are using.
- If you don't regularly use paint-stained rags, especially those soaked in linseed oil, they can spontaneously ignite and burn your home. Do not store your bin containing them near open flames, heating, in a hot attic, or near flammable objects that you will not be happy to destroy.
- If you have sensitive skin, you probably shouldn't paint in oil (if you're just an amateur artist, pregnant, or both, skip oil paints).
What do you need
- Household gloves
- Protective glasses
- Newspapers, old towels, protective covers or similar materials to protect surfaces from dirt
- Paper towels, rags, newspapers or similar materials for cleaning the brush
- Paint thinner or safflower oil
- At least one container with a tight lid
- Soap (special brush cleaner, dish detergent, or shampoo)
- Warm water
- Hair conditioner (optional)


