Author:
Clyde Lopez
Date Of Creation:
20 June 2021
Update Date:
1 July 2024

Content
Replacing drum brake pads is a simple process; however, it requires the use of a tool and a little attention.In return, you get significant savings on visiting a car repair shop. In this article, we will look at the basic steps for replacing the pads, but before starting work, be sure to open the repair manual for your car and clarify the specific points inherent in this model. Read on!
Steps
 1 Put on asbestos-proof respirator. You are now about to start work involving the release of fine asbestos dust, which is deadly if inhaled. Get a respirator - not a regular paper mask that you can buy in any supermarket, but a special protective device designed to work with asbestos. Drive out children and pets. Especially children - you must not let them close to your workplace, even for a second.
 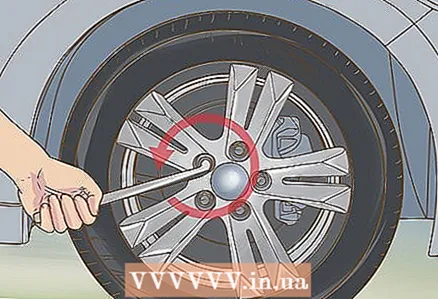 2 Remove the cap from the wheel and loosen the nuts. Jack up the vehicle and substitute safety supports.
 - Never do not work with a vehicle that is only on a jack. Pieces of wood, bricks, or even concrete blocks are not an adequate substitute for fall arrest stands specially designed to support the vehicle.
- Unscrew the nuts completely and remove the wheel.
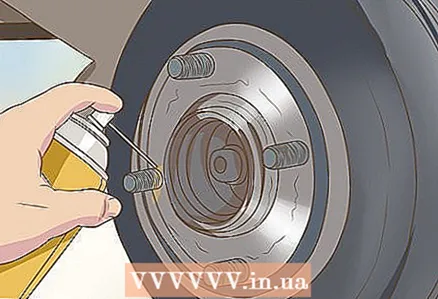 3 Spray the entire wheel hub completely with a penetrating grease such as PB Blaster.
- Note: "WD-40" is not a penetrating lubricant.
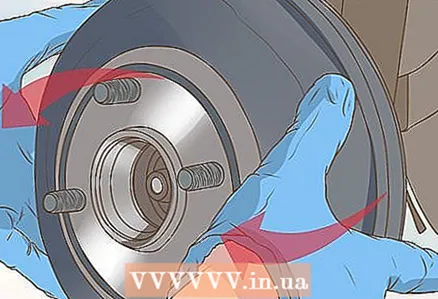 4 Grasp the edges of the brake drum and remove it. Slightly wiggling the drum while tightening will make it easier for yourself.
 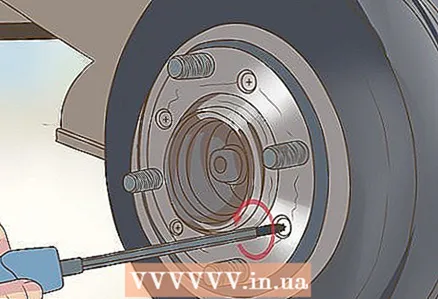 5 Note that some of the drums are also secured with screws, so you will have to unscrew them first.
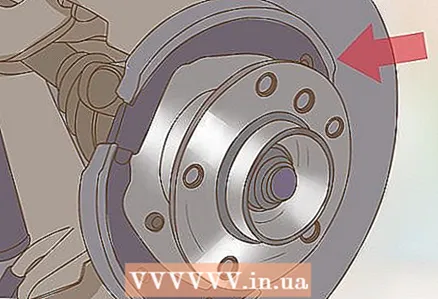 6 After removing the drum, inspect it carefully.
- If the inner surface of the drum is scored or damaged, then the drum must be sanded or replaced.
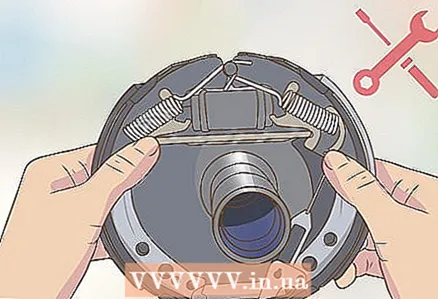
- Drum brake mechanisms contain a mass of springs and levers necessary for the automatic brake pads and the functioning of the parking brake. They are often multi-colored. Before you start disassembling the entire mechanism, take a picture of it so that after reassembly you have the opportunity to check its correctness!
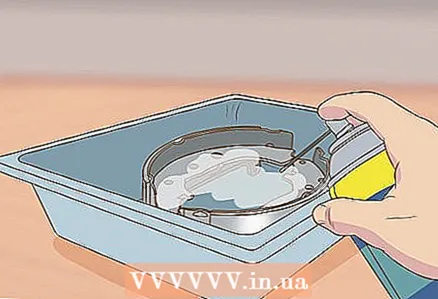 7 Spray the entire machine with brake cleaner. Remember that most brake pads contain asbestos, so the dust should not be inhaled. Put on a respirator.
 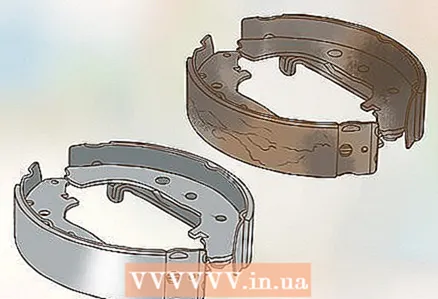 8 Compare the new pads with the old ones. Make sure all holes are in the correct locations.
 - Don't forget to compare the shoe widths.
 9 Disassemble the brake mechanism.
- Remove the return springs of the pads.
- Remove the parking brake rod.
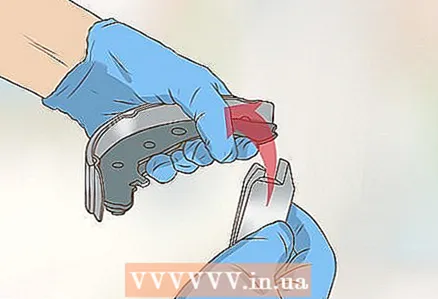
- Hold the pad locking pin on the back and remove the pad locking springs.
- Spread the pads to the sides by their tops and disconnect the pads from the pins of the brake cylinder.
- Remove both pads together with the automatic feed mechanism.
- Place the old pads on the ground next to the new ones.
- Sometimes the front and rear pads are different from each other. Most often, pads with shorter brake pads are placed on the front end.
- Carefully bring the tops of the pads together to loosen the auto feed spring.
- Remove the automatic feed mechanism.
- Remove the spring and immediately hook it onto the new pads exactly as it did on the old ones.
 10 Assemble the brake.
- Twist back the automatic feed mechanism. It has a right-hand thread on one side and a left-hand thread on the other.
- Install the automatic feed mechanism on the new pads and spread their tops to tension the spring.
- Reinstall the pads assembled with the automatic feed mechanism; place the holes on the corresponding pins.
- Reinstall the pad retaining springs.
- Connect the pads to the pins of the brake cylinder.
- Reinstall the parking brake rod.
- Install the return springs of the pads.
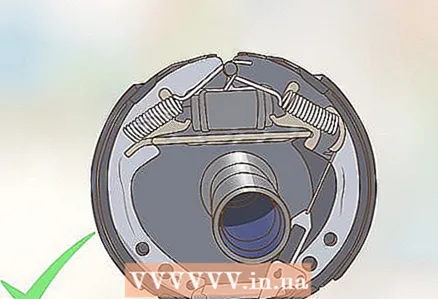 11 Compare the resulting painting to the photograph taken before the brake was disassembled. If something doesn't look right, correct it according to the photo.
  12 Finish the assembly.
- Slide a new or old sanded brake drum onto the pads.
- Replace the wheel.
- Adjust the brakes.
- Remove the safety supports.
- Lower the jack.
- Repeat on the other side.
Tips
- Do not disassemble the brakes on both sides at the same time. If you could not take a photo and then got confused in the assembly of the springs, then you can see how everything is installed from the other, unassembled side.
- Drum brakes on some cars do not have an auto-feed mechanism for the pads. On such brakes, the pads are supplied manually by rotating a special square head located on the back of the brake mechanism. Periodic unscrewing of this head will allow you not to face a situation when the drum is worn out (sometimes - even through and through) by the brake pads.
- There are no identical brakes in the world on two different models of cars: all designs are different from each other. The steps outlined above are mostly for American school cars.
- When buying new pads, consider purchasing a set of new springs as well. This is usually an inexpensive pleasure (usually around $ 10), but definitely worthwhile.
- If you are not qualified enough, then do not carry out work on replacing the pads. For example, your qualifications are insufficient if you need to read about how to do it before removing a wheel.
Warnings
- Never operate a vehicle if it is only supported by a jack. Never, even in emergencies.
- Get a quality auto tool kit. These kits are produced for a reason.
- When the pads are removed from the mechanism, never touch the brake pedal. If you press on it, the pistons of the brake cylinders will be squeezed out, and in order to install them in place, you will need more work than what is described in this article.
- Do not breathe shoe dust! A regular mask will not help - the size of asbestos dust granules is much smaller than the diameter of the filter cells of a standard respirator.
- If you have no idea how to replace the pads, then do not even tackle it. This operation is too responsible to start your acquaintance with auto repair with it.
What do you need
- Jack
- Safety supports
- Spanner key
- A set of various tools: pliers, screwdrivers, etc.
- Penetrating grease (2 cans)
- Brake cleaner spray (2 cans)
- Recoil spring puller
- Retaining spring puller
- Digital camera
- Repair manual for your car
- Torque wrench


