Author:
Judy Howell
Date Of Creation:
3 July 2021
Update Date:
21 June 2024
Content
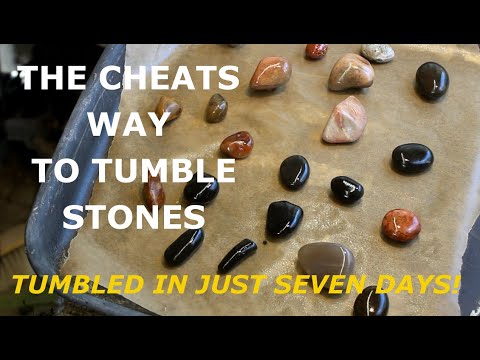
Polishing or grinding stones, also called stone working, is a fun hobby that produces beautiful results. You can polish stones manually, which requires few tools. You can also purchase a polisher that can polish dozens of stones at the same time. After buffing, place the bricks in your house to show off your newfound skill.
To step
Method 1 of 2: Polish with sandpaper
 Choose the right stone. You can polish any stone, but stones with some characteristics are easier to polish. If you want to polish an easy stone, choose a slightly softer stone like onyx, limestone or calcite. Stones that are very hard take a lot longer to polish. Although it takes a long time to polish hard stones, they will shine more strongly than softer stones.
 - To see if a stone is soft, scratch it with another stone. If the scratch looks chalky, it is a soft stone.
- Also try to choose a stone that is round in shape and does not have large protrusions and deep holes.
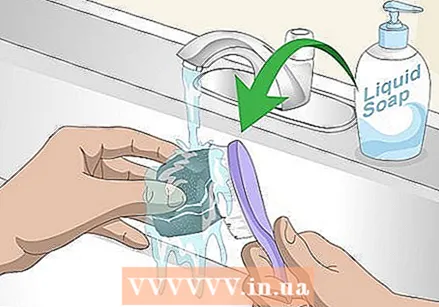 Wash the stone. If the stone is dirty, wash it thoroughly with soap and water. Use a scrub brush to remove all stubborn dirt and dust. Pat the stone dry after you clean it.
  Shape the stone. If you want to make the stone more rounded, use a small hammer or chisel to cut pieces out of the stone. Put on safety goggles to protect your eyes from rock splashes. Also wear safety gloves if you wish. Chop away any bumps and protruding parts.
 - If you are happy with the shape of the stone, you don't have to think about shaping it.
- You can also rub the stone over a piece of concrete to break off any protruding parts.
 Rub the stone with a piece of coarse sandpaper. Sandpaper with grain size 50 is the coarsest sandpaper that exists and is very suitable for further shaping the stone. Run the sandpaper over the protrusions and bumps on the stone you want to smooth. When you are happy with the shape of the stone, sand it evenly with a 50-grit piece of sandpaper to smooth the entire surface.
 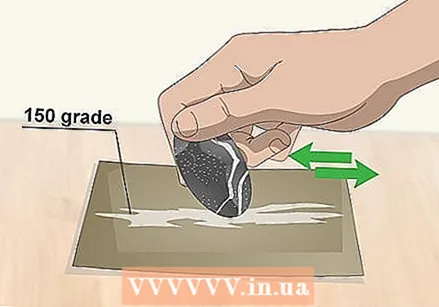 Use fine sandpaper to remove scratches. Take the stone and rub it with 150-grit sandpaper. You may notice that the 50-grit coarse sandpaper has left scratches on the stone. Go over these scratches with a 150 grit piece of sandpaper to smooth and remove them.
 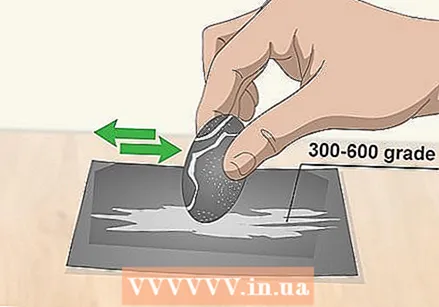 Sand the stone with a 300 to 600 grit piece of sandpaper. Sand the entire surface of the stone with a piece of sandpaper with a grain size of 300 to 600. Concentrate especially on scratches in the stone. This type of sandpaper is fine and will not scratch, but it can remove scratches left by coarser sandpaper.
 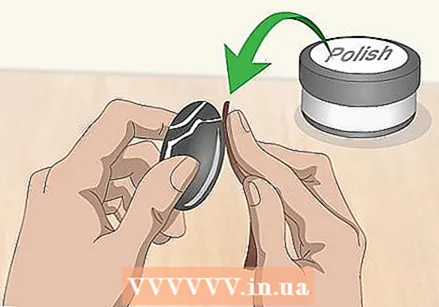 Rub the stone with a piece of leather and polish. After you've sanded the stone, polish it with leather and a tube of polish. Buy a tube of polish and a piece of leather at a hardware store if you don't already have these items at home. Put some blobs of polish on the leather and rub it over the stone. The stone should now shine beautifully.
 - Make sure not to buy a colored polish as it can tint the stone.
Method 2 of 2: Using a buffing machine
 Buy a polishing machine (drum machine) and polishing powder. Polishers are very suitable for polishing stones because they make the stones shine more than you can achieve with manual polishing. You can also grind and polish dozens of stones at the same time. You can buy such a device online from specialized web shops in gemstones or geological materials. Keep in mind that prices vary a lot, so buy a device that suits your needs. Also buy polishing powder intended for polishing stones with grain size 80 (coarse), 220 (medium) and 400 (fine).
 - A cheap plastic polisher is a good option if you only want to use the machine a few times. Spend money on a more expensive appliance if you want to make stone polishing your new hobby.
 Choose and sort your stones. Before you start polishing your stones, sort them so that the stones you put in the drum are roughly the same hard and have roughly the same shape.
 - It is not a good idea to put stones in the drum that are not all equally hard. The harder stones will wear out and scratch the softer stones. It is also not a good idea to put stones of different shapes in the drum. If you put both irregularly shaped and round stones in the device, the rounder stones will be polished faster than the irregularly shaped stones.
- Try to put stones of different sizes in the machine. The stones will become more even in shape.
 Fill the drum of the appliance half to three quarters with stones. First wash the stones with soap and water. After washing, put stones in the drum that are about the same hard and about the same shape. Then remove the stones from the drum and weigh them. After weighing you put them back in the drum.
 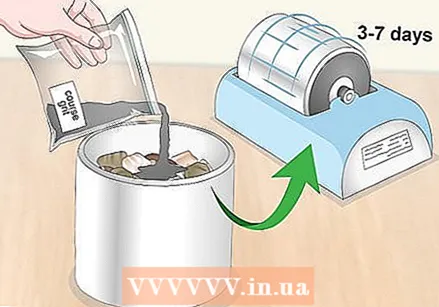 Switch on the appliance and polish the stones with coarse polishing powder. Measure 50 grams of polishing powder per 500 grams of stones in the drum. Then pour water into the device until the water reaches the bottom of the top layer of stones. Put the lid on the appliance and switch it on. Let the device work for 24 hours, then open it to see how far the process is.Put the lid back on and switch the appliance on again.
 - Polish the stones in the appliance for 3 to 7 hours and check the stones every 24 hours to see if everything is going well.
- The coarse polishing powder is intended to make the stones smoother in shape. For rounder stones it should take about 3 days before they have a nice shape. Irregularly shaped stones can take up to 7 days for the surface to be smooth and even.
- By checking the stones every 24 hours you can see the progress. After checking, you can decide that the stones are ready for the next step or that they need to be polished in the device for another day.
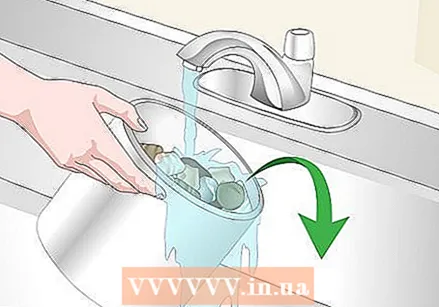
 Remove the stones from the device. After 3 to 7 days, remove the stones from the drum and place them in a shallow bowl. Remove the polishing powder from the stones and clean the inside of the drum. Do not flush the polishing powder down the sink drain as it will harden and clog the drain. Instead, throw it in the trash.
 - Wash the stones and appliance thoroughly until they are spotlessly clean. If small amounts of coarse powder remain on the stones or in the device, the next part of the process may be disrupted.
 Polish the stones in the appliance with powder of medium coarseness. Put the clean stones back in the polisher. Use the same amount of polish as you used before. Then fill the drum with water until the water reaches the bottom of the top layer of stones. Put the lid on the drum and switch on the appliance. Let the device run for four or five days and check the stones every 24 hours.
 - After four or five days, turn off the device and open it. Place the stones in a container and remove all polishing powder.
- Again, make sure the stones and drum are completely clean, and discard the powder instead of flushing it down the drain.
 Polish the stones in the machine with fine polishing powder. Put the clean stones back in the drum. Use the same amount of polish as you used in the previous steps. Then fill the drum with water until the water reaches the bottom of the top layer of stones. Put the lid on the drum and switch on the appliance. This cycle should last approximately 7 days. Check progress every 24 hours.
 - This is the last step where you use polishing powder, so do not stop the appliance until you are satisfied with how smooth the stones are and how strong they shine. Checking progress may require you to clean a stone to see how much it shines.
 Clean the stones and the polisher. Thoroughly clean the stones and the device. Make sure you have removed all of the powder from the nooks and crannies of the appliance, as powder residues can reduce the performance of the appliance later on. When you remove the powder from the stones you will see that they shine beautifully.
  Polish the stones one last time. Sometimes soft stones will not shine as strongly as you would like if you only polish them in a buffing machine. To re-treat stones that you want to shine more, use leather and a polish. Put a dollop of polish on a piece of leather and rub it over the stone. Make sure that the polish gets all over the surface. The stone will now shine beautifully, just the way you want it.
Tips
- To find stones to polish, go to the beach or buy semi-precious stones.
- Don't forget to clean the polisher thoroughly or it will get clogged and stop working properly.
Warnings
- Remember never to rinse the polishing powder down the sink. It will harden and be very difficult to remove from the drain.


