Author:
Marcus Baldwin
Date Of Creation:
17 June 2021
Update Date:
1 July 2024

Content
- Steps
- Part 1 of 3: Choose the Right Work Environment
- Part 2 of 3: Prepare Materials
- Part 3 of 3: Apply glue
- Tips
- What do you need
The process of gluing acrylic glass (plexiglass) is slightly different from gluing paper or wood. Unlike regular glue, acrylic glue creates a chemical reaction that physically bonds and solders the plastic together. In fact, this is not as difficult as it seems, especially if you do the work scrupulously, slowly and observing safety precautions. After all the necessary preparations, you just have to wait a little.
Steps
Part 1 of 3: Choose the Right Work Environment
 1 Find a suitable workspace. Since you will have to work with glue that emits toxic fumes, choose a well-ventilated area to work with. For example, work outdoors or in a room with multiple windows.
 - Position yourself between windows or between a window and an open doorway.
- Install one or two fans to circulate air.
- A room with an exhaust fan is fine too.
 2 Take the necessary precautions. This means that you need to wear safety goggles, gloves and a face mask. In addition to the toxic fumes from acrylic glue, you should also make sure that any waste from cutting or grinding the acrylic glass does not get into your lungs or eyes.
 - When working with acrylic glue, follow the instructions carefully to avoid trouble.
 3 Choose a surface to work on. If you plan on gluing plexiglass in your workshop, garage, or even your kitchen, make sure your work surface is compatible with acrylic adhesive. It can be concrete, metal or wood. Do not glue acrylic glass to glass or paper surfaces.
Part 2 of 3: Prepare Materials
 1 Examine the edges of the acrylic. The borders of acrylic glass should be flat, without bumps or chips. Acrylic glue will not stick to gaps and crevices or fill them in like conventional glue. Instead, it will soften the acrylic and chemically bond the pieces together. This is why it is so important that they are as flat as possible.
 - If you notice any uneven areas, use a router (power tool with a profile cutter) or light sandpaper to make the edges perfectly smooth and square. But when sanding, don't round the edges.
- The surfaces to be bonded should be lightly sanded and should not shine, as surfaces that are too smooth are more difficult to bond.
 2 Wipe the acrylic with isopropyl alcohol. After sanding and smoothing the edges of the acrylic, wipe it off with a clean cloth dampened with rubbing alcohol. Isopropyl alcohol will remove all dirt, dust and other debris from the acrylic surface. This also applies to oil stains from your fingers, which may interfere with adhesion.
 - Make sure the surfaces are free of dust, as this is critical to the bonding process.
 3 Prepare acrylic adhesive. The most common acrylic glass adhesive is the solvent-based adhesive sold with an applicator bottle and needle. Fill the bottle approximately 75% through the neck before use.
 - After that, gently squeeze the bottle so that some air gets inside.
Part 3 of 3: Apply glue
 1 Connect the pieces of acrylic glass. Arrange the pieces of acrylic the way you want to connect them. The parts must be assembled at a 90 degree angle. Use a combination square to keep the pieces at the correct angle. Secure parts with hands or clamps.
 - Make sure the pieces fit together before applying the glue.
- Fix the position of the parts with adhesive tape. Then the glue can be applied accurately without moving the parts.
 2 Lower the applicator and squeeze out the adhesive. Turn the bottle upside down and position the needle over where the two pieces of acrylic meet. Run the needle along the seam of the parts, applying light pressure to the bottle. Pull the bottle towards you. The acrylic adhesive should run between the joints and fill in any seams or cavities along the way.
 - Squeeze the bottle and move it without stopping to prevent too much glue from spilling onto the acrylic glass.
- If you are gluing the corner joint of a box, apply acrylic glue to the inside edge of the cover. When gluing flat joints, apply glue to both sides of the coating.
- Don't let the acrylic glue get on the parts you don't want to glue. Acrylic adhesive will damage any surface it touches. If you do get some glue on the acrylic, let it evaporate. Don't wipe it off.
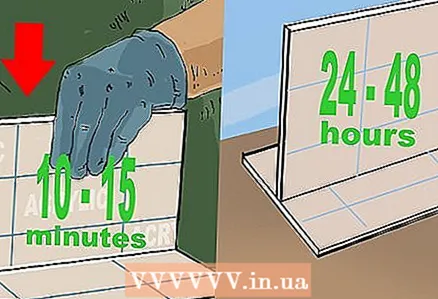 3 Let the acrylic glue harden. Most acrylic adhesives will cure in 10-15 minutes.During this time, hold the acrylic pieces with your hands or use clamps. The glue will completely cure in about 24 to 48 hours.
 - Initially, the acrylic glue will be cloudy white, but if the pieces have been glued correctly, the dried glue will become transparent.
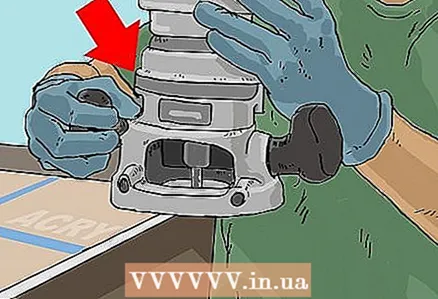 4 Trim the acrylic. Cut off the overhangs and intersecting pieces of acrylic with a router (power tool with a profile cutter). Be careful, however, as the heat it generates can melt the acrylic. Do not manipulate the acrylic until the glue is completely cured.
Tips
- Do not use superglue, as it reacts poorly with acrylic and will cause chemical burns on the acrylic surface.
- Wear safety goggles and rubber gloves when handling acrylic adhesives.
What do you need
- Acrylic glass
- Acrylic adhesive
- Applicator bottle
- Funnel
- Milling machine
- Sandpaper
- Alcohol
- Clean cloth
- Cement, metal or wood surface
- Combined elbow
- Protective glasses
- Latex gloves
- Mask for the face


