
Content
Roughly speaking, there are three types of electric motors: AC (alternating current, this electricity is available at the wall outlet), DC (direct current, this electricity is provided by a battery) and universal motors, sometimes called series motors, and which can be powered by AC or DC voltage. ... The inverting procedure is easiest and safest to carry out on DC motors. These simple motors are based on magnetic fields that oppose each other and rotate the axis. As a result, in order to change the direction of rotation of such motors, it is sufficient to reverse the magnetic polarity. With our instructions, you will learn how to invert a simple AC motor found in a radio-controlled car, toy train, or robot using a toggle switch or slide switch.
Steps
Part 1 of 2: Checking the Details
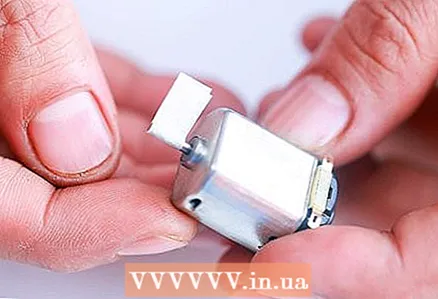 1 Attach a tape to the shaft. Attach a piece of electrical tape to the rotating motor shaft, making a small flag.
 - This way you can easily determine the direction of rotation.
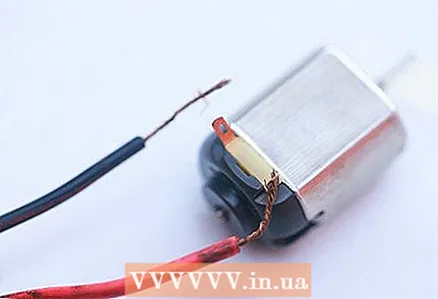
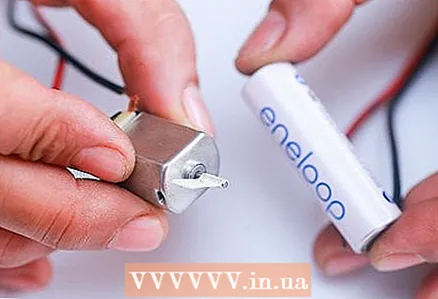 2 Check engine and battery. Temporarily connect the engine to the battery to check if they are working properly. If you already have wires attached to the engine, connect the white wire to the positive side of the battery and the black wire to the negative side.
 - If the engine does not turn, there is a possibility that the battery being used is not powerful enough. Try using a battery with a higher voltage. Likewise, if the motor rotates faster than necessary, then the voltage can be reduced.
- Please note that a battery that is too powerful can melt the engine coils. Therefore, before connecting the battery, it does not hurt to check the rated power of the engine.
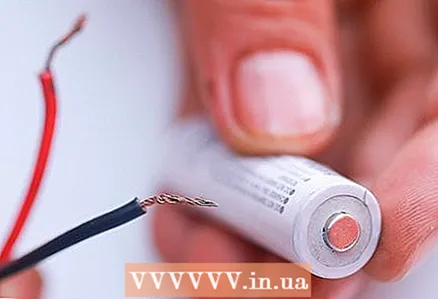 3 Inverting the wires. Disconnect the wires from the battery and then reconnect them from opposite sides (i.e. white to negative and black to positive). Reversing the polarity should cause the motor shaft to rotate in the opposite direction.
 - If the motor does not rotate in the opposite direction, then the reason may lie in the fact that the wrong motor is selected. Most DC motors are easily inverted, but there are exceptions.
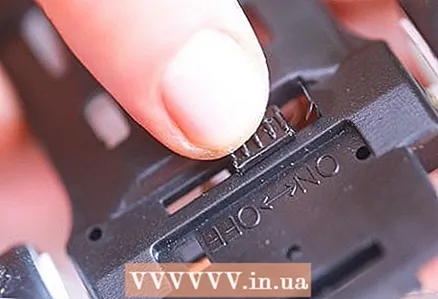
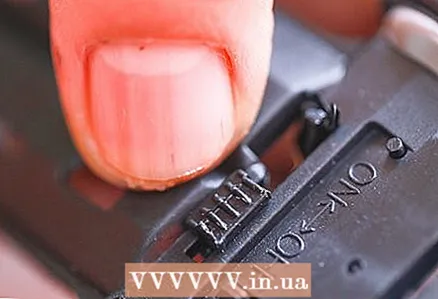 4 Check the switch. In the second part of this article, you will learn how to install a two-pole, two-position switch that will change the direction of rotation of the motor. These switches are inexpensive and available at most electrical stores. Before proceeding with the next steps, check the power rating of the switch to make sure it is suitable for the battery being used.
 - A battery that is not powerful enough can melt if too high a voltage is passed through it.
Part 2 of 2: Installing the switch
 1 Assigning the color of the wire. To make it easier to remember the order of connecting the wires, you can use copper wires of four different colors and write down where to connect the wire of which color.
 - You will need one wire for the positive terminal of the battery, one for the negative terminal of the battery, one for the positive terminal of the motor, and one for the negative terminal.
 2 Connect the positive power wires to the switch. Position the switch so that looking at it from above in front of you there are two vertical rows of three pins (that is, so that the switch can move up and down, and not from left to right). Then, using a soldering iron, solder the long wire to the top left terminal of the switch. Subsequently, this wire will be connected to the positive terminal of the battery.
 - With the first wire securely clamped in place, take a small wire of the same color (for example, white) and run it from the top left terminal where you just attached the battery wire to the bottom right terminal of the switch. Solder.
 3 Connect the negative power wires to the switch. Take a long wire of a different color (for example, black) and solder it to the lower left terminal of the switch. This wire will subsequently be connected to the negative terminal of the battery.
 - Then take a small wire of the same color and run it from the bottom left terminal where you just attached the battery wire to the top right terminal of the switch. Solder.
 4 Connect the motor wires to the switch. Solder one of the two remaining colored wires to the two center pins. These wires will go to the positive and negative terminals of the motor.
 - For example, if you have yellow and blue wires left, solder the yellow wire to the left center pin and the blue pin to the right center pin.
 5 Connect the motor wires to the electric motor. Take the wires soldered to the center pins of the switch and solder them to the motor.
 - The wire from the left center terminal of the switch should be soldered to the positive terminal of the motor and the wire from the right center terminal of the switch to the negative terminal.
- Make sure the switch is in the center (OFF) position before proceeding with the next steps. Otherwise, you may receive electric shock or burns when connected to a battery.
 6 Connect the power wires to the battery. Connect the long power wires to the battery, with the wire soldered to the upper left terminal of the switch going to the positive side of the battery and the wire from the lower left terminal to the negative side.
 - Depending on the battery you are using, you can wrap the ends around the terminals or simply press them down.
- Secure the ends of the wires to the battery terminals with electrical tape. Do not leave exposed wires as they may become hot during use.
 7 Check the switch. Your inverting switch should be ready for operation. The engine must be shut off when it is in the center position. In the upper position, the engine should rotate forward, and in the lower position - backward.
 - If, when switching to the up and down positions, the motor does not rotate in the direction you would like, then you can simply re-solder the switch or swap the wires at the battery or motor terminals. Do not swap motor and battery leads at the same time, otherwise you will end up where you started!
Tips
- We recommend that you check the rated voltage of the motor and make sure that the voltage supplied by the battery is correct. Otherwise, the engine may be damaged or it will not run due to lack of power.
- If you don't want to use a switch, you can use a small PCB. This will save you time if you plan to install multiple switches. A suitable working template for the PCB can be found here.
- When using a high power battery, you can replace the switch with a relay. Relays handle higher voltages than conventional switches, and you will always find a 6-pin relay that connects in the same way as a switch.
Warnings
- Wait until the motor has come to a complete stop before changing the direction of rotation. Fast back and forth shifting can damage the motor.
- Inverting high-power motors can be unsafe if you don't know what you are doing. It is for this reason that inverting AC motors is such a challenge. Without professional equipment and experience in electrical work, it is better to use only DC motors for this purpose.


