Author:
Sara Rhodes
Date Of Creation:
13 February 2021
Update Date:
1 July 2024
Content
- Steps
- Part 1 of 3: Opening a Word Document
- Part 2 of 3: Turning on the Drawing Panel
- Part 3 of 3: Grouping Objects
- Tips
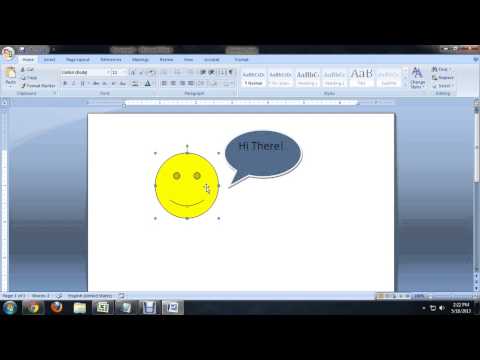
Grouping objects in Microsoft Word is an effective way to manipulate them (so that the program treats multiple objects as one). For example, you can group shapes so that when you move them, the distance between them is not disturbed.
Steps
Part 1 of 3: Opening a Word Document
 1 Start MS Word by double clicking on the program shortcut on the desktop.
 2 Click "File" - "Open", in the window that opens, find and select the required document and click "Open".
 3 In the document, find the objects you want to group.
Part 2 of 3: Turning on the Drawing Panel
 1 Click the View tab (or click View on the menu bar).
 2 Hover your mouse over Toolbars and select Drawing Panel. This panel will appear in the lower left corner of the document (this applies to Microsoft Word 2003; in Word 2010/2013, this panel is the Format tab and is displayed after clicking on the picture / image).
Part 3 of 3: Grouping Objects
 1 Select the objects or shapes that you want to group. To do this, hold down the CTRL key and click on the desired objects / shapes.
 - Make sure the objects are positioned relative to each other the way you want them to be.
 2 Click Group (on the Format tab) to open the menu.
 3 In the menu, click "Group" to combine multiple objects / shapes; when moved, the grouped objects move as a whole.
Tips
- An alternative way to open the document in Word. Start Windows Explorer, find the document you want, and double-click on it.


