
Content
- Steps
- Method 1 of 7: Add the Standard Toolbar in Word 2003
- Method 2 of 7: Add a custom toolbar in Word 2003
- Method 3 of 7: Add toolbar buttons in Word 2003
- Method 4 of 7: Change toolbar buttons in Word 2003
- Method 5 of 7: Add the Command Ribbon to the Quick Access Toolbar in Word 2007 and 2010
- Method 6 of 7: Add and remove buttons on the Quick Access Toolbars in Word 2007 and 2010
- Method 7 of 7: Move the Quick Access Toolbar in Word 2007 and 2010
- Tips
Microsoft Word and other Microsoft Office products provide the ability to customize the user interface to organize frequently used tools in the most convenient way for users. The text editor Microsoft Word 2003 (the latest version of Word) to display the menu interface and toolbar allows you to customize your toolbars and create new ones to meet the needs of your users. Whereas the 2007 and 2010 versions of Word let you customize their Quick Access toolbar, which complements their ribbon menu interfaces. The following steps will show you how to add toolbars in Microsoft Word 2003 and how to customize toolbars and toolbar buttons in this version of Word, and walk you through the procedure for customizing the Quick Access Toolbars in Word 2007 and 2010 text editors.
Steps
Method 1 of 7: Add the Standard Toolbar in Word 2003
 1 Select "Toolbars" from the "View" menu. A list of available toolbars appears with check boxes in front of the toolbars that are currently enabled.
 - The default toolbars that appear when you install Word 2003 are: the Standard panel, which contains buttons for commonly used commands such as Open, Save, Copy and Paste, and the Formatting toolbar, which includes text formatting commands such as Bold, Italic, Underline and the ability to add bullets or numbering.
- Word 2007 and the Quick Access Toolbar in Word 2010 take the place of the Standard toolbar in Word 2003, and buttons on the Word 2003 Formatting toolbar appear in the Font and Paragraph sections of the ribbon "Home" in Word 2007 and 2010.
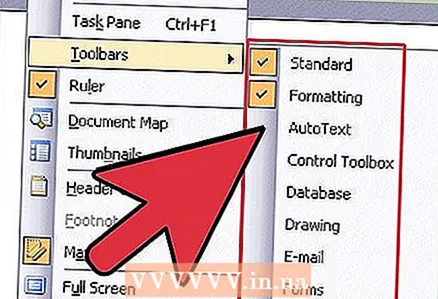 2 Select the desired toolbar from the Toolbars submenu.
Method 2 of 7: Add a custom toolbar in Word 2003
 1 Select "Toolbars" from the "View" menu.
 2 Select "Customize" from the "Toolbars" submenu.
 3 Click the Toolbars tab, then click New... "(New).
 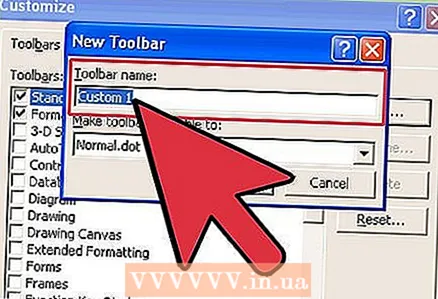 4 Enter a name for your new toolbar in the Toolbar Name field.
 5 Choose a location to store the toolbar in the "Make toolbar available to" box. You can save the new toolbar in a template or open a document. Click "OK" after making your selection.
  6 Select the buttons you want to place on the new toolbar. Click the Commands tab, then select the desired category for the button. Drag the button to your new toolbar.
 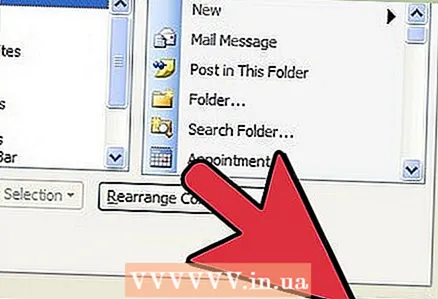 7 Click "Close".
Method 3 of 7: Add toolbar buttons in Word 2003
 1 Click the More Buttons button on the right side of the toolbar. It's a down arrow button, similar to the down arrow button to the right of the dropdown list of fields. It only appears when the panel is docked.
  2 Check the box next to the button you want to add in the submenu that appears.
Method 4 of 7: Change toolbar buttons in Word 2003
 1 Display the toolbar you want to modify if it is not already displayed. If you want to make changes that affect more than 1 toolbar, you need to display all the toolbars that will be involved.
  2 Select "Customize" from the "Tools" menu.
 3 Follow the procedure for the changes you want to make.
- To move a button, drag it to a new location on the same or a different toolbar.
- To copy a button, hold down the "Ctrl" key on your keyboard and drag the button to a new location on the same or a different toolbar.
- To remove a button, select the desired button to remove and drag it outside the toolbar.
- To recover a deleted button, follow the steps in the "Add buttons to the Word 2003 toolbar" section.
- To change the button image, right-click the button, select "Edit Button Image" and then make the necessary changes in the "Edit Button" dialog box and click "OK". (This procedure will not work for any button that displays a list or menu when you click on it.)
 4 Click "Close".
Method 5 of 7: Add the Command Ribbon to the Quick Access Toolbar in Word 2007 and 2010
 1 Click the desired ribbon tab to display the ribbon using the command you want to add to the Quick Access Toolbar.
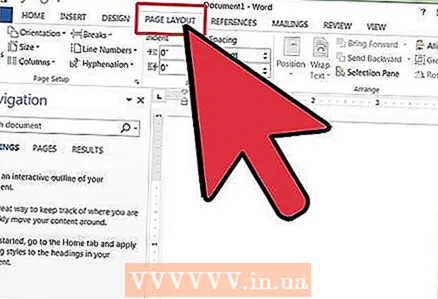 2 Right click on the command you want to add to the toolbar. A pop-up menu will appear.
  3 Select "Add to Quick Access toolbar" from the pop-up menu.
- Word 2007 also allows you to right-click to add any of the File menu button options to the Quick Access Toolbar. However, Word 2010 does not allow menu items on the left side of the File tab page to be added to the Quick Access Toolbar.
Method 6 of 7: Add and remove buttons on the Quick Access Toolbars in Word 2007 and 2010
 1 Click the Customize Quick Access Toolbar button on the right side of the toolbar. This button has a down arrow, similar to the down arrow to the right of the drop-down list and to the right of docked toolbars in Word 2003. The Customize Quick Access Toolbar drop-down menu is displayed.
  2 Select More Commands. The Word Options dialog box appears with the Customize option selected.The center pane displays 2 columns: the left column displays a list of available buttons, and the right column displays the buttons that are currently enabled.
  3 Add, move or remove buttons or dividers as you like.
- To add a button or separator to the Quick Access Toolbar, select it from the list on the left and click Add.
- To remove a button or separator from the Quick Access Toolbar, select it from the list on the right and click the Remove button.
- To move a button on the Quick Access Toolbar, select it from the list on the right and click the up arrow button to move it up the list (and to the left on the toolbar), or the down arrow button to move it down the list (and right in the toolbar).
- To restore the default toolbar settings, click "Reset" in Word 2007, or click the "Reset Defaults" drop-down menu button and select "Reset Only Quick Access Toolbar" in Word 2010.
 4 Click "OK" to close the dialog box.
Method 7 of 7: Move the Quick Access Toolbar in Word 2007 and 2010
 1 Click the Customize Quick Access Toolbar button on the right side of the toolbar.
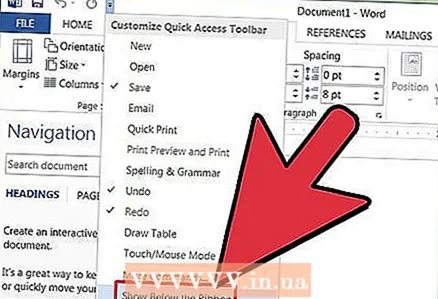 2 Select "Show Below the Ribbon". This will change the location of the Quick Access Toolbar below the menu ribbon.
Tips
- While it is possible to resize toolbar buttons in Word 2003, similar steps in Word 2007 and 2010 are not possible for the Quick Access Toolbar except to reduce the screen resolution. All 3 versions of Word allow customization of their menus (or menu ribbons for Word 2007 and 2010). Word 2007 and 2010 also allow you to import a customized Quick Access Toolbar or menu ribbon from your copy of any version of Word to another computer with the same version of Word installed on it. (However, imported toolbars or ribbons override any previous settings.)


