Author:
Janice Evans
Date Of Creation:
26 July 2021
Update Date:
1 July 2024
Content
- Method 2 of 4: Doing push-ups
- Method 3 of 4: Advanced Push-Ups
- Method 4 of 4: Lightweight push-ups
- Tips
- Warnings
- Place your hands on the floor with your palms, placing them about shoulder-width apart. They should be close to the shoulders and point with the elbows back.
- If you are sitting on a relatively soft surface (such as a carpet), you can lean on your fists to complicate things. If you are on a rougher surface, you can purchase special push-up grips (they look like handles that are placed on the floor).
- Bend your toes up (towards the head). Keep your fingertips flat on the floor.
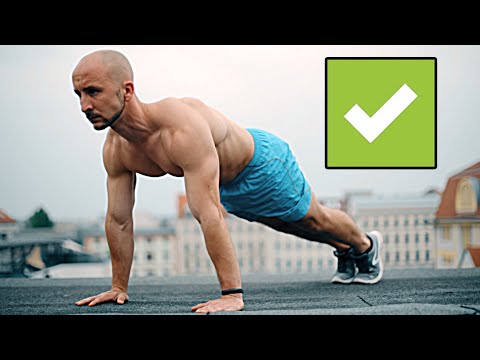
 2 Lift yourself up with your hands. Your weight should be supported by your hands and your toes. The body should be in a straight line from head to toe (called the "board" pose, which is also used in other exercises). This is the starting and ending position of the push-up.
 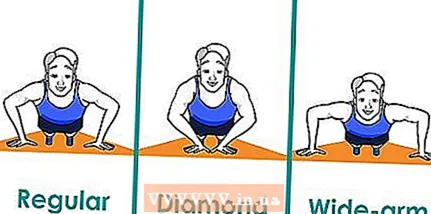 3 Choose the type of push-up that suits you best. There are three types of push-ups that work different muscles. The difference is how you place your hands in board position. The closer the arms are, the greater the load on the triceps. The wider, the greater the load on the pectoral muscles.
 - Close-up of hands: hands are placed directly under the shoulders or slightly closer. This strains the arms much more than in a standard push-up position.
- Standard hand position: arms slightly wider than shoulder width. This works out both the arms and the chest.
- Wide arms: the arms are much wider than the shoulders. This push-up option works the chest and requires less effort from the hands.
Method 2 of 4: Doing push-ups
- 1 Lower your body to a level where your arms are bent at the elbows 90 degrees. Keep your elbows close to your body for more stress. The face should be looking down. Maintain your body in a plank position, do not break a straight line. Breathe in as you lower your body.
- How low you lower your body to the ground depends largely on your strength and the structure of your body, but you should strive to ensure that the body does not fall below your fists.
- 2 Lift yourself up off the ground. At this time, an exhalation is made. The effort required to lift is done with the arms and chest.The triceps (the muscles behind the upper arms) are also involved, but they are not the main muscle group involved in the process. Don't help yourself with your booty or belly. The lift is done almost until the arms are fully extended (but not quite).
- 3 Repeat ascents and descents at a measured pace. Each pair of movements represents one push-up. Do push-ups until you finish the set, or reach your maximum strength.
Method 3 of 4: Advanced Push-Ups
- 1 Do hand clap push-ups. Push yourself off the ground with enough force to make a clap with your palms while your body is in the air. This exercise can be attributed to strength.
- 2 Do diamond push-ups. In the board position, your hands should be together under you and form a diamond. This exercise requires significant hand strength.
- 3 Do scorpion push-ups. Start doing a standard push-up. When you lower your body, lift one leg towards your back, bend it at the knee and move it to the side. Do separate sets for both legs, or simply alternate them each time.
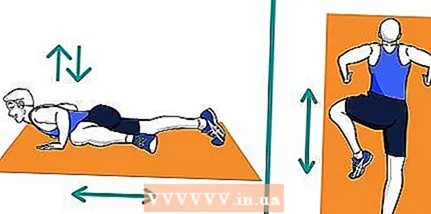 4 Do Spider-Man push-ups. Start doing a standard push-up. When you lower your body, lift one leg and bring your knee to the side towards your shoulder. Do separate sets for both legs, or simply alternate them each time. When done correctly, this exercise works all the muscles in your torso, not just your upper body.
 - 5 Do one-arm push-ups. For balance, spread your legs slightly, put one hand behind your back and do a push-up on the other hand.
- 6 Perform push-ups on your fists. Instead of leaning on your palms, lean on your fists. This requires more strength in the hands and wrists, and also strengthens your fists for boxing or martial arts training.
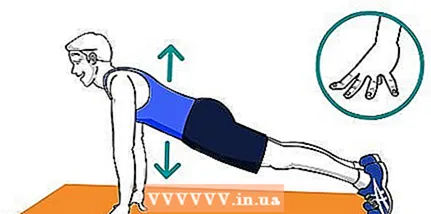 7 Do two-finger push-ups. If you are very strong, you can start doing push-ups using your fingers instead of your palms.
 - 8 Do raised push-ups. To increase the load, the leg support can be raised.
Method 4 of 4: Lightweight push-ups
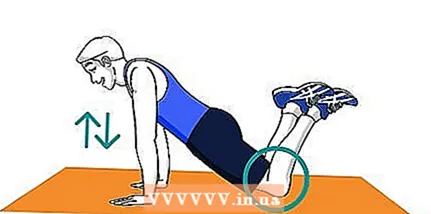 1 Do push-ups on your knees. If you are unable to do full push-ups, try supporting your weight on your knees rather than your toes. Perform these push-ups as usual, and after you feel comfortable with it, move on to doing full-fledged push-ups.
 - 2 Perform push-ups on an incline. You can make push-ups easier by raising the support of the arms. Find a slanted surface or lean against a piece of furniture. Do these push-ups until you are ready to move on to flat-surface push-ups.
Tips
- One of the benefits of push-ups is that they can be done almost anywhere. Find an area of the floor that is large enough to lie down unobstructed. The surface must be level and not slippery. Preferably, it is comfortable for the hands (for example, not made of gravel).
- If you're just starting your workout, it is good to do push-ups on a slightly soft surface (like a rug or gym mat) so that the push-ups are more comfortable on the wrists.
- If you have a wall mirror, use it to check if your position is correct.
- Normal push-ups are difficult to do correctly with proper postural control, especially for beginners. If you find muscle tremors while doing a regular push-up slowly, you are doing a push-up that is too difficult for your physical condition (or you are not warmed up enough).
- Concentrate on working your chest muscles, straining them at the peak of the push-up. This will help the muscles grow faster. If you can't tighten your chest muscles, then do lightweight push-ups. Consider doing oblique push-ups with a mirror to control your pectoral muscles. Don't eat a lot before push-ups.
- Warm up before starting exercise. Use simple arm movements and stretches to warm up your muscles. Warming up reduces the risk of injury and prepares muscles for work. You can do weight lifting / pushing / stretching, etc. if you want to warm up well enough before diving headlong into the exercise. Remember to stretch your arms and wrists, the key working parts of your body when doing push-ups. Also remember to do cooling stretches and movements after loading.
Warnings
- As with any strength-building exercise, if you experience sudden chest or shoulder pain, stop immediately! If your chest or shoulders hurt, you have done more push-ups than your body can handle, or you are not ready for these exercises. You may want to start with some lighter chest strengthening exercises before doing push-ups. If the pain occurs anywhere else, you are doing something wrong. If pain persists, seek medical attention.
- Stop doing push-ups when your lower back gets tired. Do not bend as this may result in injury.
- A closer position of the hands to make push-ups more difficult can lead to negative consequences. If you place your arms too close, you may have problems balancing when lifting and lowering, and unnecessary stress on the bones of the arms. This can lead to bone or shoulder pain in the long term. The danger zone varies from person to person, depending on the size of the body. The general guideline is as follows: when placing your hands on the floor, move your thumbs towards each other, if they touch each other, then you are at the limit. If you want to make push-ups even more difficult, consider other difficult push-ups. Try cotton push-ups. At the same time, try not to lose the straight line of the body.


