Author:
Florence Bailey
Date Of Creation:
24 March 2021
Update Date:
1 July 2024

Content
Learn how to quickly and efficiently draw a quickdraw (get the pistol out of the holster) ... Most pistol fights are very unexpected, and thus quickdraw is a skill that must be honed to perfection. Here's the correct tactical technique to introduce your pistol. There are five steps for this, and each of them has a conscious purpose. As you practice your presentation, start by taking each step slowly and slowly. Once you can complete each step individually and perfectly, try making steps three through five faster. Once you are able to do steps 3 to 5 smoothly and perfectly, you will find that you can do it much faster.
Steps
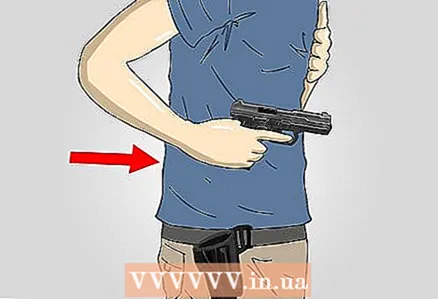
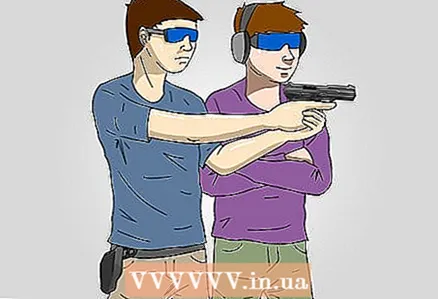
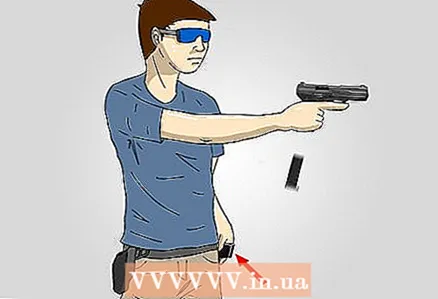
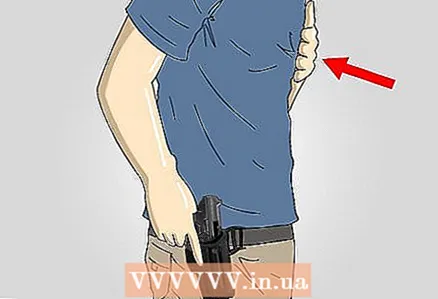 1 Both hands must perform maneuvers at the same time. Press the supporting hand against your body (it is very good to touch the upper chest while doing this). Your hand that is firing moves up and down over the pistol grip to get a good grip on the pistol (while holstered). A good pistol grip will be obtained when the hand is at the highest point of the grip. The web of your hand between your thumb and forefinger should be as high as possible from the shaft pin. Your index finger should be straight and on the side of the holster (pictured). Free yourself from the active system lag you may have.
 - This is one of the most important steps to complete your presentation quickly. You must practice shot (sudden) in this position.
- If you have a poor pistol grip at this stage, it will be difficult for you to adjust, as the shots from the weapon will be inaccurate.
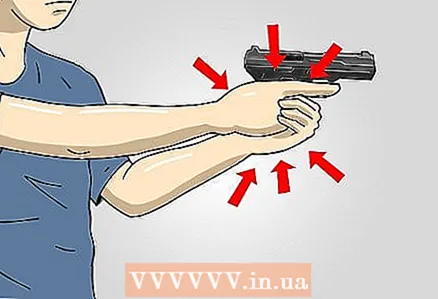
- This position is easy to practice many times (and you should train to the maximum) to get a short, quick movement. Make sure you hold the pistol perfectly (all fingers around the grip - the butt - and the index finger on the trigger).
- This is one of the most important steps to complete your presentation quickly. You must practice shot (sudden) in this position.
 2 Your wrist should be straight. It should not be tilted to the left or to the right, neither forward nor backward. Pull the gun straight, remembering to keep your wrist straight. If, in order to pull the pistol out of the holster, it is necessary to raise the pistol, then turning the hand in the shoulder up and back should allow the pistol to be pulled out of the holster (for a passive, direct holding of the holster, a jerk is required)
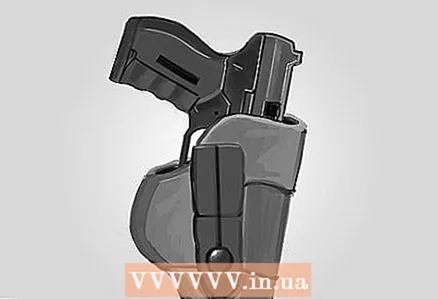
 - The pistol should not have any obstructions (from the front) created in the holster, but depending on the holster, it can be very close to the holster (for example, the holster in the image has an open front, so lifting over the holster is not required, you just need to raise it) ...
- The pistol should not have any obstructions (from the front) created in the holster, but depending on the holster, it can be very close to the holster (for example, the holster in the image has an open front, so lifting over the holster is not required, you just need to raise it) ...
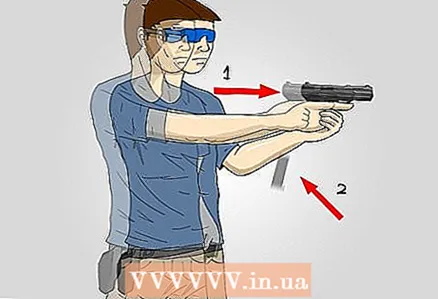
 3 Remember to keep your wrists straight or in line with your forearm, and swing your arm down and forward at your shoulder. This will allow the pistol to be aimed at the target. If your pistol is on the safety catch, then you must remove it from the safety lock the moment you rotate your hand forward.
 - From this position, you can shoot very close to the target (if needed). Do not think to shoot from this position if the target is more than 5 meters away from you. For these reasons, this position is called "close-contact firing position" or "holding fire".
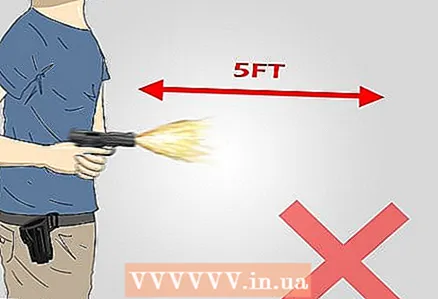
- This is not a position where you are allowed to shoot at an official range, so either you will have a dry practice of this position, or you need to find a less official range (see the Tips section).
- The basics when practicing moving from position two to position three is to keep the wrists straight / in line with the forearm and rotate at the shoulder.
- From this position, you can shoot very close to the target (if needed). Do not think to shoot from this position if the target is more than 5 meters away from you. For these reasons, this position is called "close-contact firing position" or "holding fire".
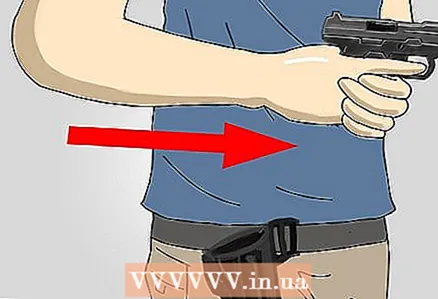
 4 Remember to keep the pistol pointed at the target, bring it up to your supportive hand in the upper chest and adjust the pistol for the dominant / shooting eye. As you move the pistol, your supportive hand should be ready to receive the pistol. She must also move and meet the gun under the dominant eye. The supporting hand should wrap around the front of the handle.
 - Set the muzzle level (parallel to the ground - for dry practice - or pointing to your target), look at your targets and your weapon comes into view, you can start building up the muzzle level in your field of view in a fraction of a second as the weapon moves.
- It's good to have a friend nearby who can follow during the transition from position three to position five, this is very convenient. A friend can tell you if you are "bowling" (dropping the muzzle low) or arching (raising the muzzle high). None of these techniques are effective and will not illuminate the field of view on the fly.
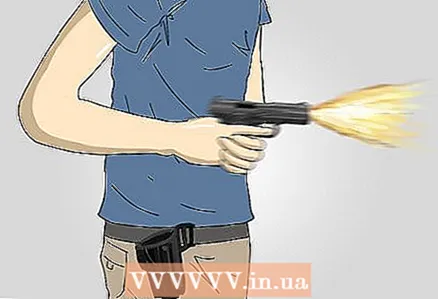
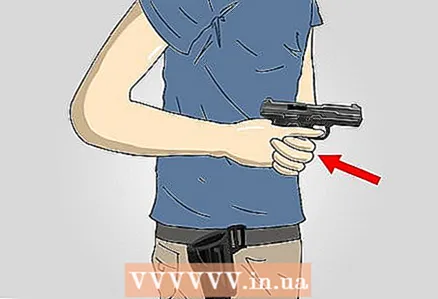
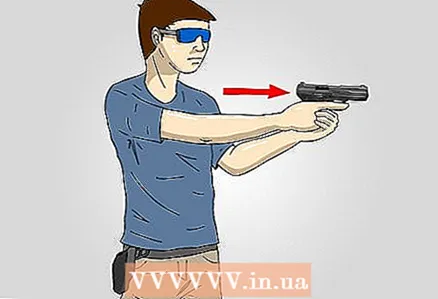 5 Complete the movement, face the threat, straighten both arms. Flexion of one of the shoulders is not recommended. Applying pressure to the pistol and bending one arm causes a natural tendency for your body to spin, causing your shots to fail. This can be overcome over time, but is not recommended.
 - On a range, a very straight shooting arm is a good way to keep the field of view as close as possible, but in a tactical situation it is usually best not to keep it fully extended because this will increase the visual size.
- Practice straightening only up to two-thirds of the way, or even half. This will get a little addictive as the pistol is much closer to your face than you're used to, but the smaller profile is much better for melee tactics.

- Before the final installation of the pistol, you must quickly focus directly, and only, on the front sight. The alignment of the field of view should soon take place.

- On a range, a very straight shooting arm is a good way to keep the field of view as close as possible, but in a tactical situation it is usually best not to keep it fully extended because this will increase the visual size.
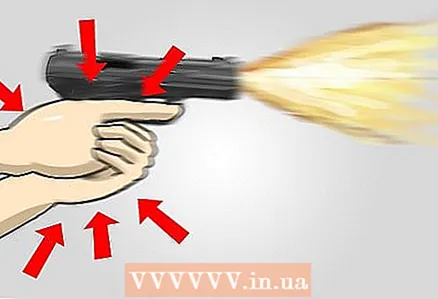
 6 Creation of "isometric pressure" in the firing position. This is a stabilizing pressure, which, first of all, is very helpful for observing the shots, but it also helps with retention and other things. Isometric pressure is produced when the supporting arm is withdrawn, pushing the shooting arm forward.
 - This is a tense position, but very rewarding. Practicing this every time you are on the range will help you shoot and give you a mechanical memory that can be used in any extreme situation. This pressure that builds up must be a little tedious the first few times you train it. Especially when your shooting hand is not on top.
- The grip can be loosened (to improve accuracy) while more pressure is applied to the supporting arm.
 7 Doing a tactical reload before holstering the pistol (only done after combat) is an excellent tactical choice and habit.
- Not only are you facing a lull in the fight (nothing threatens right now), but if something happens, after holstering your weapon, you have a full magazine (+1 in the barrel) to strike back against shocks that may occur.
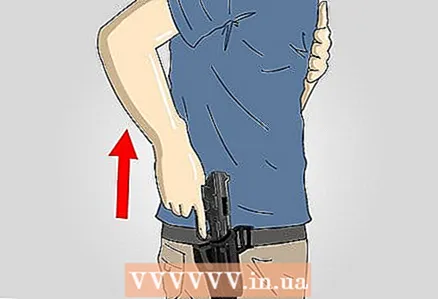
 8 Place the weapon in the holster in the exact opposite order to that described above. Step back to close contact position 3, place your hand on your stomach.
 - At this point, you should pause. In a combat environment, a struggle that seemed to be over may arise again. Take one last quick look around.
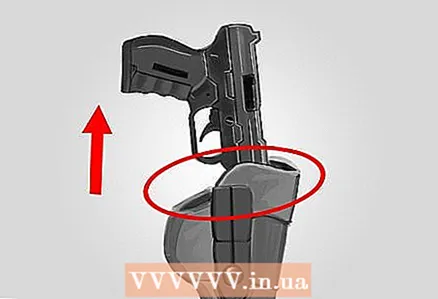
- Then, for safety's sake, twist your wrist and raise your elbow, lower the gun straight down into the holster for security. Unless you are a law enforcement officer, there should be no rush to holster your weapon, so these last two steps can be taken slowly and make sure your pistol slides smoothly into the holster.

- Be sure to save the pistol grip until you have fully holstered the pistol (again, this allows you to quickly respond to any surprises that may arise).
 9 Practice (ideally start slowly!) about 500 to 1000 times (no joke - this is how long mechanical memory of muscles develops), and soon you will realize that you can do it very quickly.
 - Dry practice (with an unloaded pistol - see Warnings below) is the best way to get ingrained movement in your muscle memory at no extra cost. Practicing for about 20 minutes every day for a week will surprise you with how quickly you can learn.
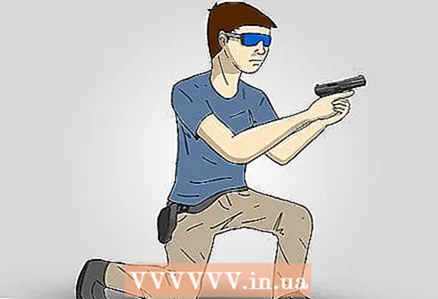
 10 Try aiming and shooting at the target at the range when you have a great view. Remember, steps three through five should be smooth and even, try focusing on the front sight before you are spotted before your pistol is in the final position. It's like you quickly pulled a pistol out of its holster.
Tips
- The more you practice, the better the result.
- Searching for an open range is safer than private property. The construction of landfills should be such that stray bullets do not fly away. While nothing is perfect, using an open range will give you freedom of movement, making your practice safer. It is also less likely that you will find out that something innocent was shot by a stray bullet on the evening news.
- The landfill is not always the best place to shoot. In a polygon, you are limited by space, you and your target never move. A private property with a lot of space is likely the best location (be sure to check local and state laws and get permission from the landowner).
Warnings
- Safety first! Firearms are very dangerous. Use a pistol or other firearm only if you are an experienced shooter or a very experienced shooter directly supervising you.
- All training should be done at the shooting range in compliance with all safety rules, or in a legal and private area with an unloaded pistol (or you can replace the rounds with replaceable caps).
- Any firearm must be used in a safe and legal place. Know and follow state and local laws on the use and transport of firearms. Laws change drastically between states and can vary between counties or even cities.


