Author:
Peter Berry
Date Of Creation:
12 February 2021
Update Date:
1 July 2024
Content
Making a bra on your own can be time-consuming and difficult, but there are ways to simplify the process for a beginner to do as well. Read on to find out more.
Steps
Part 1 of 5: Preparation
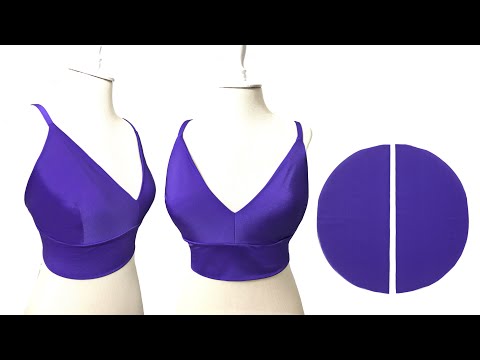
Find or create a template yourself. Beginners should look for shirts online or in a catalog instead of trying to create your own. A good template that can be adjusted to fit your size and will leave you completely satisfied with the finished product.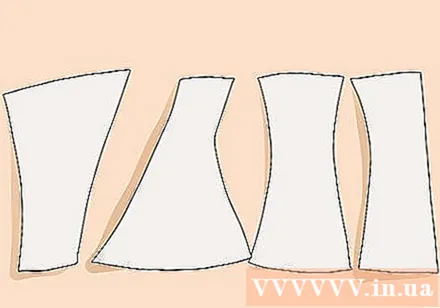
- Remember that simple and basic patterns are more suitable for beginners than complex patterns. Making a bra by yourself is difficult, so with the first 1-2 pieces start with easy-to-make patterns.
- You can find free or premium t-shirts, but the best t-shirts fall in category 2. A few reliable sources you can visit:
- http://www.trulyvictorian.net/tvxcart/product.php?productid=27&cat=3&page=1
- http://www.corsettraining.net/corset-patterns
- You can also design your own shirt instead, but that requires you to calculate your intricate measurements on drawing paper.

Take your measurements. A good sample usually has multiple markings on it, usually between sizes 6 and 26. Take your bust, waist, and hip measurements.- When measuring your breasts, wear a standard bra and wrap the gauge around the widest part of your bust.
- Measure your waist by wrapping the tape measure around the narrowest part of your waist, about 5cm above your navel. A bra is an outfit to shape the body, so normally, you will subtract your waist measurement by 10 cm.
- You measure your butt by wrapping the gauge around the widest part of your butt. This is about 20 cm below where you measure your waist.
Prepare the fabric. Check the fabric to make sure it is fine. If needed, you can also color it and make it shrink.- You can shrink the fabric by being slightly gentle.
- Check the fabric. The threads need to be perpendicular to each other. Stretch the cloth and fix it by pulling it diagonally on both sides. Doing so will help the threads to align themselves. It is a longitudinal and diagonal fabric that fixes the threads.
Pin the template to the canvas. Place the sample on the fabric with the fabric line as directed and stretch it tightly. You should avoid straining the fabric around your waist. Pin the pattern onto the fabric.- You can also apply pressure to the model. If using this method, draw the outline of the pattern with chalk before cutting.
Cut the fabric into pieces. Make sure you cut the cloth correctly according to the sample instructions. Just a small difference can have a huge effect on the final product.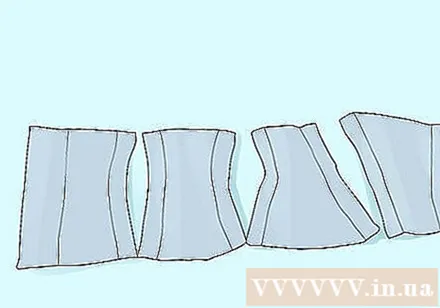
- Fold the fabric, cut the piece between the back twice and leave no space between the edge of the fabric and the seam on the back.
- Fold the fabric and cut the center piece on the front once, leaving no space between the edge of the fabric and the seam on the front.
- Cut all remaining pieces twice.
Create your own frame borders. Use a sewing machine to sew a series of even lines along the back of the fabric. These lines will be the frame border, the stitching line and the end frame outline.
- Try to keep outlines straight and even.
- Sew the lines of the necessary widths to match the thickness of the steel frame.
Part 2 of 5: Connection lines
Stick the pieces together. Combine all cloths as shown in the sample instructions. Pin clips securely in place so they don't get bent when you stitch.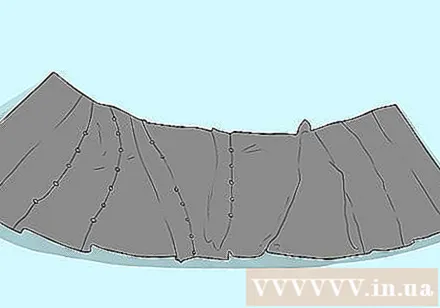
- You can also comb the fabrics together to avoid stitching.
- If you are confident with your straight stitch, you can pinch the ends of the contours and sew the sewing machine accordingly without using pins or combing.
- Make sure that the left sides of the cloth are facing inward.
- Sew the pieces together. Use sewing machines to sew the lines connecting the pieces.]
- The cloth edge should face outwards with the left side facing inward. The distance between the edge of the fabric and the seam will be covered by the fabric containing the frame on the outside of the shirt.
- Don't rush to sew the last piece of fabric in the center of your back.
Open each stitching part. After you sew the seams, you should force them to open back. After pressing, the fabric part will lie flat.
- Trim any excess fabric if necessary to avoid staining.
- Remember that you can also force-open the extensions when you are trimmed.
Sew the waist crease in place. Place the elastic across the fullest part of the shirt. Use the comb to fix on the front center and the center of the back as well as above each seam.
- The waist elastic length needs to be determined by taking the number of waistlines you want, adding 5 cm of space between the edge of the fabric and the seam and dividing 2. You will need to cut two elastic bands or ribbon when measuring, one for front and one for the back.
Sew the fabric between the last back. Sew the fabric straight between the last back in place, keeping the waist elastic between the layers as you sew the seams in place.
- When done, open the seams and trim the seams as in the step above.
- You can also measure your waist to check the size before cutting the fabric between the edge and the seam.
Part 3 of 5: The outer shell
Cut out some textured strips. Cut several strips of the woven pattern diagonally, meaning they will be diagonally from the edge of the fabric when you cut. Cut some more strips along the grain or parallel to the edge of the fabric.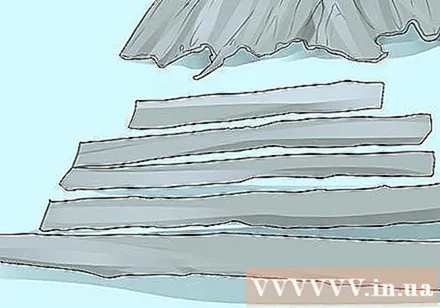
- Diagonal strips are used to cover your curves. Vertical strips of fabric will be used as the vertical cover containing the inner steel frame.
- Each strip should be twice as wide as the steel you intend to use as the frame and at least as long as the bra. Usually the strips need to be about 2.5 cm wide.
- The number of covers should match the number of steel frames you plan to use.
Press the strips into bags. Use the diagonal press to press the strips into bags. These strips will then have a wrinkled edge.
- If you don't have a diaper press, fold and press firmly against the strip so that the long edges fold together and meet in the center of the strip. These bags should be about 0.95 cm wide.
Sew the diagonal sacks to decorate them first. Round bags you plan to use for decorative purposes should be placed in the foreground and stitched along the edges.
- These bags will be curled, usually extending from the middle front, just below the chest to the front end.
- However, these bags are not required.
Sew the vertical bags. Pin fixes the sheaths along the front of the shirt. Sew them on the edges and stitch them again in the middle.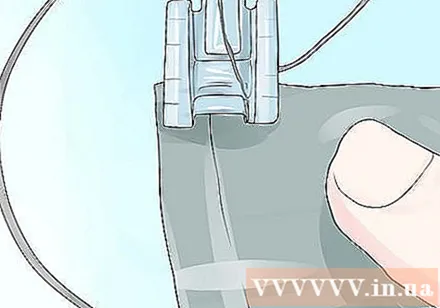
- These bags only need to be folded on the front of the shirt. You will need one for the middle panel and 3 on each side. However, the number of bags also depends on the width of the steel frame. Larger pieces require fewer bags and narrower pieces need more bags.
Part 4 of 5: Fixing fabrics, frames and stitches
Attach the fixing piece of fabric in place. If you use imitation leather or genuine leather, you will not be able to staple the permanent fabric in place.Instead, use transparent and water-absorbent garment tape to stick along the bottom, outside the corner of the cloth in the center of your back. Press the fixing cloth onto the tape, fold the edges, and stick to the inside.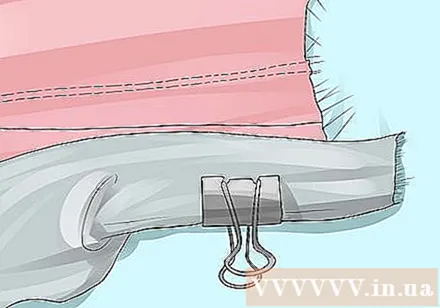
- You can also use satin, cotton, or any other fabric for the cross-fixing. The choice is up to you, but keep in mind that each fabric gives the shirt a different look.
- Continue using the same method to finish pasting the remainder of the diagonal fixing strip in place.
Sew on the fixing of the fabric. Use sewing machines to straighten the fixed strip that has been glued into place.
- At this point, you should only sew the fixed bottom fabric. You need to add a frame to your shirt before you can finish the head.
Cut the frame. Use a wire knife to cut the strips of metal into pieces of the right length. Break the frame over and over to soften it.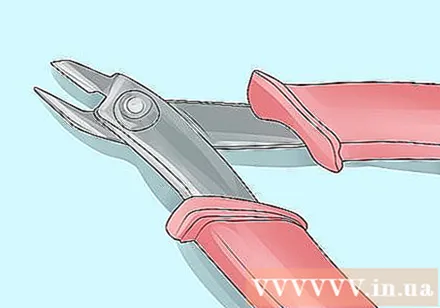
- Determine the appropriate length by spreading the frame over the lines that mark the frame as stitched to your shirt. Measure their length so that the frame stretches all the way except for the distance between the stitching and the edge of the fabric.
Create a cap for each frame strip. Use pliers to mount the flap on the edge of each steel frame strip, continuing to adjust until it is in place.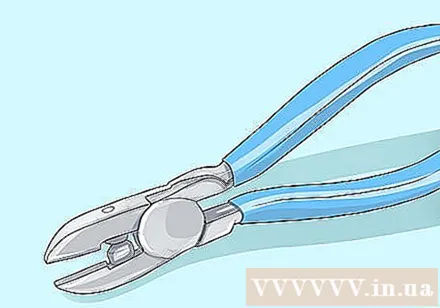
- If you have trouble getting the lid on the frame, you can use hot glue or manual glue that works on both fabric and steel.
Insert the bracket bars. Push the brackets into the bag on your shirt.
- Sew a fixed line along the top edge to keep the frame bars from straying. However, do not stitch through the steel bar as it may break the needle of the sewing machine.
Fix the top edge. Use the same adhesive tape and sewing technique that you used on the bottom edge of the shirt to fix the top of the shirt with a diagonal strip of color.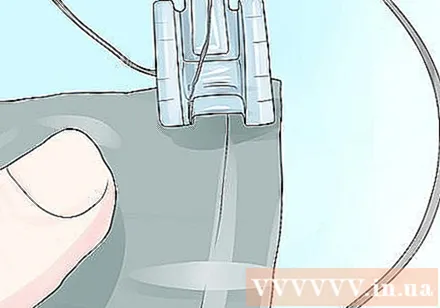
Add loops. Place your stitches or laces on the sides, 2.5 cm apart. At the waist, leave space for the 4 pairs of stitches about khoảng cm closer.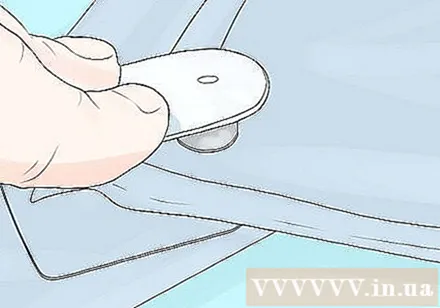
- Use fabric punching tools, leather punches or awl to punch stitches.
- Use a plastic hammer to fix the stitches on both sides.
Part 5 of 5: Final steps
Thread the shirt. Start at the top and thread the string below your waist in a scissors fashion. Continue using this technique bottom up and also stop at the waist. Tie these strings together at the waist in a "rabbit ears" or "shoelace" fashion.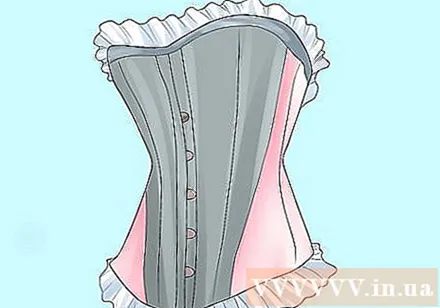
- You need all about 4.5 m of wire.
- Ribbons and cords are the oldest types of ropes used, but flat or small ropes will last longer.
Put the shirt on. The top of the shirt should just barely cover the nipple area and the torso should cover your hips without warping.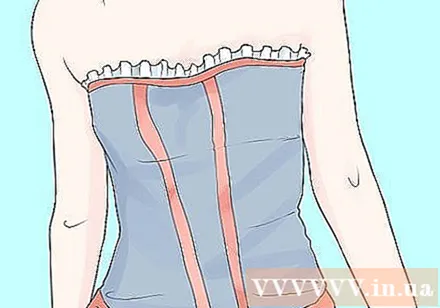
- Tighten the waistline of the shirt by pulling the straps at the waist.
What you need
- Measure
- Pin or pattern staples
- Chalk
- 1.5 m patterned woven diagonal fabric dyed any color you want and has been shrinking
- Chun waist or striped silk ribbon
- Flat steel bar or twisted steel used as a frame
- Frame covers
- Wire cutter
- Pliers
- A good quality and durable thread
- Pair of stitches and 5 mm loops
- Straight sewing machine
- Tailor's sleeve or fabric / leather punching tool
- Fixed diagonal strip maker
- Waterproof adhesive tape used in apparel
- Fixed diagonal cloth strip
- Cord


