Author:
John Stephens
Date Of Creation:
28 January 2021
Update Date:
1 July 2024

Content
Tired of running to the craft shop to buy expensive polymer clay? This article will show you how to make your own substitute clay for the store-bought polymer. However, you should be aware that homemade clay will not be quite the same as commercially available products.
Steps
Method 1 of 4: Make clay with glue and cornstarch
Use this recipe to make your own clay at home. This clay has a texture similar to that of store polymer clay, but may shrink slightly (polymer clay is not). This effect is small, but you should keep this in mind when using clay for some modeling, and consider pre-squeezing a small sample to estimate the clay shrinkage when molding the product.
- You need to make the model of the clay larger so that as it shrinks it becomes the correct size.

Pour 3/4 cup glue and 1 cup cornstarch into the non-stick pot. You can place the pot on the counter or on the stove but not open the stove. Stir both ingredients well.- Using PVA wood glue is most effective for this formulation, although the usual milk glue that children use is just as effective. However, milk glue will make the clay softer than the type made from wood glue.

Add 2 tablespoons of mineral oil and 1 tablespoon of lemon juice to the colloidal cornstarch mixture. Stir all ingredients well. If you can't find pure mineral oil, use petroleum oil (petroleum oil, not wax) or baby oil instead.- If you want, you can add food coloring or acrylic paint to the mix right at this step to create color. Note do not add too much paint as it will alter the texture of the clay. If you want vivid colors just paint on the clay model you create.

Place the pot on the stove. Heat the mixture over low heat. When cooking the mixture, stir your hands well so that the ingredients move around the pot. Do not let the mixture stand still as this will affect the overall texture of the clay.
Continue stirring the mixture until it has a texture similar to the mashed potato. When you have a mixture like mashed potatoes, remove the pot from the stove and place it on a cool surface.
- You can place pot pads or towels on the counter to protect the counter surface.
Add some mineral oil to the soft clay. The oil will give your hands a greasy shine when kneading the clay so the ingredients won't stick to your hands.
Place the clay on the counter for easy handling and kneading. You should do this while the clay is still hot, but as far as your hand can handle it.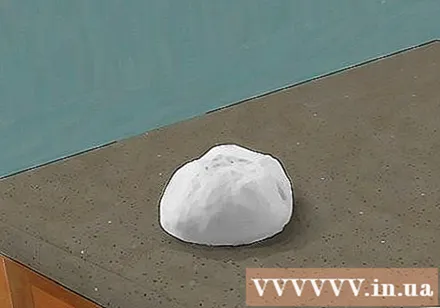
- You can also use rubber gloves to protect your hands.
Knead until the clay is smooth. You will need to knead the clay that has a texture like pizza dough well and evenly. Wash the clay into round members when finished.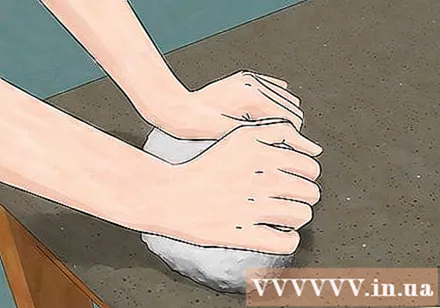
Store the finished clay in a zippered freezer bag that can be used in the refrigerator. To keep the clay fresh and not hard, you should remove it from the bag before storing it.
- If the clay is still warm, do not put it in the bag. Wait for the clay to cool completely before unlocking and storing it.
Use clay to create a model. Now you have clay and you can use it to create any shape you want. When making clay, you should apply a little hand lotion to ease the smoothness of the clay.
- Let the clay model dry for at least 24 hours or so if it is still wet.
- Paint the color you like on the clay. Using Tempera paint and other paints are also very effective.
- You should also paint on areas where you want to keep the color white as the clay will be translucent if you don't paint.
Method 2 of 4: Make clay with glue and glycerin
Use this recipe to make your own polymer clays that won't crack. This formula has a high glue ratio, giving the clay a sticky consistency but will not crack. In addition, glycerin is added to reduce the crackability of the finished clay.
- Clay made with this recipe also dries faster, taking only about 30 minutes.
- Once done, however, you'll need to wait at least 1 night and preferably a week to be able to use the clay. This will make the clay less sticky.
Wear old clothes or an apron. You will keep your clothes clean throughout the whole procedure.
Mix water and glue in a non-stick pot and boil for about 2 minutes. Stir ½ cup of water with 2 cups PVA wood glue in a non-stick pot. Always stir the mixture well during boiling and remove the pot from the stove about 2 minutes after boiling.
- You can use baby milk glue, but wood glue works best with this formula because it is stronger.
Stir the cornstarch with 1/4 cup of water in a small bowl and pour into the pot. Fill the bowl with cornstarch and water and pour into the pot of the just boiled glue mixture. Stir all ingredients well.
- Cover the dough with the plastic wrap while it cools.
- If using food coloring, you can add 1 to 2 drops or adjust to the color you want. Or you can paint after the clay dries.
Sprinkle cornstarch on the surface used to make clay. Remove the dough from the pot and knead it well. Continue kneading and adding cornstarch until the dough is less sticky.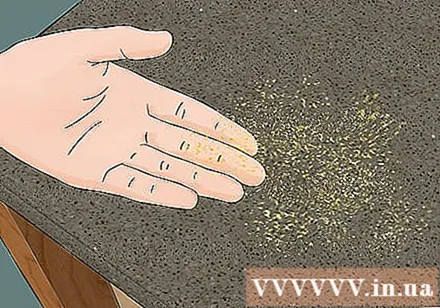
Stop kneading when the clay is smooth and pliable. The purpose of kneading is to add the gluten in the cornstarch to the dough. Now the dough is ready for use.
Store the clay tightly sealed so it does not dry out. Put the clay in the bag so it won't dry out while you wait until you can use it. advertisement
Method 3 of 4: Make hard clay
Use this recipe to make hard clay. You will need more ingredients, but create a clay so hard it won't break when dropped from a height of 1 meter.
Mix the ingredients, except for cornstarch, in a non-stick pot and cook over low heat. Mix 1 cup of PVA glue, 1/2 tablespoon of stearin (stearic acid), 1.5 tablespoons of glycerin, 1.5 tablespoons of Vaseline cream, and 1/2 tablespoon of citric acid in a non-stick pot and heat over low heat. Stir all ingredients well.
- Use the lowest heat to heat the mixture.
Add some cornstarch each time to the mixture and continue stirring. Add 1/2 cup of cornstarch to the mixture a little at a time, always stirring. Just add a little bit of cornstarch at a time to prevent clumping. Keep stirring the clay mixture until you can remove it from the pot.
- The dough will be sticky at first, then get heavier and harder to stir, but keep stirring until it is easily removed from the pot.
Clay for about 20 minutes. Place the clay on a table that is lined with non-stick paper (such as stencils). The clay will be hot, slightly sticky and not yet smooth. Stir the clay for about 20 minutes until the dough no longer lumps and the clay becomes smooth and free from stickiness.
- Let the clay cool for a few minutes if it is still hot after you are done kneading it.
Store clay in sealed plastic bags. Store the clay in a sealed plastic bag so that it does not dry out before use. Just push all the air out before you close the bag. Use clay to sculpt any shape you like and paint in acrylic. advertisement
Method 4 of 4: Making Pasta Francesa clay
This is a traditional clay recipe in Latin America. This recipe is very popular in Latin America and is very effective for making clay. Many formulations require 10% formaldehyde or formalin, but replacing it with white vinegar is safer and non-toxic.
Mix cornstarch, water, and glue in a non-stick pot. First, mix 1 cup of cornstarch with 1/2 cup of water in a non-stick pot and cook over low heat until the dough is completely dissolved. Once the cornstarch has melted, add 1 cup of glue and stir well.
Add glycerin, cold cream and vinegar to the saucepan and stir well. Add 1.5 tablespoons of glycerin, 1.5 tablespoons of cold cream with lanolin, and 1.5 tablespoons of white vinegar in a saucepan. Continue boiling over low heat and stir well until the ingredients become thick powder, no longer sticking to the pot.
- Be careful not to heat too long to harden the dough.
- Glycerin is a popular baking ingredient that you can find at the bakery stalls in supermarkets.
- Buy a cold cream with lanolin at the cosmetics store.
Apply lotion to your hands to knead the dough. Allow the dough to cool by covering a damp cloth. You should knead the dough until smooth. That way, you have clay to mold into different shapes.
- Let the models you create dry completely after about 3 days.
- Oil paint or acrylic paint can be used to paint on models when they are dry.
Store clay in plastic bags. Use plastic bags to store the clay and store in a cool, shady place. advertisement
Curse
- Store dry clay in closed boxes or bags when not in use, as the clay will dry and harden when exposed to air.
- Have clay ready before your child needs to use it as a model. Non-toxic, easy-to-shape clay is best suited for young children.
- Wait at least 3 days for the clay to dry completely before painting. Some types of clay will dry faster, especially when it's not too thick. The clay will dry quickly when you place it in a warm, dry place and in front of a fan. However, using the oven the clay will dry out too quickly causing it to crack.
- Clay from cornstarch is often referred to as "cold porcelain". Some of these clays must be purchased from the store, but you can also make your own at home. In addition, you can also make your own cold ceramic in the microwave.
What you need
Method 1:
- About ¾ cup of regular milk glue (non-toxic, commonly used in schools)
- 1 cup of cornstarch
- 2 tablespoons mineral oil
- 1 tablespoon lemon juice
- The non-stick pot (you can use any non-stick pot but if you don't have one, you can use a non-stick spray on the bottom and sides of the pot so the ingredients won't stick)
- Wooden spoon
Method 2:
- 3/4 cup of water
- 2 cups PVA wood glue
- 1 cup of cornstarch
- 2 tablespoons of glycerin
- Food color (optional)
Method 3:
- 1 cup of cornstarch
- 1 cup polyvinyl acetate glue or PVA wood glue
- 1/2 cup of water
- 1.5 tablespoons of glycerin
- 1.5 tablespoons cold cream with lanolin
- 1.5 tablespoons white vinegar
Method 4
- 1 cup PVA wood glue or milk glue
- 1/2 cup cornstarch
- 1/2 tablespoon stearin (stearic acid)
- 1.5 tablespoons of glycerin
- 1.5 tablespoons of Vaseline
- 1/2 tablespoon citric acid


