Author:
John Stephens
Date Of Creation:
27 January 2021
Update Date:
1 July 2024
Content

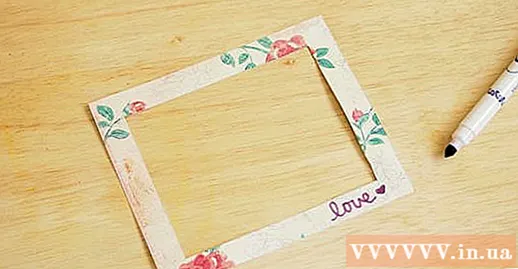
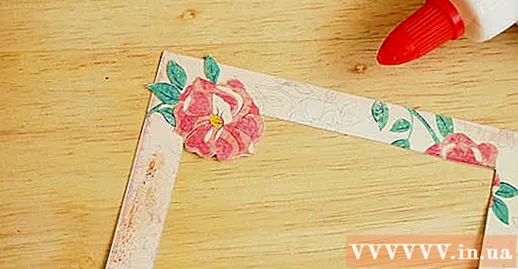
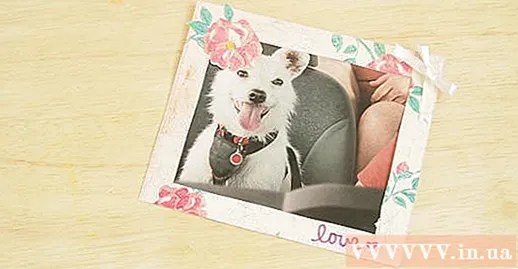
Paste the decorative paper. Cut the paper into shapes - some ideas like stars, hearts, letters, or symbols - and paste them onto the frame.


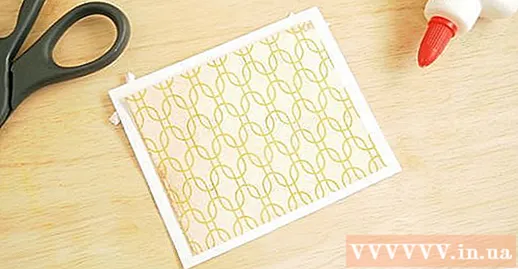
Paste this new rectangle behind the canvas. Stick the three edges firmly and evenly, but leave one edge for insertion.

Method 2 of 5: Use a popsicle stick
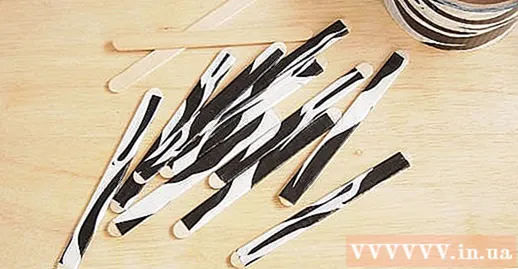
Decorate the popsicles. You will need six or seven large popsicles to look your best, but you can also use smaller ones. Wrap them with decorative tape or textured tape, or decorate them with brushes, crayons, or paint.
Stick the popsicles together into a picture frame. Place the two sticks vertically, about 13cm apart, and stick a decorative stick across the head. Stick the next trimmed stick next to the first one, being careful not to let the glue show between the gaps. Continue until the two vertical sticks are completely covered by the decorative sticks.
Decorate photo frames. Stick pictures of wood, beads, paper, buttons, ribbons, or anything else you like to the front of the frame.
Paste your photo. A small photo will work better for this type of frame - using a photo the size of a wallet to decorate the room makes both the photo and the frame look great. Use glue, tape, or pins to attach the pictures to the frame.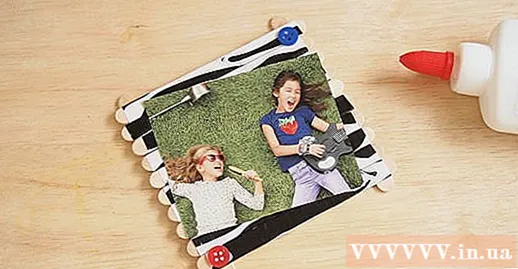
Attach the magnet on the back. Stick a magnet with strong horizontal suction in the center near the top of the back of the frame so you can hang the photo on the refrigerator or anywhere that attracts magnets.
- You can use a hanger instead of a magnet if you prefer, but the small and lightweight photo frame makes it the perfect ornament for your school refrigerator or locker.
Completed! advertisement
Method 3 of 5: Use sticks and sticks
Collect 4.8, or 12 sticks. The number of sticks depends on the thickness of the frame you want. They should be about 30cm long and about 3mm to 13mm in diameter. Choose sticks that are relatively straight, and do not have any knots, branches, or any other ugly features.
Prepare the rod. Make sure they are of equal length, about 30cm. Remove all leaves and branches. Rinse the strips if they become dirty. Then divide the sticks into four groups (groups of 1,2 or 3 each), and arrange each group in a picture frame, with one group lying along one side of the image.
- Arrange the sticks in each group next to each other instead of bundling them up at the top to create a wider frame.
- Make sure your photo will fit the rectangle between the sticks you just lined up.
Tie the rods to the corners of the picture frame. Use a glue gun to attach the end of the wire to the back of the frame (you can also use hot glue to fix it in front of the two sticks). Diagonally pass the wire around in front of the corner. Then pass the rope across the back where the two sticks meet. Cross the rope forward again this time it will lie across the other diagonal (so if the first time you bring the rope from the top right corner to the bottom left corner, then this time you will bring it from the bottom right to the upper left corner). This time wrap it up the back. Again, wrap diagonally, then wrap horizontally, then diagonally, then wrap vertically. At this point, the front corner will have two lines wound through each diagonal, so the wire will have a thick X shape. The back side will wrap a vertical line through each rod where each rod intersects, so the wire behind will be a thin square shape. Fix the end of the cord with hot glue.
- Keep the rods on each side flat and close together. Make sure the knots are tightened so that the edges of the frame are secure.
- If you want to try other styles, try any of the tying styles to tie the corners. Try a square and cross tie, or experiment with your own.
- Repeat this step for the remaining three corners. When that's done, you should have a solid frame.
Paste the photo onto the back of the frame. Adjust the image if needed. If you don't want to be pasted directly on the photo, or if you want to be able to change the picture in the frame, stick a larger sheet of paper on the back of the frame. Stick the three sides of the paper and insert the picture through the gap on the bottom edge.
Attach a string to the top of the frame as a hanger. This rope will be 15cm to 18cm long, depending on the size of your photo frame. Again, use a glue gun to attach it to the two corners above. You will be able to hang the frame using this wire.
Completed! advertisement
Method 4 of 5: Use a wooden stick or a square wooden stick
Frame the photo if desired. You will have to stick the photo straight onto the wooden frame. If you don't want to paste it directly onto the photo, or if you want a border around it, frame it, or just stick it onto good quality paper or plain colored paper.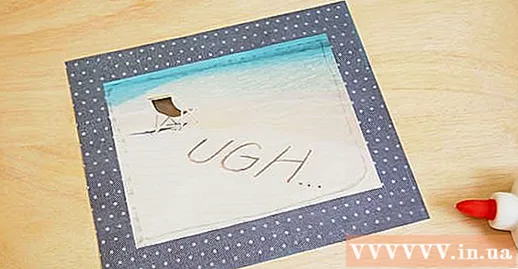
Prepare two equal square sticks or sticks. Use wooden slats 2cm wide, or square wooden sticks 6mm to 13mm wide. They should be 2 cm longer than the photo width.
Paint or spray the shade on the wooden stick or stick in the color you want. For a simple photo frame, glossy paint on the wooden frame looks best. However, you can also paint it with watercolors or decorate with paint if you want.
Stick the stick on top and bottom of the photo. Align the picture horizontally to the center, and make sure the wood is perfectly straight and evenly even on the top edge. Stick the stick on the top edge of the picture so you can see the photo below. If you find yourself covering the photo too much, stick to another piece of paper underneath the photo and stick a stick on the paper.
Attach the rope to the top wooden bar. Take a rope that you will use as a rope. It should be around 20-30cm long, depending on the size of your photo. Drill small holes on the back of the log in the middle of the distance from the photo corner to the end of the wood. Tie wires into these holes.
- If you don't want to drill holes, just stick the wire into the wood with hot glue. This will be sturdy enough and the wire will not be exposed on the front of the frame.
Completed! advertisement
Method 5 of 5: Use old magazines or paper
Buy or make the base frame. Cut out the cardboard the size of the photo frame you want, and cut it in the middle to place the photo. Photo frames can be as simple or creative as you like - from basic rectangles, or cut out large panels with boxes to nest two or three different pictures. Craft paper stickers after each image box to keep the photo inside. Stick the three sides of the paper so that the picture can be inserted into the frame.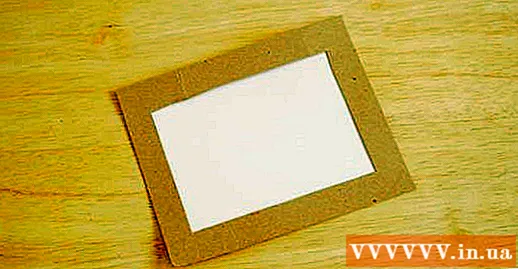
- You can also buy simple wooden photo frames if you don't want to make your own.
Collect lots of old magazines or other papers. The color and gloss of magazines make them perfect for photo frames, but you can also use old newspaper, cardboard, or any draft paper you have around.
Cut the paper into strips. If you're using paper from a magazine, just cut it in half lengthwise. If you're using newspaper, cut into strips 10cm wide and 25cm long.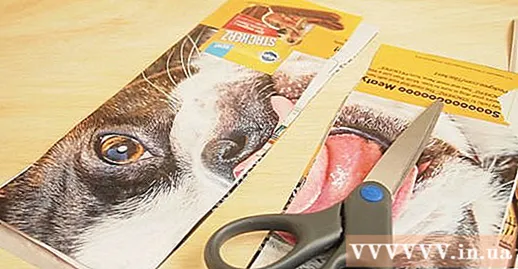
Use a wooden stick or skewer to roll the strip into a tube. Place the wooden stick at a corner of the paper, at a 45 ° angle from the paper. Roll the paper corner around the stick. Hold the paper tightly, using a wooden stick to roll the paper into a tube.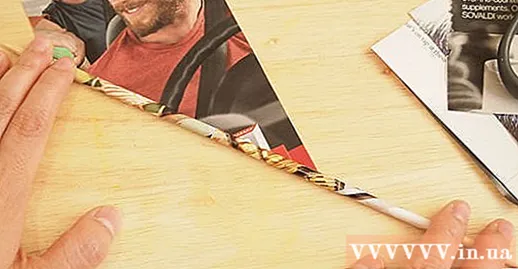
- When you roll, the ends of the wooden stick will be covered by paper. Don't lose them, as it is more difficult to remove the wooden stick from the tube. Simply hold the stick out to make sure you always have enough grip when taking it out of the tube.
When the paper corner is near, apply glue along the edge to fix the tube. You can just put a drop of glue on the corner opposite to the starting angle; this will keep the tube in place. However, if you cut the paper tube later, you may be able to cut off the adhesive and release the tube. To prevent this, apply the adhesive to the entire outer corner of the paper tube. This way, it stays in the tube no matter when or how you cut it.
Repeat the above steps to roll enough paper tubes to frame your photo. You will need more than you expected, so make sure you roll as much paper as you want before you proceed.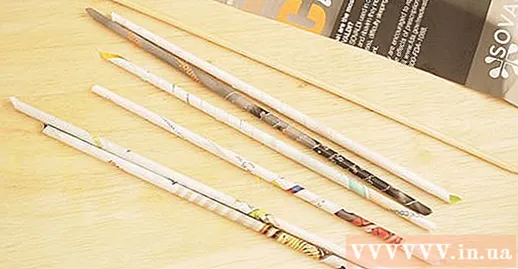
Apply Mod Podge glue on the background photo frame. You can use other glues to fix the paper tubes, but Mod Podge is more effective, is firm and easy to use, so it is a great choice for this type of frame.
Arrange paper tubes along the edges of the picture frame. This will make the corners look clean and smooth, and you won't have to worry about trimming the bottom of the other tubes well.
Stick the tubes on the picture frame. Cut tubes short before gluing, or trim them to fit when placed. With a simple photo frame, stack all the scrolls vertically on the frame, one next to the other. This will create a classic simple look.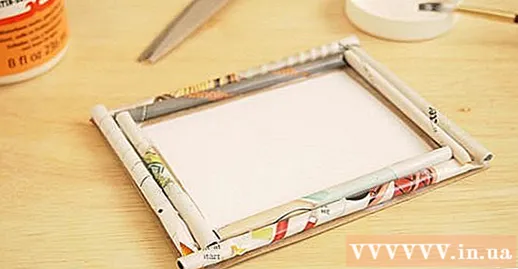
- Try placing the rolls diagonally or perpendicularly, or even use them to create patterns. For example, arrange paper tubes in a small square that rotates 45 ° from the outside to form a diamond in the center of the frame. Bend the paper tubes to make corners, or stick them to the edges of the picture frame. Be creative - the arrangement of the scrolls determines the look and feel of your photo frame.
- Be sure to stack the rolls of paper tightly together so that there are no gaps or holes in the picture frame.
Apply Mod Podge glue to the paper tubes. Once you've stacked the paper tubes onto the picture frame, applying a thin layer of adhesive will act as the adhesive that holds them firmly. It will also provide an overlay that strengthens the frame and keeps it beautiful and shiny.
Let the frame dry. Once the glue is completely dry, insert your photo into the frame. advertisement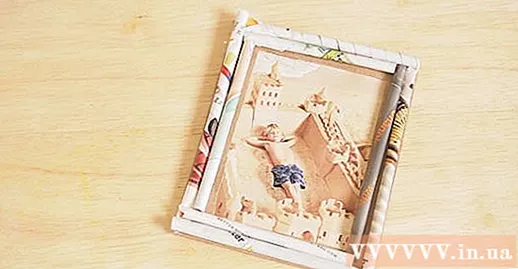
Advice
- You can check out a few reference books. They can be helpful in giving you ideas.
Warning
- Be careful when using scissors or a knife. They can injure you.


