Author:
Laura McKinney
Date Of Creation:
10 August 2021
Update Date:
1 July 2024

Content
The circuit is a closed loop with a flowing stream of electrons. The simple circuit consists of a power supply (battery), conductor and resistor (light bulb). In the circuit, electrons flow from the battery over the wire to the bulb. Get enough electrons, the light is on. With the correct installation, with just a few simple steps, you can light up the bulb.
Steps
Part 1 of 3: Creating simple circuits with batteries
Full collection of supplies. To create a circuit, you need a power source, two insulating conductors, a bulb and a lamp base. The power source can be any removable or block battery. The rest of the supplies can be found at the electronics store.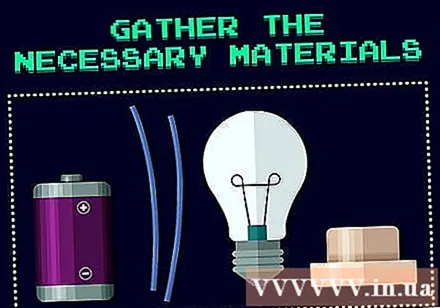
- When choosing a bulb, don't forget the battery's power.
- To simplify wiring, use a pre-wired battery head cap, a 9V battery or a block cell.
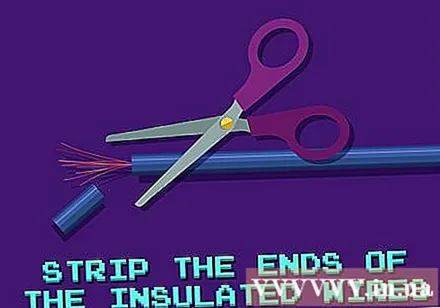
Peel off the wire end. For the circuit to work, the wire needs to be completely exposed. Therefore, you must separate the sheath at the end of the wire. Peel off the insulating sheath with pliers, about 2.5 cm at each end.- If you don't have pliers, you can use scissors to carefully cut off the insulating sheath of the wire.
- Be careful not to cut the wire.
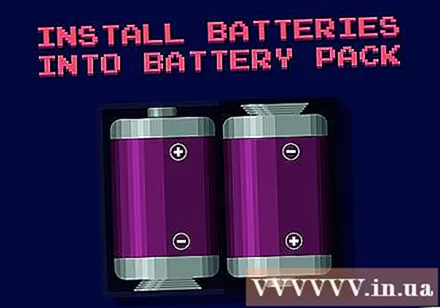
Insert the battery into the base. Depending on the type of battery you use, you may not need this step. If you use multiple removable batteries, you will need a battery holder. Insert the batteries next to each other, pay attention to put in the correct positive and negative direction.
Connect the cord to the power supply. The wire will conduct current from the battery to the bulb. The easiest way to connect wires is to use electrical tape. Connect one end of the wire to the other end of the battery, ensure contact between the wire and the metal end of the battery. Same goes for the other wire and the other end of the battery.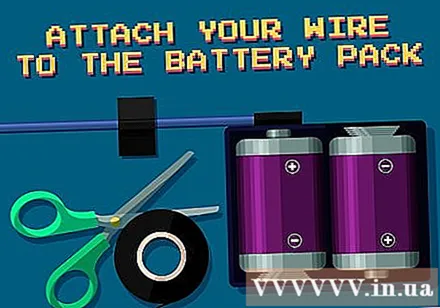
- Alternatively, if using a battery hood, attach the end of the cord to the end of a 9V battery or block cell.
- Exercise caution when creating electrical circuits. Although rare, there is still a very slight jerky ability when directly touching the cord while connected to the battery. You can avoid this by touching only the insulated part of the cord or removing the battery until the light is installed.

Tighten the other end of the wire to the metal screw on the base of the light. Take the sheathed segment at the end of each wire and bend it into a U-shape. Loosen the screw at the base of the lamp just enough to pass this U-shaped part around the screw. Each wire is connected with one screw. Tighten the screw and make sure the wire's metal conductor makes contact with the screw.
Circuit test. Fasten bulb to base. If the circuit is properly connected, the light will light up when fully installed.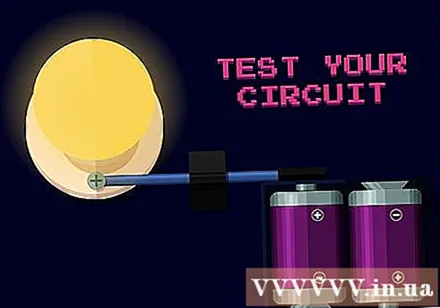
- The bulb can heat up quickly. Therefore, be careful when removing and assembling.
- If the bulb does not light, check that the power cord is in contact with the battery end and is connected to the metal part of the screw.
Part 2 of 3: Installing the switch
Collect supplies. To install the switch, instead of two, you now need three pieces of wire. Once the covers are removed and connected to the battery case, you can proceed to install the switch.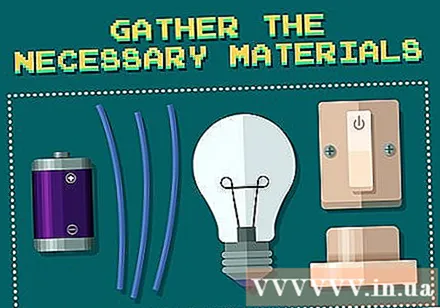
Install the switch. Take the sheathed end of a wire connected to the battery and bend it into a U-shape. Loosen the screw on the switch and thread this segment of U-wire underneath. Tighten the screw to ensure a connection with the metal conductor of the wire.
Connect the third wire to the switch. Bend one end of the sheathed wire into a U shape. Insert under the other screw to connect to the switch. Tighten the screw to make sure the metal part of the screw is in contact with the metal part of the wire.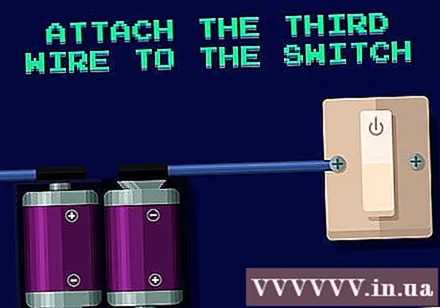
Lamp connection. Take the end of each wire (one from the source and one from the switch) and bend it into a U shape. Loosen the screw on the base of the light just enough to thread the U-shaped part of the wire around the screw. Each wire will be connected with one screw. Tighten the screw, making sure that the wire is maintained in contact with the metal screw.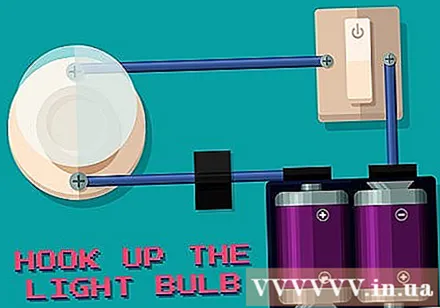
Circuit test. Fasten the ball to the light base. Switched on! If the circuit is properly connected, the ball will light up when fully screwed into the base.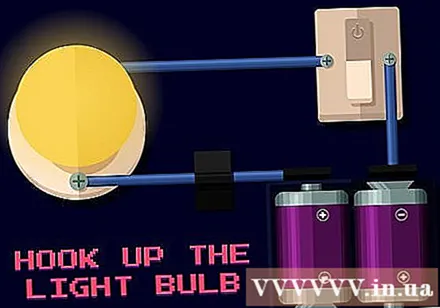
- The bulb can get hot very quickly. So, be careful when disassembling and assembling.
- If the bulb does not light, check to make sure that the wire is in contact with the battery ends and connect the metal part of the screw.
Part 3 of 3: Finding and solving circuit errors
Make sure all power cords are properly connected. To make a circuit, every wire must be in contact with the metal part of each part. If the bulb does not light, check each battery pole and the screw on the light base to make sure the power cord is connected to the metal.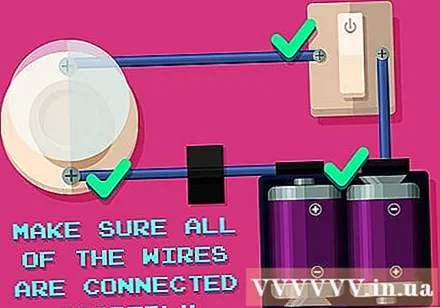
- Make sure screws are tightened tightly to maintain connection.
- In some cases, you may need to further separate the wire insulation.
Check the filament of the bulb. The light will not light up if the filament is broken. Light the bulb under the light and make sure the filament is an integral part. Try a new shade. If the ball is not the problem continue with the next error finding and handling step.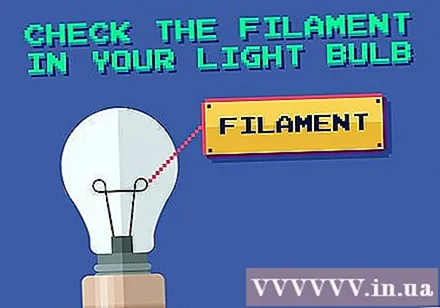
Check the battery power level. If the battery is depleted or low on power, the light may not have had enough power to light. Use a power tester to check the power level or you can simply replace the battery. If this is the problem, theoretically, the light bulb should light up as soon as the battery is replaced. advertisement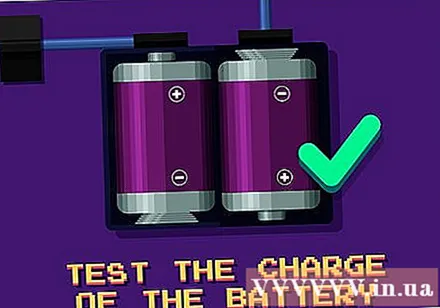
Warning
- Don't touch the light bulb as it will be very hot.
What you need
- The battery
- Battery base
- Wire
- Light bulb
- Lamp base
- Electrical tape


