Author:
Robert Simon
Date Of Creation:
20 June 2021
Update Date:
1 July 2024

Content
- Try a puncher to create hearts, stars, and other stickers out of patterned paper.

- There is no need to apply the adhesive so much that the patch gets wet; You just need to apply a thin layer of glue.
- Make sure the patch is completely dry before using it.
- Store the sticker in a plastic bag or box until needed.

Crop pictures from magazines or print your own designs. For this method, you will use designs that have been printed on paper with waterproof inks. You can use pictures from magazines or books printed on glossy paper, or experiment with printer ink by printing designs from a computer. When printing an image, it is a good idea to test one and then make the image slightly wet before printing it actually. Use scissors to cut out pictures and characters you like.
- When choosing an image, you must consider the width of the clear tape.Each sticker should be fitted onto the tape. The image must be the same size as the tape or smaller.
- If you want a larger sticker, you'll need to join two pieces of tape. This is relatively difficult. You must place the tape so that the edges are slightly overlapping so that no part of the paper is exposed. Your sticker may not look good. You will also see a seam between the two strips of tape.

Paste the clear tape on the prepared pictures. Cut a piece of clear tape large enough to cover your entire sticker. Stick the tape over the front of the image that you cut or printed. Press hard so the tape sticks to the image.
- When you put tape on the sticker, you must work wisely so that the tape is glued to the picture. Moving the tape after applying can tear the picture. In addition, you should try to keep the surface of the tape after applying from swelling or wrinkles.
- Try using double-sided tape. Double-sided tapes come in a variety of types, such as rolls, paper-based or used in patch-making machines like Xyron's.
- Try Washi tape. Washi tape is like clear tape, but has the advantage that you can stick it whenever you want and can easily peel it off when needed. If you want the patch to have a good grip, you can use cloth tape. Washi tapes are sold with many different colors and patterns.

Swipe the front of the sticker. Use a coin or your fingernail to press down on the front of the sticker and swipe over the surface so that the tape will stick to the ink on the paper. Continue working for a few minutes to make sure the ink has adhered to the tape.

- Make sure the entire surface of the tape is wet instead of concentrating on wetting just one spot. If you focus on only one location, the images will be visible only that location.
- If the paper doesn't float, keep running it under warm, running water.
- Another alternative is to soak the sticker in a bowl of warm water. Place the sticker in the bowl of water and soak for a few minutes.

Method 3 of 4: Make stickers with decals
Design stickers. Design stickers on the computer or use a brush or pencil to draw directly on the surface of the decals. You're limited only by the size of the paper - if you want, you can still make your sticker in A4 size!
- Design stickers on your computer using Adobe Photoshop, Paint or any other software that allows you to draw. You can also grab images from your personal photo album or save them from the internet as stickers. When you're finished, simply print your designs onto the tracing paper.
- If you want to use a photo or drawing as a sticker, you can scan it on your computer or upload the photo captured with your digital camera. Format the file in Photoshop, Paint, Word or Adobe Acrobat and then print it out on decals.
- Use a pen, pencil or paint to draw directly onto the decals. Just make sure you don't get the paper too wet or it will affect the adhesive strength.
Cut the sticker. Use scissors to cut pictures printed or draw on decals. You can cut in squares or use serrated scissors to add a unique pattern to the edges. Arrange your stickers a little apart when you print so you can cut them easily.
- When using adhesive paper, simply peel off the paper that protects the adhesive. Place the back of the sticker in the glue. Press firmly down on the picture to make the glue stick to the picture. Next, peel the image off - the glue has now stuck to the back of the image. Now you can stick the image onto any surface. It is recommended to apply the sticker immediately as there is no protective layer on the back of the picture.
- You can leave white borders when cropping or sniping close to the image. Professional sticker makers sometimes leave no white borders and cut with Exacto knives.
Peel off the paper behind the sticker. When you need to use stickers, simply peel off the protective paper and stick the pattern on the selected surface. advertisement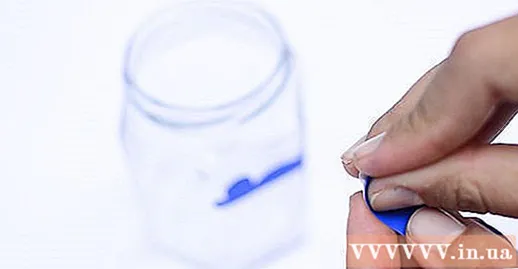
Method 4 of 4: Make stickers in other ways
Use paper as a sticker. Draw any images, shapes or characters on the sticker paper. You can buy these at most stationery stores. After drawing, just cut around the drawing and peel off the paper behind to paste. Stick the sticker on the parchment if you don't need it right away.
Make stickers from surface paper (contact paper). Draw the image on the underside of the paper with a quill pen that can be used on any surface. Next, just cut out the sticker and peel off the underlying paper layer and paste it on the selected surface.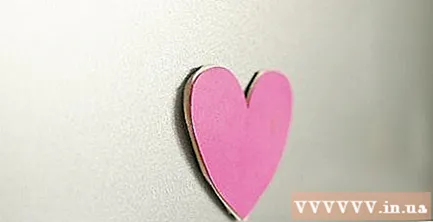
- Surface paper is also translucent, making it very suitable for bonding to hard colored papers.
Use a sticker maker. If you want to make a lot of stickers and are willing to spend money (about 350-450 thousand VND), you can buy a sticker maker online or at a store selling imported products. Place the desired shape (drawing, photo, even ribbons) into the sticker maker and drag the picture over the other end of the machine. Some have a handwheel and you only need to rotate to let the picture be pushed out; Or with some models you just stick the picture on one side of the camera and drag the picture to the other side to glue it to the picture. After dragging the picture over the device, your sticker is ready to use: just peel it off and paste. advertisement
What you need
Make stickers out of glue
- Paper thin
- Drag
- Gelatin
- Hot water
- Corn syrup or sugar
- Mint or vanilla extract
- Paint brush
Make stickers from clear tape
- Magazines or books printed with waterproof ink
- Drag
- Duct tape
- Warm water
Make stickers from decals
- Tracing paper
- Printer (optional)


