Author:
Peter Berry
Date Of Creation:
18 February 2021
Update Date:
28 June 2024

Content
Directly connecting 2 computers together helps you to transfer files faster than other methods, and you can also share the network connection of one computer with the other. The connection process depends on the operating system you use and your purpose: for file sharing or internet connection sharing.
Steps
Method 1 of 5: Share Files (Windows with Windows)
Turn off the wireless adapter on the computer (optional). If the computer has a wireless adapter, turn it off when making the connection. Do this to avoid network conflicts.
- Click the Start menu, type ncpa.cpl and press the Enter key.
- Right-click on the wireless connection and select "Disable".

Connect two computers using an Ethernet cable. Newer computers can use a standard Ethernet cable because the network adapter will automatically detect that you connect the two computers. Older computers may have to use a crossover cable, which is a standard Ethernet cable with reverse connection at one end.
Go back to the computer you want to share. Although you can share files back and forth between two computers, it will be easier to set up on a newer computer.
Right-click the network icon on the System Tray. Open "Open Network and Sharing Center".

Click "Local Area Connection" next to "Unidentified network". This is the action of opening new connection information between 2 computers.
Click.Properties (Characteristic). Select "Internet Protocol Version 4" and click Properties.
Select "Use the following IP address" (Use the following IP address). This is the action that allows you to enter an IP address manually.
Enter the IP address. Since you do not use the internet, you can enter any IP address. For ease of understanding, you set the IP address to.
Press Tab to automatically enter the subnet mask. Click on OK.
Switch to the other computer. Open the Network and Sharing Center similar to the first one.
Click "Local Area Connection" next to "Unidentified network". This is the action of opening new connection information between 2 computers.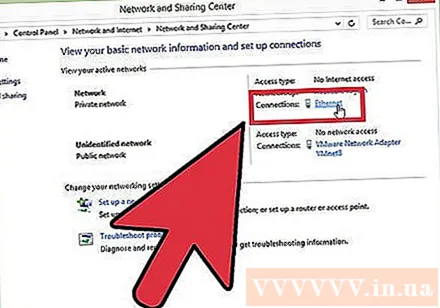
Click.Properties. Select "Internet Protocol Version 4" and click on Properties.
Select "Use the following IP address". This will allow you to manually enter an IP address on the second computer.
Enter the IP address with the other last group of digits on the first machine. Since we use it on the first device, enter the second device.
Press Tab to automatically enter the subnet mask. Click on OK. The two computers are now connected to their private network.
Return to the computer used to share data. Find the drive, file or folder you want to share with the 2nd computer.
Right click on the object you want to share and choose "Properties". Click the Sharing tab.
Click.Advanced Sharing (Advanced Sharing) and check the "Share this folder" box.
Click.Permissions (Allow) and check the "Allow" box next to "Full Control". This will allow the second computer to read and write to the shared folder. Click Apply.
Return to the object's Properties window and select the tab.Security (Security). Make sure "Everyone" is listed in the user list. If you don't see it, click the Add ... button and follow the instructions to add "Everyone" to the list.
Click the Start menu on the computer accessing the shared folder. In our example is the second computer.
Type.\IP address and press Enter. Using the IP address you entered earlier, type \192.168.1.10.
Move to the shared file. You should now see all the folders you've shared on the first computer. If the permissions are set correctly, you can copy, delete, and add files to the shared folder. advertisement
Method 2 of 5: Share Files (Windows to Mac)
Open the Control Panel on the Windows computer. You need to activate your Guest account for easy connection.
Click "User Accounts" then select "Manage another account". This will allow you to add a Guest account to your computer. You can remove the account after the file transfer.
Click "Guest Account", select Next.Turn On (On). This is the step to activate your Guest account.
Go back to Control Panel and select "Network and Sharing Center". You will need to make a few more changes before connecting 2 computers.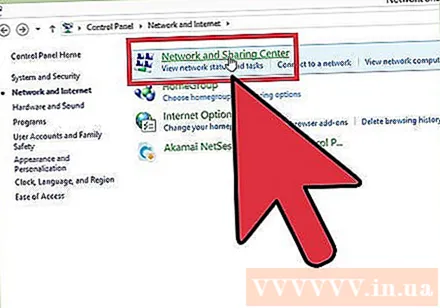
Click "Change advanced sharing settings". Scroll down and select "Turn off password protected sharing".
Connect two computers using an Ethernet cable. Most modern computers can use standard Ethernet cables. If you cannot connect 2 machines, you may need to use a crossover cable.
Click the Start menu on the Windows computer. Type ncpa.cpl and press Enter.
Double click on Local Area Connection. This will help you change the settings for a new connection between two computers.
Click the button.Details ... (Info) and write down the line "Auto-configuration IPv4 Address".
Locate the drive, file, or folder you want to share with your Mac. If you want to share everything on your Windows machine, choose the hard drive that contains the data.
Right-click on the object you want to share. Select "Share With" and click "Specific people".
Type "Guest" and click.Add (More). Don't forget to capitalize the letter "G" in the word "Guest".
Click "Read" in the "Permission Level" column next to "Guest". Select "Read / Write".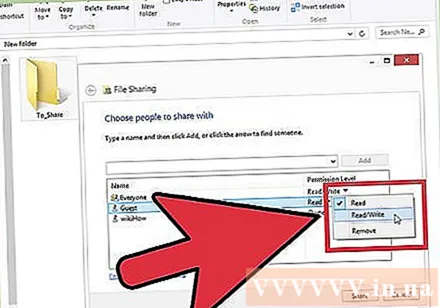
Click the button.Share (Share). Click Next to share the folder.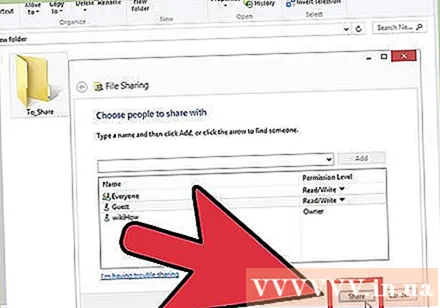
Open a Finder window on the Mac. Press Command + K to open "Connect to Server".
Import .smb: //IP address. Use the IP address found in step 9. Click Connect.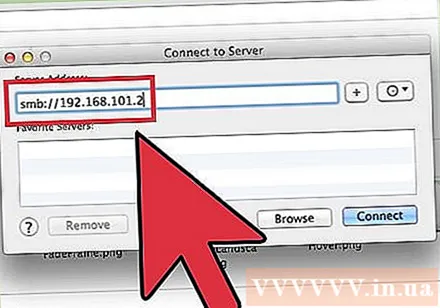
Choose to sign in with the "Guest" account. Click Connect to create the connection.
Select shared folder and click.OK. Depending on what data you shared from Windows, at this step you will see one or more available folders.
Navigate to the shared file. Now that the connection is established, you can share your data through the setup folder on your Windows PC. You can use your Mac to drag / drop files out / into this folder to access your Windows computer. advertisement
Method 3 of 5: Share Files (Mac to Mac)
Purchase a Thunderbolt cable. Thunderbolt is the fastest and easiest way to connect data between two Mac computers. Most modern Macs support Thunderbolt connectivity.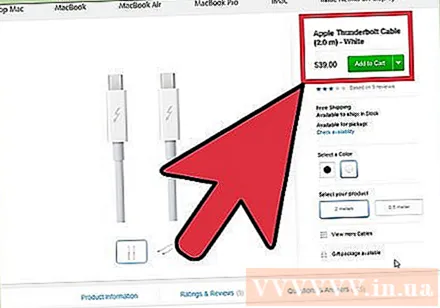
Turn off the computer used for sharing files. The Thunderbolt connection turns the other machine into an external drive, so you don't have to boot into the operating system.
Connect the two machines using a Thunderbolt cable. Thunderbolt cables are only one way.
Turn on the 2nd computer and hold down the T key. This is the operation of booting the computer into Target Disk mode.
Wait for the Thunderbolt logo to appear. You should see the logo appear after a few seconds. You can now release the T key.
Access the hard drive on the first Mac. The second device will appear as the external hard drive of the first. You can open that hard drive, access and transfer data as you normally would. Thunderbolt cables provide the fastest available connection, so data transfers are very fast. advertisement
Method 4 of 5: Internet Sharing (Windows)
Connect two computers using an Ethernet cable. Newer computers can use an Ethernet cable because the adapter will automatically detect that you are connecting the two computers. Older machines can use a crossover cable, which is a standard Ethernet cable with reverse connection at one end.
- You can use internet tethering to share the network with any computer that can connect via an Ethernet cable, any operating system is fine.
Click the Start menu on a Windows computer connected to the internet. Type ncpa.cpl and press Enter.
Right click on the connection to access the internet. Select "Properties".
Click the "Sharing" tab. This is the action that allows you to share your internet connection.
Check the box called "Allow other network users to connect through this computer's Internet connection" (Allow other network users to connect through this computer's internet). Click the OK button.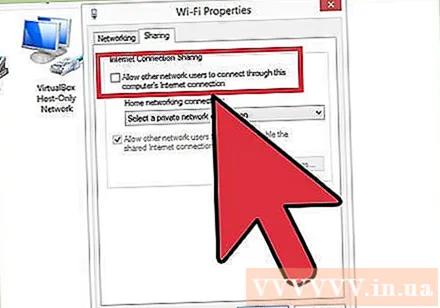
Access to internet on 2nd computer. After internet connection sharing is enabled on the first computer, the second computer can access the network immediately. advertisement
Method 5 of 5: Internet Sharing (Mac)
Connect two computers using an Ethernet cable. Newer machines can use an Ethernet cable because the network adapter will automatically detect that you are connecting 2 computers. Older machines may require a crossover cable, which is a standard Ethernet cable with reverse connection at one end.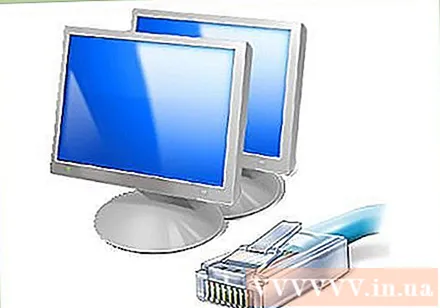
- You can use internet tethering to share the network with any computer that can connect via an Ethernet cable, any operating system is fine.
Click the Apple menu on a Mac with an internet connection and select System Preferences. Select "Sharing" in the System Preferences menu.
Click the "Internet Sharing" option in the left pane. No hurry dialog box.
Select your Mac's internet connection in the drop-down menu. If you connect two computers via an Ethernet cable, you usually share the Wi-Fi connection.
- Older Macs will show "Airport" instead of "Wi-Fi".
Check the "Ethernet" option in the "To computers using" list. The machine will share the network connection with any computer connected via an Ethernet cable.
Check the box "Internet Sharing". Click the Start button if prompted.
Access the network on the second computer. After network connection sharing is enabled on the first computer, the second computer can immediately go online.
- It took a while for the second computer to find a new IP address.


