Author:
Lewis Jackson
Date Of Creation:
13 May 2021
Update Date:
1 July 2024

Content
This wikiHow teaches you how to control the devices (computers, phones, tablets, etc.) that are allowed to connect to the Internet through your wireless hotspot. The implementation process will vary by manufacturer, but in general you can apply the Linksys and Netgear instructions below to interact with most other router interfaces.
Steps
Method 1 of 2: With Linksys routers
Connect to the router using a web browser. You can access your router using the same router IP address as any website. Here's how to determine an address on Windows and macOS:
- On Windows:
- Open the Start menu and click Settings (Setting).
- Click Network & Internet (Internet & network).
- Click View your network properties (See network configuration) at the bottom of the main frame. The IP address will be listed under the ″ Default gateway ″ heading.
- On macOS:
- Open the Apple menu and click System Preferences (Customize system).
- Click Network (Network).
- Click Advanced (Advanced) on the bottom right frame. You may need to first click a link in the left pane to see this option.
- Click the card TCP / IP. The IP address is the series of numbers next to the ″ Router ″ header.
- On Windows:

Log in with the administrator username and password (admin). Unless you have changed your login information, both the username and password are the same admin.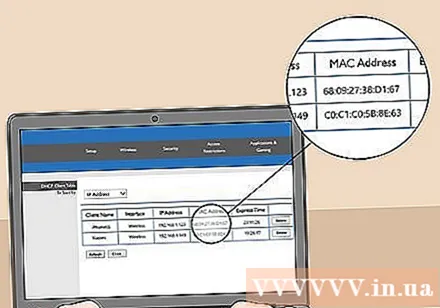
Find the MAC address of the device you want to restrict. A quick way to determine this is to immediately connect the device to the router, and then locate the device's entry in the DHCP table. Connect the device first, next, you will proceed as follows:- Click the card Status (Status) at the top of the page.
- Click the sub tag Local Network (Local Area Network).
- Click DHCP Client Table (DHCP Client Table). A list of all devices connected to the router will appear. The IP and MAC addresses are also shown next to each device.
- Copy the MAC address of each device you want to control and paste into a text editor.

Click the card Access Restrictions (Restricting access). This option is at the top of the page.
Click OK.
Create a new Access Policy list. This is a list that controls which devices on the network can access the Internet (or certain ports / websites) through this router.
- Select the number from the ″ Access Blocking Policy drop-down menu.
- Enter a name for the list next to ″ Enter Policy Name ″ (example: ″ Block these devices, ″ ″ Allow these devices ″).
- Click Edit List (Edit list).
Enter the MAC address of the device you want to limit. Add each address to the line of the respective device.
Click Save Settings (Save settings).
Click Close (Closed). So you can choose to allow or block these devices.
Choose Allow (Allow) or Deny (Refuse).
Choose when to allow or deny these devices. To block these devices at all times of the day, select Every Day (Every day) and 24 Hours (24 hours). Or you can also choose a specific date and time to limit access.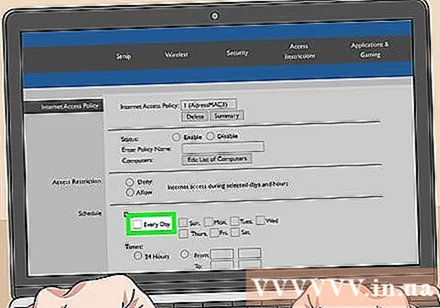
Restrict access to certain websites (optional). If you want to block certain websites for this list, enter the URL (eg www.wikihow.com) in the space trống URL ″.
Restrict access to certain apps (optional). To prevent these devices from using certain ports or applications, you can select the service from the ″ Applications ″ menu and click the arrow to add it to the ″ Blocked List ″ column. ).
Click Save Settings. So the setting will be updated, and the restrictions (or permissions) you selected will begin to apply.
- To add another list, choose another number from the ″ Access Blocking Policy menu, create a new list name and click Edit List to add items.
Method 2 of 2: With Netgear router
Connect to a Wi-Fi router using a web browser. The easy way to connect to a Netgear router is to open a browser and visit Routerlogin.net.
Login as administrator. If you haven't changed it yourself, enter it admin as username and password are password.
Click the card Advanced. This is usually located near the top left corner of the page.
- Different Netgear router models will have a slightly different administration website interface.
Click the item Security (Security) is in the left column.
Click Access Control (Access control). This is one of the options located below the ″ Security heading.
Check the box next to ″ Turn on Access Control ″. A list of all the devices that are currently connected to the network will appear, and there are also links to see if the device has been connected but is currently offline.
Choose the access rule. Choose one of the two options below:
- Allow all new devices to connect: This option allows any device to connect to the network as long as the user enters the correct Wi-Fi password. This option is for you if you want to block certain devices, not all.
- Block all new devices from connecting: This option does not allow any device to connect to the Wi-Fi network (even if they have a password) unless you add the corresponding device's MAC address to the list.
Find the device you want to block (or allow). If the device is not online now, you can click View list of allowed devices not currently connected to the network (See the list of allowed devices that are not currently connected to the network) to search.
Check the box next to each device you want to block (or allow).
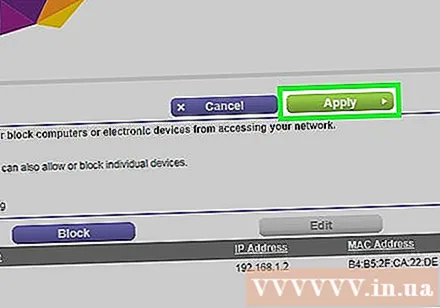
Click Block (Block) or Allow (Allow).
Click Apply (Apply). The device you choose will be allowed or blocked as desired. advertisement