Author:
Robert Simon
Date Of Creation:
19 June 2021
Update Date:
1 July 2024

Content
Whether you want to use images for pranks, bug reports, or technical support, screen capture is always a useful method to know when using a computer. Fortunately, taking screenshots on OS X is very simple. You can press a key combination to take a variety of screenshots on your Mac or other Mac computer.
Steps
Method 1 of 5: Take a picture of the entire screen
Hold down the keys: Command + Shift + 3 You should hear the camera sound for a moment. Here's the simplest of screenshots: capture the entire screen at that point.
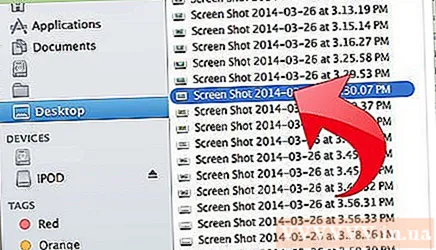
The screenshot search is a file with a png extension on the desktop and has a record screen capture date and time. advertisement
Method 2 of 5: Take a picture of the selected screen part

Hold down the keys: Command + Shift + 4 Your mouse pointer will turn into a small grid with pixel coordinates in the lower left.
Click and hold the mouse or trackpad and drag the cursor to select the rectangular portion of the screen you want to capture. You can press the Esc key to start over without taking the picture.

Release to take a photo. Your file will again be stored on the desktop. advertisement
Method 3 of 5: Take a screenshot of a window
Hold Command + Shift + 4 + Space. This step will turn the cursor into a small camera icon and turn any window the user is pointing to a prominent blue.
Highlight the window you want to take screen capture. To find the right window, you can browse through open applications using Command + Tab or press F3 to select all open windows. Press Esc to cancel without taking any pictures.
Click the highlighted window. Search for your file on the desktop. advertisement
Method 4 of 5: Save screenshots to clipboard
Hold down the Ctrl key and execute any of the above commands. This step saves the screenshot to the clipboard instead of a file on the desktop.
Paste the screenshot into a word processor, email, or image editor by holding Command + V or making a selection Paste from the menu Edit. advertisement
Method 5 of 5: Take a screenshot in Preview mode
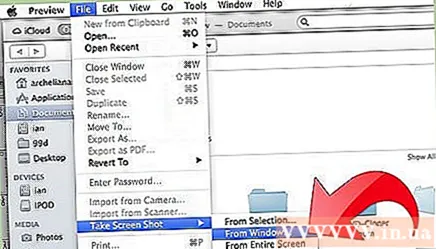
Open Preview. Look for the Preview section of the Finder application folder and double-click the icon.
Open the File menu and hover your mouse pointer over Take Screen Shot.
Here the options are From Selection (selected parts only), From Window (from windows), or From Entire Screen (full screen)
- From Selection will turn the cursor into a grid. Click and drag the rectangular part you want to capture.

- From Window will turn the cursor into a camera icon. You need to highlight the window you want to capture and click.
- Entire Screen will start a countdown. You need to arrange things on the screen according to the desired shot and wait for the time to decrease.

- From Selection will turn the cursor into a grid. Click and drag the rectangular part you want to capture.
Save a new image. The screenshot will immediately open as an unnamed preview image window. You need to open the file and select menu Save. Type in a name, select a location and file type, and click Save. advertisement
Advice
- If you intend to take a snapshot of the browser window, make sure that you don't have any tabs open that you don't want others to see.
- Screenshots are also saved to the clipboard that stores the text just like when copying and pasting text.


