Author:
Robert Simon
Date Of Creation:
15 June 2021
Update Date:
24 June 2024

Content
Many people believe that a good camera can help them with their photos. However, in photography, technique is much more important than equipment. As long as you practice enough and avoid some common mistakes, any machine can give you excellent work.
Steps
Part 1 of 9: Choosing the Camera and Equipment That Match Your Shooting Style
- Consider your style and intended use. When choosing to buy a camera, you can be overwhelmed by the variety of options and brands available on the market. The camera has too many options and functions to list in an article. Try the tips below.
- If you live in an insecure area, don't go around with an expensive looking high-end camera. A lot of the machines look normal, though good, and equipped with superior functionality. A small camera is also not a bad choice in this case.
- Avoid being dominated by color. The bright colors stand out excessively and at the same time, when trying to photograph animals or in other "sneaky" shooting situations, the subject can turn out to be mean and run away.
- Size, technology and price are not necessarily the problem. Not every cheap camera is bad, and not necessarily expensive is good enough. A large DLSR can be too big and cumbersome for the casual photographer, and conversely, a low-cost, low-quality camera will show him or her in sharp shots.
- Each machine has its own advantages and disadvantages. Some are too complex with many functions you may never use. If you already have a GPS in your phone, you won't need the system on your device. If you already have Photo Editing Software at home, you will probably never use any veil (photo application on camera). Most cameras are not waterproof, cold or drop resistant, which are things to consider if you are adventurous or not careful.
- Choose a camera that can focus easily with a high optical zoom ratio, a large shutter speed, good ISO (light sensitivity) and multiple image "modes". Don't worry too much about the MegaPixel (mp) resolution of the machine. A low quality camera with a high MP is not able to produce the same quality image as a high quality camera with a low MP. Many professional photographers achieve excellent work with only older models. 10MP or more is enough for quality products.
- Only interested in optical zoom. Zoom, the proximity of objects in the camera, is extremely important for capturing images of animals at zoos or situations in sports. Optical zoom maintains the sharpness of the object no matter how close the zoom is. Digital zoom and other zoom functions lose clarity and blur the image when zoomed close.
- The shutter closing speed limits the ability to capture dynamism (action scenes). A higher speed is better for motion capture. However, with HD camcorders, you can always "cheat", shoot and re-capture using the screen capture software and stop the movie.
- High sensitivity (ISO) is good for low-light photography and action scenes. Without good ISO, pictures will be grainy with a lot of grain in low light. Have you ever gotten a mess of colors when zooming in great pictures online? That is noise. However, professional photographers always know enough to regulate this noise to maintain sharpness in work.
- High sensitivity cameras are also good for low-light and flash (flash) situations where use is prohibited or discouraged, such as in public aquariums, where backgrounds are bright. or reflective, night view or concert.
- Be careful when choosing a camera with an autofocus mode! As one of the troubles with low-quality cameras, this can be time consuming and annoying when you miss out on a perfect shot or drain your battery. This means that the camera will focus on its own, continuously adjusting itself, making it difficult to capture dynamic scenes like flowers swaying in the wind or flashing light. This function should be of as high a quality as possible and can always be turned off when needed.
- The camera's shooting mode will come in handy if you do not know how to adjust for the perfect image. Some cameras adjust their settings with Smart Capture Mode on their own. You can also re-choose from hue, sharpness, saturation, and brightness to action scenes in Photoshop. Once you get used to it, you can always fine-tune these shooting modes at will.
- Get a tripod! Thanks to that, the machine is completely stable! In some settings, it is sometimes difficult to take good shots because the camera becomes too sensitive to any slight vibrations and produces disappointing products.With a tripod, low-quality cameras are still able to achieve stunning frames.
- Pack other accessories such as carrying pouch, memory card, battery or charger, as well as a waterproof case that will fit the camera well for wet trips. Don't forget cleaning tools and lens caps. Don't hesitate to have more than one machine for different uses.
- Use the highest memory card capacity. A low capacity can lead to low image quality.
- Using the camera of your phone / tablet is at your own risk. Unless the lens on this device has a resolution of 10mp or more with high zoom capabilities and good light sensitivity, which is usually only available on extremely expensive models in most cases, no matter what. capture high quality products with your phone / tablet.
Part 2 of 9: Understanding Your Camera

Read the instruction manual. Explore the function of each control button, switch, button and each menu item. Learn basic uses like using flash (off, on, and auto), zoom in and out, and use the shutter button. Some cameras have a beginner's manual included and also provide further instructions on the manufacturer's website. Don't worry if you don't have one, the documents can be easily found online. advertisement
Part 3 of 9: Getting Started

Set the resolution to the highest setting for high image quality. Low resolution products make editing difficult, you cannot comfortably cut them as with the high resolution version (and still produce printable results). Memory card upgrade. If you do not want or cannot buy a new memory card, select the "good" image quality mode if available, with a smaller resolution.
If so, start with one of the machine's automatic modes. The most useful mode is "Program" or "P" on the digital SLR. Ignore the suggestion of manual focus entirely - the development of AF and metering techniques over the past fifty years has not happened to nothing. If the picture is in focus or the exposure is poor, this time Let's start to manually adjust certain functions. advertisement
Part 4 of 9: Finding Photography Opportunities
Bring the machine everywhere. With the camera in hand, you will begin to feel the world differently, always observing and looking for opportunities to take great photos. Hence, shoot more and the more you shoot, the more you progress. What's more, as they regularly take photos of friends and family, they'll get used to having the camera with you at all times, becoming less and less embarrassed about being photographed. Your look will be more natural, with less "posing" feel.
- Remember to bring spare batteries or charger if using digital camera.
Go out. Encourage yourself to go out and shoot in natural light. Take a few normal shots and shots to feel the brightness at different times of day and night. Although many people feel that the Golden Hour (the last two hours before the sun goes out) is the best time to take pictures, it doesn't mean taking pictures in the middle of the day is impossible. Under bright sunlight, sometimes open shaded spaces can create a soft and attractive light (especially for human subjects). Go out, especially when most of you are eating, watching TV or sleeping. The sun is often overwhelming or unfamiliar to many real people just because they never see them! advertisement
Part 5 of 9: Using the Camera
Do not allow the lens to be obscured by the cap, fingers, strap or any other obstructions. Yes, this is the basics, but any of these (often overlooked) obstructions can destroy your photos. With digital cameras equipped with live preview, especially with SLR cameras, this error is less common. However, we still stumble, especially when rushing to capture a frame.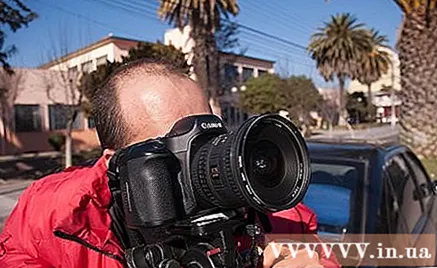
White balance setting. Simply put, the human eye automatically adjusts when it receives light, in almost any lighting condition, white remains white to us. Digital cameras do this by converting colors in certain ways.
For example, under tungsten (incandescent) lighting, blue is added to compensate for the red in the light. On the contrary, in cold light such as a fluorescent lamp, the camera will turn red to compensate for the blue color. Some even have a tungsten mode (pure white setting) and incandescent light simultaneously. Experimenting with each setting to see the results and learning how to take advantage of them is a must. White balance is one of the most important and underestimated settings in modern cameras. Learn how to adjust and what each setting means. Under natural light, "Shade" (or "Clouds") is a good choice in most cases and helps create warm colors. If the results too red, you can easily edit with the following software. "Auto", which is set by default on most cameras, sometimes produces good results but sometimes also produces slightly cooler colors.- This setting is also known as color temperature.
Set an ISO speed slowly if conditions permit. Digital SLRs usually have no problem with this but are especially important when using compact digital cameras (they often have small sensors and are therefore susceptible to noise). A slower ISO speed (a smaller number) helps to reduce noise but at the same time, also causes you to let the shutter open and close more slowly, leading to a number of disadvantages, such as the limited ability to capture dynamic scenes. For stills and good lighting (or stationary subjects and low light with the help of a tripod and remote control), use the slowest ISO speed you have. advertisement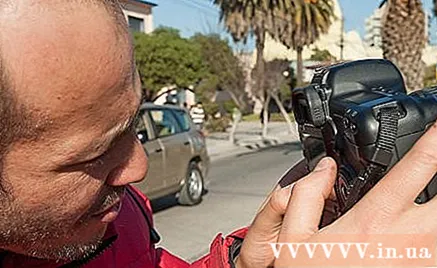
Part 6 of 9: Taking Great Pictures
Organize photos carefully. Frame the photo in mind before doing with the viewfinder. Consider the following rules, especially the last:
- Use the Rule of Thirds, where the focus in the image is along the "third" line. Try not to let any horizontal lines or other lines "split the picture".
- Eliminate background scenes that are distracting or cluttered. When the tree is present, move it so that it doesn't feel like the tree is coming from the beginning. Change the angle of the shot so that the windows don't see from the other side of the street. If you're shooting your vacation, take some time to let all of your family members put all their stuff, backpacks, and bags away. Keep that mess away from the photo and you'll have a better and less tangled product. If it's possible to blur the background in a portrait photo, do so and so forth.
Ignore the above advice. See what it is the law, which works in most cases when properly understood - and are not see that as the absolute rule. Sticking to the rules can lead to boring pictures. For example, background clutter and focus can add content, contrast and color as well as sheer symmetry can create drama, ... Sometimes, every rule can and Candlestick demolished for an artistic effect. That's how countless great works came into being.
Fill the frame with your subject. Don't hesitate to approach. If you are using a digital camera with a multitude of megapixels, you can always use cropping and retouching software later.

Try an interesting angle. Instead of shooting straight, try shooting from above or leaning up. Choose a shooting angle that maximizes color and minimizes shade. A low shooting angle makes the subject look longer or taller. You can also make clear subjects smaller or appear as if you are hovering overhead by placing the camera above the subject. A strange angle gives you a more interesting picture.
Focus. Bad focus is one of the most common ways to ruin an image. If so, use the autofocus on the camera. Usually, you can do this by pressing the shutter button halfway. Use "close up" mode for closeups. Do not manually focus Unless there is a problem with the autofocus as normal, the camera has much better autofocus and metering capabilities than you would do by yourself.- Balance ISO, shutter speed and aperture. ISO represents the camera's sensitivity to light, shutter speed tells how long it takes the camera to take a shot (which adjusts the amount of light received by the camera) and aperture is the aperture.By balancing and keeping them as close to the average as possible, you can avoid noise caused by high ISOs, blurring that comes from slow shutter speeds and side effects of a low aperture. Depending on your shooting intentions, you should adjust these settings to be bright enough and still retain the desired effect. For example, if you want to capture a shot of a bird plunging out of the water, you need a fast shutter speed to focus and you also need a low aperture or high ISO to compensate for it. A high ISO causes noise but a low aperture is perfect because it can create a defocus effect and draw attention to the subject. By balancing these elements, you will get the best shot. advertisement
Part 7 of 9: Avoid Blurred Photography

Hold on. Many people are surprised by the blur of the image when zoomed in or taken from afar. To minimize blur: If using a full-size camera (which uses an image sensor of the same size as a standard film frame) with a zoom lens, hold the camera body (finger on the shutter button) with one hand and Use your other hand to support the bottom to fix the lens. Place your elbows close to your body and use this position to keep your body steady. If so, turn on the camera or lens stabilization (IS on Canon gear and VR - Vibration Reduction on Nikon products).
Consider using a tripod. If you experience natural hand shake, if you are using a large (and slow) telephoto lens, if you are trying to shoot in low light, want to shoot continuously (such as HDR (High Dynamic Range). extended reaction) or panoramic photography, a tripod will come in handy.If you have to expose for a long time (more than a second), the switch cord (for older models) and remote control are a good choice for you. If not, use the self-timer.
Consider are not use a tripod, especially when not available. It limits your ability to move and frame your shot. At the same time, it's also heavier to carry around and makes you hesitate to go out and shoot.
- With shutter closing speed and the difference between fast and slow closing, you only need a tripod when it is equal to or slower than the inverse focal length. For example, if you have a 300mm lens, your shutter speed should be faster 1/300 second. If you cannot avoid using a tripod by using a higher ISO speed (which results in the shutter closing faster), by using camera shake stabilization or simply moving to a better light, use it.
If you're in a situation that isn't suitable for using a tripod, or you don't have a tripod at that time, try one or more of the following ways to reduce shake:
- Turn on image stabilization on the camera (only some digital cameras have it) or on the lens (only a few expensive lenses generally).
- Zoom in (or replace it with a wider lens) and get up close. This reduces the effect of small changes on the camera and increases the maximum aperture for a shorter exposure time.
- Hold the camera in two locations away from the center, such as near the shutter button and on the opposite or end of the lens (do not cover the lens, do not obstruct the operation of the autofocus unit such as the focus ring or hold the lens if it is a fragile part like a compact camera). This will reduce the corresponding machine vibration when the hand is moved.
- Press the shutter button slowly, firmly and gently. Only release your hand when the picture has been taken for a while. Place your index finger on the top of the machine. Press the shutter with the second knuckle to hold the button steady. Anyway, you've had to hold it for a long time.
- Find support for the device (or hands if you are afraid of scratches) and / or lean your hands on your body or sit down and rest your hands on pillows.
- Place the camera on something (maybe a case or strap) and use the self-timer to reduce vibration from pressing buttons if the support is soft. In this case, there is a small chance that the machine will fall. So check and be sure if it does, it's not a strong fall. Do not apply to expensive cameras or ones with fragile accessories such as flash units. If you plan to do so on a regular basis, consider bringing a bag of beans, which can be helpful in this case. There are many specialized "bean bags" on the market at affordable prices. As old, the bag can be upgraded or eaten.
Feel free to press the shutter button. At the same time, try not to lift the machine for too long, causing your hands to shake. Practice eye-level lift, focus and metering, shoot neatly and neatly. advertisement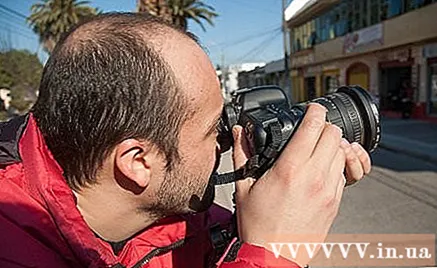
Part 8 of 9: Using Flash
Avoid red eyes. Red-eye is caused by dilated eyes under low light conditions. When the pupil is growing, the flash lightens the blood vessels located in the inner wall of the eyeball and causes the eye to turn red. If you must use the flash in low light, do not let the person being photographed look directly at the camera or try using a "bounce flash". Point the light above the subject, especially when surrounded by bright colored walls, red-eye will be avoided. If there is no removable light for adjustment as above, use the in-camera red-eye reduction feature if available. The feature illuminates a few times before the shutter is opened, and as a result the eyeballs shrink and red-eye is minimized. However, it is best not to take pictures in the condition that requires flash but look elsewhere with better light.
Use the flash properly, not when it's not absolutely necessary. Using the flash in poor light often results in poor results, or causes the subject in the image to become "exhausted", which is especially true when photographing people. On the other hand, flash is quite useful for filling shadows (if you have a fast enough sync flash speed). Do not use the flash if you can avoid it by going out or holding the camera steady (allowing you to use a slower shutter speed without causing blurring) or set a higher ISO speed (allowing the shutter to close faster).
- If you are not planning on using the flash as the primary light source, set it to get the correct exposure for the aperture used (suitable for ambient light intensity and shutter speed - this speed sync flash speed must not be exceeded). You can do this by choosing a certain step for the aperture with manual flash or thyristor light, or by using "blowout compensation" found in a good newer camera.
Part 9 of 9: Management and Experience Acquisition
Review the photos and find the best ones. Identify what makes them the best products and keep them going. Do not hesitate to delete or delete pictures. Be strong with them. If it can't satisfy you, let them go. If you use a digital device like most people, you will lose nothing but time. Before deleting, remember that the worst images also contain a lot of lessons. You need to find out why they are not beautiful and Avoid repetition.
- Practice, practice and practice. Take multiple pictures - aim to fill up your memory card or use up the maximum amount of movies you can afford. Don't use film until you often shoot well with simple digital cameras. Until then, you need to learn from your mistakes. It's inexpensive to make mistakes and being able to spot it instantly (pinpoint exactly where it went wrong and why under the current situation it's a mistake) makes things easier. The more you shoot, the more you improve and the more your work will be loved (by you and everyone).
- Shoot from a new or different angle, find a new subject and stick to it. Creative enough, even the most permanent, boring things can turn out great under your lens.
- Also, find out the limits of your camera, how well it performs in different lighting conditions, how AF varies distances, and ability to handle dynamic subjects ...
Advice
- If shooting with a digital camera, it is better to shoot with low light as it can be easily adjusted with software. Dark details can be restored but with highlights (pure white areas in highlights), that is not possible. With film, on the other hand, dark details are often worse than with digital cameras, but blowout is unlikely, even when brightly brightened.
- The problem is not with the camera. Nearly any device can produce good shots at the right time. Even a modern phone is good enough for every picture.Get to know the limits of your machines and work on them, don't buy expensive equipment until you know exactly what these limits are and make sure they're getting in your way.
- Don't be afraid to take too many pictures. Please shoot until satisfied. The perfect shot usually takes time, and your subject deserves it. Once you find something you like, appreciate and focus.
- Keep a notebook and take notes of what works and what doesn't. Review your notes often while practicing.
- Install and learn how to use photo editing software. It allows you to correct color balance, adjust brightness, crop and more. Most cameras come with software to make these simple adjustments. For more complicated operations, consider buying Photoshop, downloading and installing the free GIMP photo editing program or using Paint.NET (http://www.paint.net/), a editing program. Free lightweight photo editor for Windows users.
- When photographing children, keep low to be on par with them! A picture taken from the top of the child's head often feels inadequate.
- To find an interesting angle at a tourist site, observe where others took the photo and then try a different location. You wouldn't want pictures that look like everyone else.
- Remove the picture from the memory card as soon as possible. Back up, make some backups if possible. The photographer has also suffered or will suffer from losing one or more valuable photos if this habit is not built. Backup, backup and backup!
- Westerners often prefer close-up shots, within 2m - Asian tourists tend to stand about 5m away from the camera to look small in the picture, while also showing a lot of location / background - it's not about 'me 'it's about where I used to be.
- Post to Flicker or Wikimedia Commons (http://commons.wikimedia.org/) and maybe one day you will find your picture in use on wikiHow!
Warning
- Get permission before taking pictures of anyone, pets or their property. The only situation where you clearly don't need permission is when recording a criminal committing a crime. Always ask politely.
- Be aware that taking pictures, works of art or even architecture, even in public places, can in many cases be considered a violation of anti-copyright laws.
What you need
- A camera, whatever you have or can borrow is good enough
- Memory card with the largest capacity you can get if you use a digital camera and as many movies you can buy if you do not use.


