Author:
Monica Porter
Date Of Creation:
22 March 2021
Update Date:
1 July 2024
Content
This wikiHow teaches you how to play Wii games from files stored on an external drive or USB stick instead of an optical disc. Note: this method works only for the classic Wii version, not for the Wii U. Playing games on the USB drive / drive requires you to have the Homebrew channel installed on the Wii, which violates our terms of use. use of the Nintendo device, and the device will no longer be covered by the warranty. After installing all the necessary content, you can burn the game to a flash drive and start playing on a USB instead of an optical disc.
Steps
Part 1 of 7: Preparing the installation
Make sure you have the following equipment:
- SDHC memory card You will need a large SD card with up to 8 GB capacity to install Homebrew and perform other file-based tasks.
- USB flash drive - You will install the game here.
- Wii remote control - For the later Wii model (in black), you will need to use the Wii remote control for installation.

Format the flash drive to FAT32. To proceed, you choose FAT32 (or MS-DOS (FAT) on a Mac) in the "File System" section of the format menu.- Note: Formatting will erase all of the content on the USB, so back up the content to a computer or other flash drive if necessary.

Take out the disc from the Wii. If you already have a disc in your Wii, you will need to remove it before proceeding.
Connect your Wii to the Internet. Wii machine needs to be connected to the network to install the USB tool's package.

Install Homebrew on your Wii machine. If you do not have a Homebrew channel installed for your Wii, proceed before continuing. The Homebrew channel allows us to install custom adjustments including gaming on USB drives.
Format the SD card. After installing Homebrew using the SD card, you need to wipe the data clean so you can use the memory card for the USB installation files. The easiest way to do this is to format the memory card.
- As with USB, you choose FAT32 (or MS-DOS (FAT) on a Mac) as the file system.
Part 2 of 7: Creating USB to connect to Wii
In this section, you need to use a Windows computer. Unfortunately, we cannot properly format the USB for use with the Wii using a Mac computer. If you don't have a Windows computer, you can borrow one from your library or from a friend.
Specifies the Windows bit count. You need to know if the version of Windows you are using is 32 or 64-bit to be able to quickly download the appropriate file.
Open the WBFS Manager website. Go to https://wbfsmanager.codeplex.com/ in your usual web browser.
Click the card DOWNLOADS (Download) is near the top of the page.
Click the download link. Depending on the number of bits of your computer, this step will be different:
- With 64-bit version Click on options WBFSManager 3.0 RTW x64 is located below the title "OTHER AVAILABLE DOWNLOADS" (But other downloads available).
- With 32-bit version Click on options WBFSManager 3.0.1 RTW x86 is located below the title "RECOMMENDED DOWNLOAD" (Recommended Download).
Open the ZIP folder. Double-click the downloaded ZIP folder to open it.
Double-click the file setup located in the ZIP folder. The setup window will open.
Install the program by: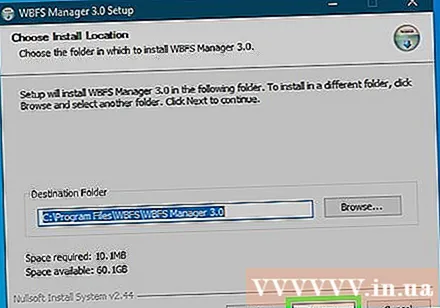
- Check the box "I agree" (I agree) and select next (Next)
- Click next two more times.
- Click Install (Setting)
- Uncheck the box "Show Readme".
- Click finish (Accomplished)
Plug the USB into the computer. The flash drive will fit into one of the rectangular USB ports on your computer.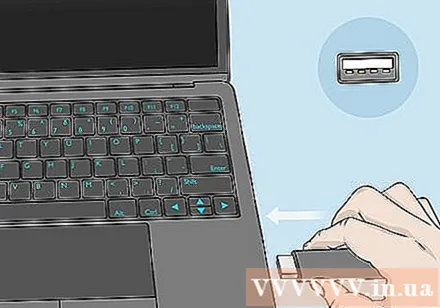
Open WBFS Manager. Double-click the WBFS Manager application icon with the Wii machine image on the blue background.
- This icon is located on the desktop of the computer.
Click OK when the option appears. The main WBFS Manager window will open.
Select USB. Click the "Drive" drop-down box in the upper-left corner of the window and then select your drive letter (usually F:).
- If you don't know the flash drive letter, look in the "Devices and drives" section of the This PC app.
USB format. Click Format at the top of the window and select Yes If prompted, then click OK when the option appears.
Unplug the USB. Click the USB icon in the lower right of the screen, then select Eject from the pop-up menu and remove the flash drive from the computer.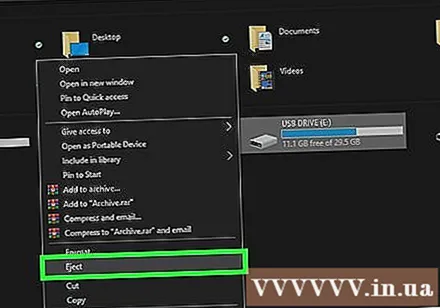
- You may need to click the mark ^ Click here first to bring up the flash drive icon.
Part 3 of 7: Downloading Installation Files
Insert the SD card into the computer. The memory card will fit into the SD slot on the computer if you insert the angled end with the icon facing up.
- If the computer does not have an SD card slot, you can purchase a USB memory card reader.
Open the page https://app.box.com/s/ztl5x4vlw56thgk1n4wlx147v8rsz6vt using the web browser normally used to download files.
Click the button Download green in the middle of the page. The ZIP folder of the file will begin downloading to your computer.
Extract the file. On a Windows computer, double-click the ZIP folder, select Extract (Extract) at the top of the folder window and click Extract all (Unzip all) from the toolbar that appears, finally select Extract when asked. The files will be unzipped into a regular folder when the process is complete.
- On a Mac computer, simply double-click the ZIP folder to open it.
Open the folder Files (File). Double-click the folder USB Loader GX then double-click on the folder Files at the top of the next window.
Copy file. Click a file in the folder, click Ctrl+A (Windows) or ⌘ Command+A (Mac) to select all, then press Ctrl+C (Windows) good ⌘ Command+C (Mac) to copy files.
Click the name of the SD card located on the left side of the window.
Paste the file in. Click an empty space in the SD card window and press Ctrl+V (Windows) good ⌘ Command+V (Mac). The file will be pasted on the memory card.
Remove the memory card. After copying is complete, you can remove the memory card by:
- On Windows Click the card Manage (Manage) at the top of the SD card window, then select Eject word in the toolbar.
- On Mac Click the up arrow to the right of the memory card's name in the left pane.
Part 4 of 7: Installing IOS263 software
Insert the SD card into the Wii. The memory card will fit into the slot on the front of the device.
Turn on the Wii. Press the power button on the unit or the remote to turn on the device.
- The Wii remote should be turned on and synchronized with the machine first.
Press the button A when prompted. The main menu will appear.
Start the Homebrew channel. Choose the homebrew channel on the Wii machine's main menu, then select Start (Getting Started) when asked.
Choose IOS263 Installer in the middle of the menu. A menu will pop up.
Choose Load (Load) when prompted. This option is in the middle, bottom of the pop-up menu.
Press the button 1 to select the task Install (Setting).
- If you are using a GameCube console then press the button Y.
Choose
(Download IOS from NUS). This option is at the bottom of the page. - If you don't see this option, navigate to the text in brackets at the bottom of the screen and press the side button right until the option appears.
Press A when prompted. IOS263 will be installed as a firmware on the Wii. This may take about 20 minutes, so be patient.
Press any button when prompted. You will exit the setup process and return to the Homebrew menu. advertisement
Part 5 of 7: Installing the cIOSX Rev20b software
Choose the installer cIOSX rev20b Installer in the middle of the Homebrew menu.
Choose Load when prompted. The installation window will open.
Scroll left to the option "IOS236". The iOS236 file you just installed will be selected.
Press the button A to confirm the selection.
Agree to the terms of use. Press the button A on game controller to agree to terms of use.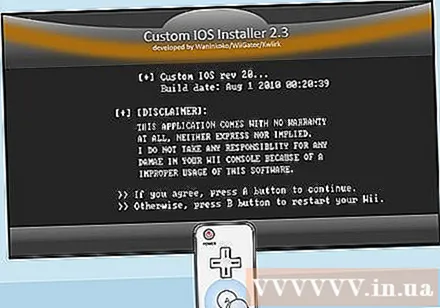
Choose the IOS version. Press the button to the left Until the option "IOS56 v5661" between the brackets appears, then press the button A.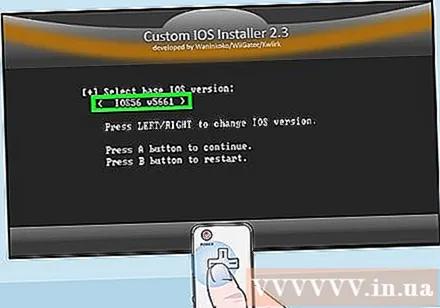
Choose a custom IOS slot. Press the button button to the left until the "IOS249" option between the brackets appears, then press the button A.
Select network settings. Press the button to the left until a "Network installation" option appears between the brackets.
Begin the installation process. Press A to start the iOS installation process.
Press any key when prompted to go to the next part of the installation.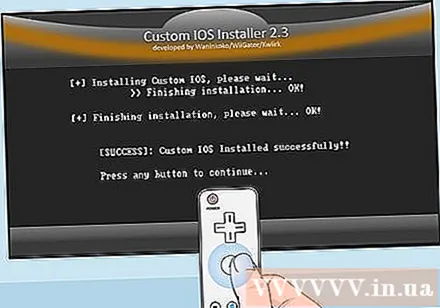
Choose the IOS version. Press the button to the left until the option "IOS38 v4123" appears between the brackets, then press the button A.
Choose another slot. Press the button to the left until the option "IOS250" appears between the brackets, then press the button A.
Use the network installer. Select "Network installation" and click A as you did with the previous installer, then wait for the process to complete.
Press any button when prompted, then press the button B. The Wii console will reboot. Once the Wii has restarted, you should be able to continue. advertisement
Part 6 of 7: Installing USB Loader GX
Navigate to the next page. Press the arrow button turn right of the four-way D-pad keys on the Wii remote control for navigation.
- You can also press the accent mark +.
Choose WAD Manager (WAD driver). This is the second option on the page.
Choose Load when asked. The WAD Manager installer will launch.
Press the button A to agree to the terms of use.
Select "IOS249" to load. Push the button to the left until the option "IOS249" appears between the brackets, then press the button A.
Disable emulator. Select "Disable" between the brackets and press the button A.
Select SD card. Select "Wii SD Slot" between the brackets and press the button A. The file list on the memory card you inserted earlier will appear.
Scroll down and select WAD. This option is near the bottom of the screen.
Select the USB loader. Scroll down and select USB Loader GX-UNEO_Forwarder.wad, then press A.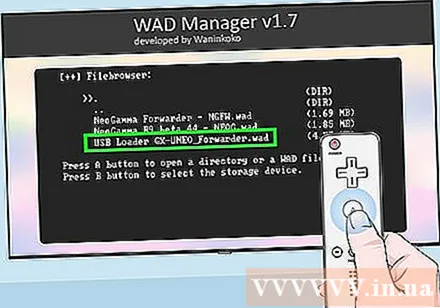
Install WAD Manager. Press the button A when asked to proceed with the installation.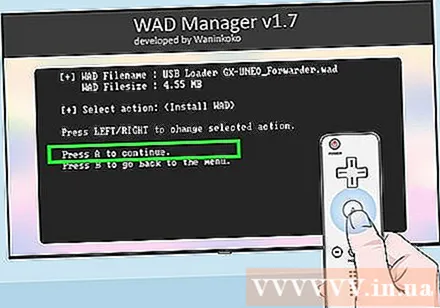
Press any key when prompted and then press the Home button ⌂. The Wii will reboot. Once the Wii has restarted, you will be back to the second page on the Homebrew channel. advertisement
Part 7 of 7: Launching game on USB drive
Press the Home button ⌂ located on the remote control again. The Home home page menu will open.
Select an action Shutdown (Shutdown) is at the bottom of the menu. The Wii will power off.
- It's best to wait until the Wii has completely powered off before proceeding.
Plug the flash drive into your Wii. The flash drive will fit into the USB port on the back of the Wii.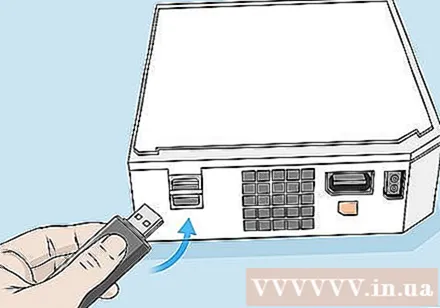
Turn on the Wii. Press the machine's power button to open it.
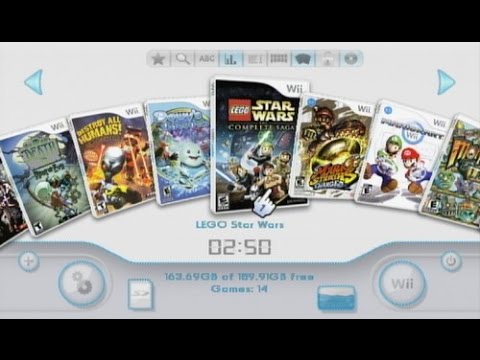
Press A when prompted. The Wii home menu will appear with options USB Loader GX to the right of the Homebrew channel.
Select item USB Loader GX on the right side of the page.
Choose Start to load the USB Loader GX program.
- This will take a few minutes, especially the first time you launch the program.
- If the message "Waiting for your slow USB" appears, try inserting the flash drive again into the other USB port on the back of the Wii.
Insert the game disc. Insert the game disc you want to back up to a USB flash drive to your Wii.
Choose Install when asked. The program will start reading the contents on the disc.
Choose OK when prompted. The Wii will begin to burn the disc to the USB.
- This process will take a while, and the progress bar may pause for a while. Meanwhile, you are not reboot the Wii or remove the USB.
Choose OK when prompted. Data logging is complete.
- You can now remove the game disc from your Wii player.
Gaming. Click on the game title and select a spinning disc icon in the middle of the window. The game will start to launch. advertisement
Advice
- You may want to consider using an external hard drive for more storage.
- Wii games usually have a capacity of about 2 GB / game, you should keep this in mind when choosing to buy USB.
- On the USB Loader GX main page, you can press the button 1 to update the cover art for each game on the flash drive.
Warning
- Do not turn off your Wii device during the installation process of any of the content in this article.
- Copying copyrighted games is a violation of Nintendo's terms of use and the law in general.
")


