Author:
Monica Porter
Date Of Creation:
17 March 2021
Update Date:
1 July 2024
Content
Heat control is a very important part of building and maintaining computers. Excessive heat can be the death penalty for sensitive components, especially when overclocking. And to cool your computer, first of all, you need to know how to apply thermal paste.
Steps
Part 1 of 3: Surface preparation
Choose a good heat dissipation glue. Most basic glues contain silicon and zinc oxide. More expensive products have a thermal conductive component such as silver or ceramic. Although the thermal paste containing silver or ceramic is more effective at transferring heat, the basic thermal glue is sufficient to fulfill the requirement.
- If you plan to overclock your computer, use a thermal paste that is silver, copper or gold. They are the best conductive metals that are widely used in heat dissipation products.

Clean CPU and heatsink surfaces. Use a cotton swab or cotton swab soaked in isopropyl alcohol to gently wipe the surface of the CPU and radiator. The higher the alcohol concentration, the better. 70% is good enough but 90% is better (if you can earn it).
Smooth the surface of the radiator and microprocessor if necessary. Ideally, these two contact faces are completely flat and really do not require thermal grease. If the base of the radiator is rough, you can wet it with a fine sandpaper to handle it. Unless getting optimum cooling performance is your goal, you don't have to take this step.
- Heat sink adhesive is designed to fill gaps and defects on contact surfaces. Because modern manufacturing techniques cannot create perfect surfaces, thermal glue has always been an indispensable part.
Part 2 of 3: Apply thermal paste to the round base radiator

Place a small drop of thermal paste on the center of the radiator base. A drop of glue should be smaller than a grain of rice. If someone says that a pea-sized amount is needed, that's too much and the thermal paste will stick to the motherboard.- With round base heatsinks, it is not necessary to spread the thermal paste evenly across the contact surface.
Attach the heatsink to the microprocessor. Balance the radiator straight into the processor. At this time, the heat dissipation glue will spread itself all over the contact surface, creating a thin and even layer of glue, filling all gaps and leaving no residue on the surfaces.- When heat is encountered, the glue spreads thinner and wider towards the edge. Therefore, using a small amount of thermal grease is very important because of its efficiency.
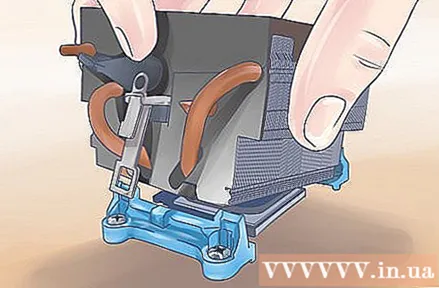
Avoid removing the radiator after it has been installed. It is difficult to check whether the thermal paste has been applied correctly. By doing so, the seal that was just created at the time of the radiator installation will be broken and you will have to redo the whole process, first wiping off the old thermal paste and then applying the new one.
Reattach the fan to the motherboard. The CPU fan wires need to be plugged into the slot for the CPU fan because they usually have the PWM function, which allows the computer to automatically adjust fan speed without changing voltage.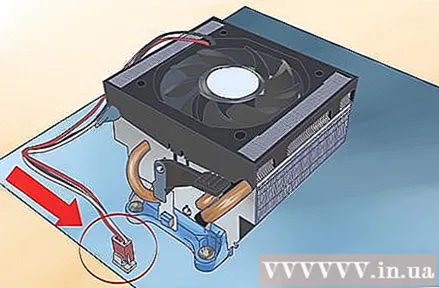
Reboot the system. Check if the fan is spinning. Enter the BIOS by pressing F1 or Del while the computer is in the power-on or POST self-test. Check if the temperature is normal: the CPU should be below 40 degrees Celsius while running, and so should the graphics processor. advertisement
Part 3 of 3: Apply thermal paste to the square base radiator
Glue the base of the radiator. With the square base radiator, it will be a little more difficult to apply glue because if you just drop the glue on the surface and press the base down, the glue will not cover the entire contact surface. The methods being applied are quite diverse. We'll cover only a few of the most popular here: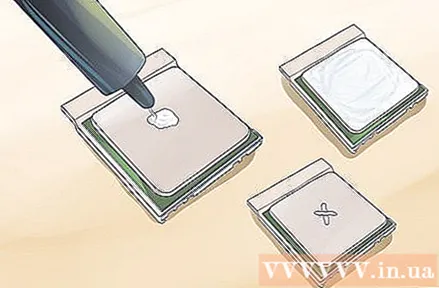
- Straight-line method - Put two parallel thin strips of thermal paste onto the base of the radiator. The distance between them should be one-third of the processor's width. The bands themselves should be approximately one-third of the processor's width.
- Cross method - This method is quite similar to the method above, only differs in that the intersecting bands form an "X" shape instead of parallel. The lengths and thickness of the strips are constant.
- Wide spread method - Most popular and effective, this method takes a little more effort. Here, we will put a small amount of thermal paste on the base of the radiator. Put on a plastic finger glove or plastic bag and spread the glue evenly over the surface with your fingers. Don't forget to spread the entire adhesive surface to the microprocessor and make sure the adhesive layer is not too thick. In most cases, the glue should be just enough to cover the metal underneath.
Install a radiator. With the first two methods, you need to mount it straight down evenly to ensure that the glue spreads to the entire surface. With the following method, you MUST tilt the radiator slightly when it is installed to prevent the formation of air bubbles. That is because normally, the thermal paste is spread too thin, not preventing the formation of air bubbles when pressed down.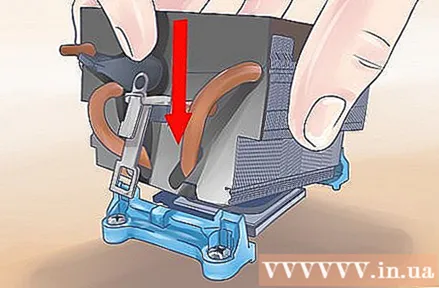
Reattach the fan to the motherboard. The CPU fan wire should be plugged into the CPU fan slot because it usually has a PWM function, which allows the computer to automatically adjust fan speed without changing the voltage.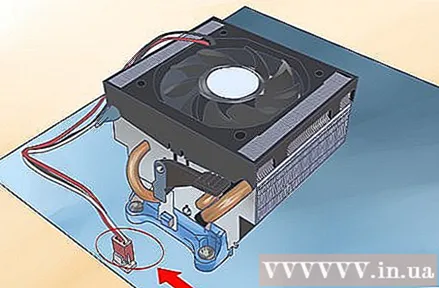
Reboot the system. Check if the fan is rotating. Enter BIOS by pressing F1 or Del during POST. Check if the temperature is normal: the CPU should be lower than 40 degrees Celsius while running, so should the graphics processor. advertisement
Advice
- Use only a thin layer of thermal grease, the thick glue will slow down the heat transfer. Heat-sink adhesive is used to fill the gap between the chip and the radiator as well as tiny mounds on their surface.
- If you are using rubber gloves to spread the heat sinks, make sure they are powder free. When the powder adheres to the thermal paste, the radiator will be severely degraded.
- Do not touch surfaces with bare hands after cleaning with alcohol. There is oil on the finger and it will damage the contact surface as well as the radiator.
- Don't forget that often the thermal paste has something called a "run time". During this time, the glue becomes more effective and reduces the temperature continuously. Sometimes this time is very short but often it can be up to 200 hours.
Warning
- Using oil-based cleaners to clean the contact surface can have a bad impact on the radiator's performance. They soon and permanently fill the void that should have been filled with thermal paste, not letting the thermal paste do its job.When you clean the surface with oil-based detergent and then apply thermal paste on top, the radiator never works properly.


