Author:
Laura McKinney
Date Of Creation:
6 August 2021
Update Date:
1 July 2024

Content


Part 2 of 3: Start knitting

Turn the wool from the bottom up. Starting with your index finger, you will hold the circle below and flip up (top ring) and pull away from your finger. When done, the circle below will be behind the index finger.
Repeat with the next three fingers. Flip the circle underneath up and pull away from your middle, ring, and little finger. At the end, only one loop of wool remains on each finger.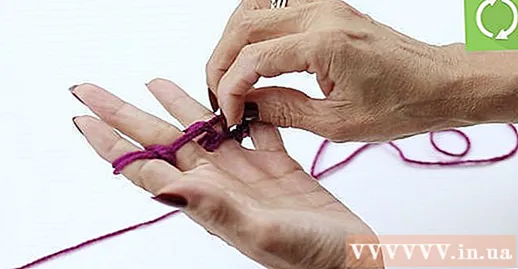
Reposition the wool rings. Use your dominant hand (hands not wrapped in wool) press the wool rings down so that they are closer to the fingers and not easily slip out.

Continue to wrap wool. Take the tip of the wool (sandwiched between the index and middle fingers) and wrap it on the middle finger, loop behind the ring finger, and wrap it around the little finger. Continue wrapping in the opposite direction by wrapping it on the ring finger, behind the middle finger, and wrapping it around the index finger. After finishing, each finger has two rings of wool.
Repeat the bottom ring up. As you did above, you will start with your index finger, turn the bottom ring up (top ring) and pull away from your finger. Repeat with the other three fingers, until only one ring remains on each finger.

Reposition the wool rings. Continue to use your dominant hand (free hand) gently push the wool rings downwards so that they are closer to the knuckles and leave space for the wool to continue.
Repeat the steps above (wrap wool, flip the loops and reposition) as long as you want. A wool string will form on the back of your hand so you can easily measure the length of your product. Don't be afraid to gently pull the string tight when knitting. advertisement
Part 3 of 3: Finished
End index finger. You will pull the other wool ring from your index finger and nest it in the middle finger. Next, turn the wool ring under the middle finger behind your hand.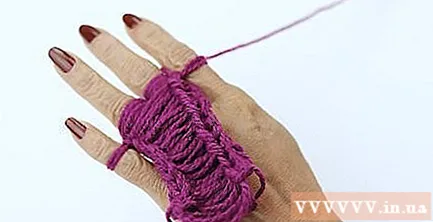
End the middle finger. Pull the other wool ring from the middle finger and insert the ring finger. Next, turn the wool ring under the ring finger behind your hand.
End ring finger. Pull the other wool ring from the ring finger and insert it into the little finger. Next, turn the wool ring under the little finger behind your hand. At the end, only one ring of wool will remain on the little finger.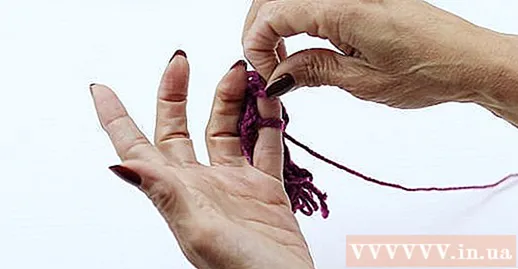
Pull the wool ring away from the little finger. Be careful not to tighten the circle when you pull it out of your hand.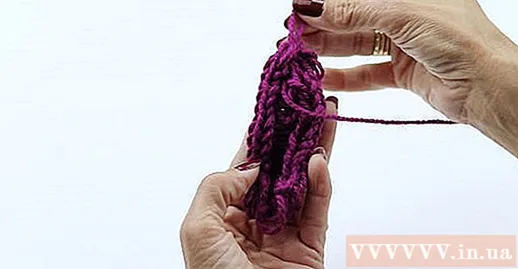
Cut the wool, leaving a few centimeters from the loop. Remember to leave a paragraph, do not cut it.
Pull the end of the wool yarn just cut through the circle. You can tug a few times so that the circle tightens around the yarn.
Tightly pull on the other end of the wool (wool end). Go back to find the wool at the beginning and pull it tight. If you want, you can tie a knot at this end to be sure.
End. If you want the rope to form a circle (for bracelets, headbands, etc.), you can tie the ends together. If not, then this step is done. advertisement
Advice
- Using a large and soft wool yarn is most suitable. If a small wool is used, there will be large holes on the product because the "knitting needles" you use - the fingers - are quite large in size.
- Wrap the yarn around your finger slightly loosely to make it easier to turn the loops up.
- If you want to knit thinner, faster string, you can knit the same way, but using only three fingers, two fingers or even one finger. This article teaches you how to do more in detail.
- Be creative! You can use your fingers to knit a lot of things.
- You can pull the ends of the yarn to tighten the string after every few stitches.
- When knitting up to step four, you do not need to wrap your fingers alternately, pull the yarn over the palm of your hand and put it on the little finger, then turn the wool rings up as usual. This will save you a bit of time and will also help you look less cluttered.
- It is better to sit and knit for a while, otherwise it will be easy to lose the beat and not know where you are knitting. If you want to take a break while knitting, you can insert a pencil into the wool rings on your fingers to mark the position.
Warning
- Remember to loosen your hands. Pulling yarn through fingers too tightly will affect blood circulation.
- If you see a loop on a wool string that is too loose, don't cut it. If this ring is close to the knitting area, remove the wool and knit.
- If you have pain when knitting for a long time, remember to take frequent breaks.
What you need
- Wool
- Drag
- The fingers


