Author:
Tamara Smith
Date Of Creation:
24 January 2021
Update Date:
1 July 2024

Content
- To step
- Method 1 of 3: Easy salt crystals
- Method 2 of 3: Grow a single large crystal
- Method 3 of 3: Variations
- Tips
- Warnings
- Necessities
Crystals can look fantastic when they appear out of nowhere in a glass of water. In reality they are formed from substances already dissolved in the water. Experiment with salt crystals and learn how it works at the same time.
To step
Method 1 of 3: Easy salt crystals
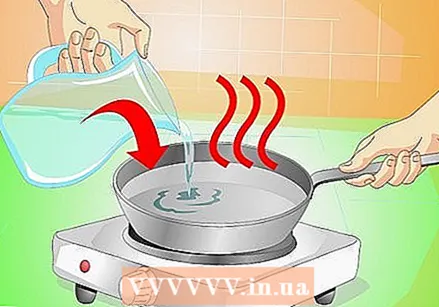 Heat a pan with water. You only need a little bit of water, about 120 ml. Heat the water until it just starts to bubble.
 - Children should ask an adult to help with the hot water.
- Distilled water will give the best results, but tap water should work too.
 Choose your salt. There are many types of salt. All of them will form a different shape of crystal. Try these types and see what happens:
 - Table salt takes a few days to form. Iodine salt doesn't work very well, but it can still form crystals.
- Epsom salt makes smaller, needle-like crystals, but it grows faster than table salt. You can get it at the drugstore or pharmacy.
- Alum grows quickly and sometimes makes visible crystals within a few hours. You can find alum among the herbs.
 Stir in as much salt as possible. Remove the pan from the heat. Pour in about 60-120 ml of your salt and stir until the water runs clear. If you don't see a single grain of salt, stir in another spoonful of salt. Keep adding more salt until you see grains of salt that won't dissolve when you stir.
 - You just got one supersaturated solution made. This means that the solution (the moisture) contains more salt than water can usually hold.
 Pour the water into a clean jar. Carefully pour the hot water into a pot or other transparent, heat-resistant container. It must be as clean as possible, so that nothing can disturb the growth of crystals.
 - Pour slowly and stop before the salt grains enter the pot. If there are undissolved grains of salt in the jar, the crystals may grow on those grains instead of on your string.
 Add food coloring (optional). A few drops of food coloring will change the color of your crystals. It can also make the crystals smaller or more clumpy, but usually not much.
 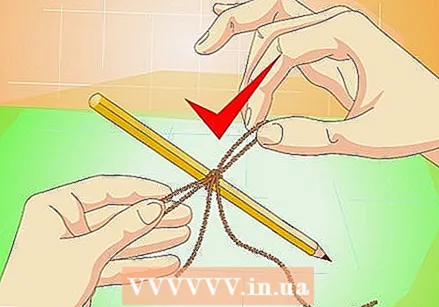 Tie a string around a pencil. The pencil should be long enough to rest over the top of the pot. You can also use a popsicle stick or small stick instead.
 - The small grooves and rough edges of the rope provide a place for the salt to hold onto and grow. A fishing line does not work because it is too smooth.
 Cut the rope to the correct length so that it can dangle in the water. Crystals will only form on the part of the rope that is under water. Cut it short enough to make sure it doesn't touch the bottom or the crystals might get lumpy and small.
  Place the pencil on top of the mason jar. The rope should hang in the pot all the way to the water. If the pencil won't lie still, tape it to the jar with masking tape.
 - Try to keep the string from touching the side of the pot. This allows smaller, more lumpy crystals to form on the side.
 Put the pot in a safe place. Place the pot somewhere where animals and small children cannot reach. Here are some tips for choosing a place:
 - To quickly form a lump of crystals, you can place the pot in the sun and / or add a fan to blow it on the lowest setting. These crystals may stop growing when they are relatively small.
- If you want a large crystal instead of a clump of crystals, keep the jar in a cool, shaded place. Place it on a piece of styrofoam or similar material to absorb vibrations. (You still have a good chance of it becoming a lump, but there should be larger, individual crystals in between.)
- Epsom salt (and a few lesser-known salts) grows faster in the refrigerator than in the sun.
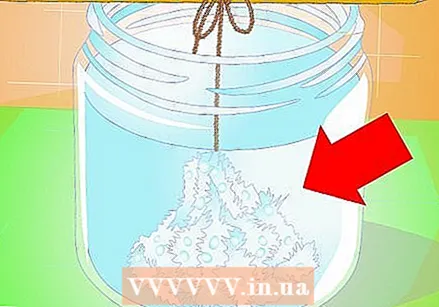 Wait for crystals to form. Check regularly to see if salt crystals have formed on the string. Epsom salt or alum crystals can start to grow within a few hours, but it can also take a few days. Table salt usually takes a day or two to start, sometimes up to a week. Once you see small crystals on the rope, they will usually grow bigger and bigger over the course of a few weeks.
 - When the water cools, it contains much more salt than cold water can usually absorb. This makes it unstable, and the dissolved salt will stick to the rope when it gets a little push. As the water evaporates, the salt remains, making it even more unstable and encouraging the crystal to grow.
Method 2 of 3: Grow a single large crystal
 Grow a pot full of salt crystals. Follow the instructions for the easy method, but use distilled water and don't use string or pencil. Just leave the salt in the pot. Within a few days, a layer of small crystals will form on the bottom of the jar.
 - Use a flat, shallow wide container instead of a pot. This makes it easy to get a single crystal that is not joined with others.
- Epsom salt is not suitable for this method. Try alum or table salt instead, or see variations below for more ideas.
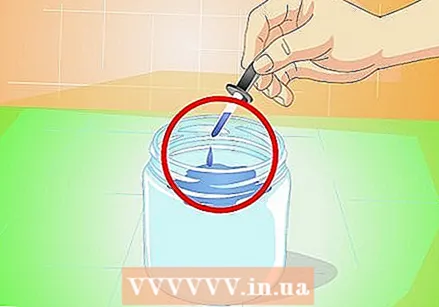
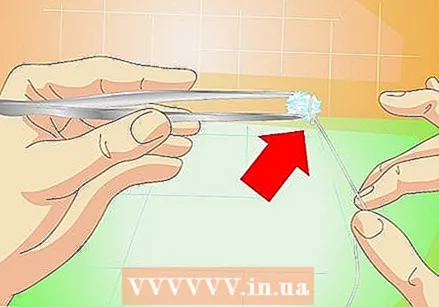
 Choose a nutrient crystal. Once the crystals are ready, drain the moisture and look at the crystals. Pick them up with tweezers and examine them. Choose a nutrient crystal that will form the core of your new, larger crystal. Look for crystals that match this description (from most to least important):
 - Choose a solitary crystal, not in contact with other crystals.
- Choose a crystal with flat, even surfaces and right angles.
- Choose a large crystal (at least the size of a pea).
- It would be best to find some crystals and set them all up in a separate jar as described below. Crystals often dissolve or don't grow, so having backup crystals is a good idea.
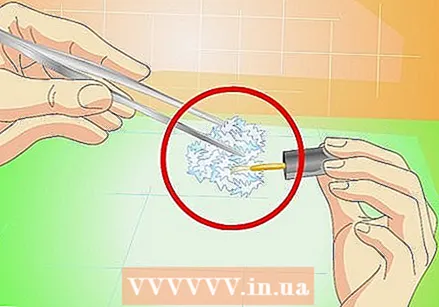
 Attach fishing line or nylon line to it. Stick them on one side of the crystal with super glue, or tie it around the crystal.
 - Do not use string or coarse wire. You need a smooth surface so that the crystals cannot grow on it instead of the crystal.
 Create a new solution. Use distilled water and the same type of salt. This time only heat the water slightly above room temperature. The goal is to make a perfectly saturated solution.An undersaturated solution can dissolve your crystal, while a supersaturated solution will cover the crystal with grains of salt and grow a lumpy mass.
 - There are several faster ways to solve this problem, but they are more difficult and may require some knowledge of chemistry.
 Place the crystal and solution in a clean jar. Clean a jar, then rinse it thoroughly with distilled water. Pour the new solution into this jar, then hang the crystal in the center. Save it like this:
 - Place the pot in a cool, dark place, such as a low cupboard.
- Hold the jar on a piece of styrofoam or other material that absorbs vibration.
- Place a coffee filter, paper, or thin cloth over the pot to keep dust out. Do not use airtight seal.
 Check the crystal regularly. The crystal will grow much slower this time, as some of the water needs to evaporate before the salt grains are forced to bond with the crystal. If everything goes as it should, the crystal will keep the same shape as it grows. You can take it out whenever you want, but it will most likely keep growing for a few more weeks.
 - Pour the solution through a coffee filter about every two weeks to remove dirt particles.
- This is a difficult process. Even experienced crystal growers sometimes find that their crystal dissolves or becomes a lump. If you have a perfect seed crystal, you may want to test a poorer crystal first to make sure the solution is good.
 When finished, protect the crystal with nail polish. Once your crystal is large enough, remove it from the solution and dry it. Spread a coat of clear nail polish over all sides to keep it from falling apart over time.
Method 3 of 3: Variations
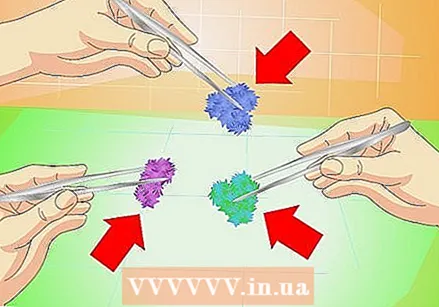 Try different substances. There are many substances that will crystallize using the techniques above. Many of these can be purchased at chemical supply stores. Here are some options:
 - Copper sulfate for blue crystals
- Chrome alum for purple crystals
- Copper acetate monohydrate for dark, blue-green crystals
- Warning. These chemicals can be harmful if inhaled, swallowed or if it comes in contact with your bare hands. Read the safety information on the label and do not let children work with it unsupervised.
 Make a snowflake. Tie a number of pipe cleaners or coarse threads together in the shape of a star. Lower it into your saline solution and watch tiny crystals cover the star and turn it into a sparkling snowflake.
  Create a crystal garden. Instead of making a single crystal, you can of course also make a cup full of crystals. To make saline solution, pour it over cut sponges or charcoal briquettes at the bottom of the pot. Stir in a little vinegar and watch crystal formations grow overnight.
 - Pour enough to saturate the sponges without submerging them.
- To make different colored crystals, add a drop of food coloring to each sponge.
Tips
- Dust in the water can cause smaller or more lumpy crystals. Cover the jar with gauze or paper towel to prevent it from falling into it. These materials will still allow water to evaporate, accelerating crystal growth.
Warnings
- Wash your hands after working with Epsom salt or alum. They are generally safe, but can irritate the skin. Don't eat them.
Necessities
- Pot
- Water, preferably distilled or deionized water
- Table salt, Epsom salt or alum
- Rope
- Pencil
- Food coloring (optional)
- Pan or saucepan
- Stirring spoon


