Author:
Tamara Smith
Date Of Creation:
21 January 2021
Update Date:
3 July 2024

Content
- To step
- Part 1 of 3: Drying on the stem
- Part 2 of 3: Cut the flowers and dry them loose
- Part 3 of 3: Harvesting and storing the seeds
- Necessities
Sunflower seeds are easy to harvest, but you will have to wait for the flower to dry out. You can let the sunflower dry on its stem outside or you can cut it off and dry it indoors. But either way, you have to protect the seeds while they dry out. Here you will find everything you need to know about harvesting sunflower seeds.
To step
Part 1 of 3: Drying on the stem
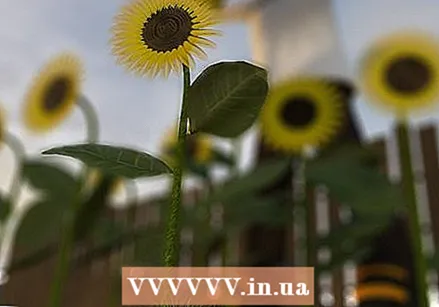
 Wait for the sunflower to wither. The sunflower is ready to be harvested when the flower turns brown. However, if there is a lot of rain, the flowers may start to mold. If this is the case, it is best to cut the flower and let it dry inside a shed or greenhouse. You should start preparing for the drying process when the back of the flower starts to turn yellow to yellow-brown.
 - In order to harvest the seeds properly, the flower must be completely dry. Otherwise the seeds will not separate from the flower. If you just let the flower stand, it should be dry enough a few days after it started to wither.
- It's easier to let sunflowers dry on the stem when the weather is dry and sunny. If you live in a more humid climate, it may be easy to cut them off and let them dry indoors.
- At least half of the yellow petals should have fallen off before you start preparing the flower for harvest. The flower head should also have started to hang. It may look like the flower is dead, but if there are still seeds in it, this is just the natural and way of drying out.
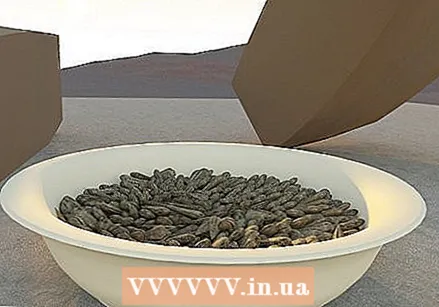
- Take a good look at the seeds. Even if they are still in the flower they should stick out. The seeds should also be hard and they should either have their familiar black and white appearance or they could be completely black as well. That can differ per species.
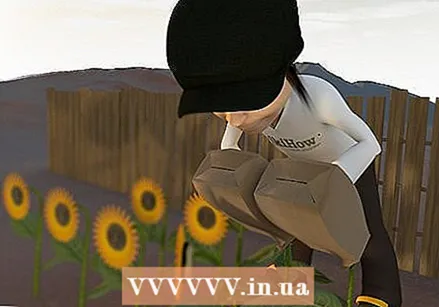
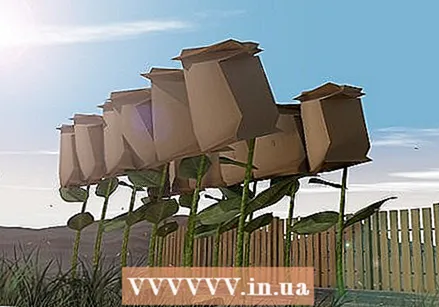 Tie a paper bag over the flower. Wrap the flour in a paper bag and tie the bag with twine or twine so that it does not come off easily.
 - You can also use a piece of fabric. Make sure that the fabric is very light and breathable, and never use a plastic bag. Plastic does not let air through, so the seeds become moist. If too much moisture gets to the seeds, they can rot or mold.
- The bag ensures that birds and squirrels and other animals do not eat the sunflower seeds before you can harvest them. It also keeps the seeds from falling to the ground and getting lost.
 Change the bag as needed. Carefully replace the bag with a new one if it tears or gets wet.
 - If it starts to rain, you can temporarily put a plastic bag over the paper bag so that it does not get wet. Do this carefully. Do not tie the plastic bag to the flower, and remove it once the rain has passed so that your seeds don't go moldy.
- Change the paper bag as soon as it starts to get wet. A wet paper bag tears more easily and the seeds are more likely to grow mold if they are in a wet paper bag.
- Collect all the seeds that fall off as you change the bags. See if the seeds are damaged and, if they are good, put them in an airtight container or container until you are ready to harvest the other seeds as well.
 Cut the flowers. Once the back of the flower has turned brown, cut the flower off and the preparation for harvest can begin.
 - Leave about 12 inches of the stem attached to the flower.
- Make sure the paper bag is tied securely. If it comes loose while you cut the flower, you can lose a lot of seeds.
Part 2 of 3: Cut the flowers and dry them loose
 Prepare the yellowed sunflowers for drying. Sunflowers are ready to be dried as soon as the back of the flower has turned dark yellow to yellow-brown.
 - The flower must be dried before you can harvest the seeds. Sunflower seeds are very easy to harvest when they are dry but when they are still moist it is almost impossible.
- Most of the yellow petals should have fallen off the flower by now. The flower head itself may also have started to hang.
- The seeds should be hard and should be either black and white or all black. The color of the seeds depends on which type of sunflower it is.
 Place a paper bag over the flour. Secure the bag with string or twine.
 - Do not use a plastic bag. Plastic does not let air through, so if you put the flower in a plastic bag, moisture can build up in the bag. If it gets moist, the seeds can rot or mold and you can no longer eat them.
- If you cannot get hold of a paper bag, a different type of fabric can also be used. As long as it is breathable fabric.
- Since you've taken the flower off the stem and let it dry indoors, you don't have to worry about animals wanting to eat your seeds. The bag is still needed so you don't lose any seeds.
 Cut the flower. Remove the flower from the stem. You can use a sharp knife or scissors.
 - Leave about 12 inches of the stem attached to the flower.
- Be careful. Make sure to leave the paper bag in place while you trim the flowers.
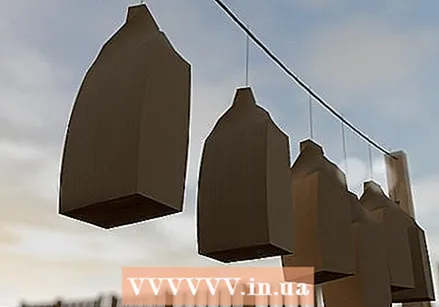 Hang the flower upside down from the stem. Let the sunflower dry well in a warm room.
 - Use a piece of string or yarn to hang the sunflower. Tie that rope to the stem just below the flower and hang the other end from a hook, for example. The sunflower should dry with the stem up and the flower down.
- Dry the sunflowers in a warm dry room. Just make sure there is enough ventilation so that it doesn't get too humid. Also make sure that the flowers hang high enough so that they cannot be nibbled by mice, for example.
 Check the sunflowers daily. Carefully open the bags every day and collect any seeds that may have already fallen off.
 - Store the seeds in an airtight container or container until the rest of your seeds are ready to be harvested.
 Remove the bags from the flowers when they have finished drying. The flowers have finished drying when the back of the flower has turned dark brown and very dry.
 - Drying takes about 4 days on average. The conditions in which you dry the flower and when you cut the flower can cause it to take a little longer to dry.
- Do not remove the bag until you are ready to harvest the seeds. If you do this, seeds can fall off and you can lose them.
Part 3 of 3: Harvesting and storing the seeds
 Place the sunflower on a clean, flat surface. Place the sunflower on a table or counter before removing the paper bag.
 - Remove the bag from the flour. If there are loose seeds in the bag, keep them in a container, for example.
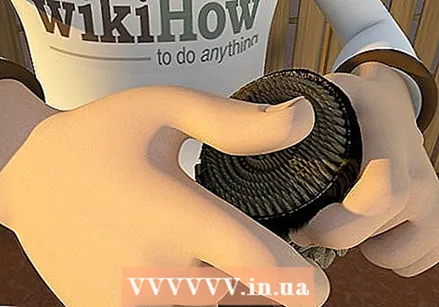 Rub the seeds in the flower with your hand. All you have to do to get the seeds out of the flower is to rub them with your hand.
 - If you are harvesting more than one sunflower you can also remove the seeds by rubbing two flowers together.
- Keep rubbing until all the seeds have fallen out.
 Rinse the seeds. Place all your seeds in a colander and rinse well under running cold water.
 - Let the seeds drain well before removing them from the colander.
- Rinsing the seeds will wash off most of the dirt and any bacteria that may be on them.
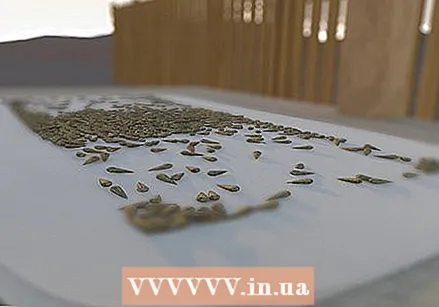 Dry the seeds. Spread the seeds on a thick towel and leave them there for a few hours.
 - You can also let the seeds dry on a few layers of kitchen paper instead of a towel. In any case, make sure that all seeds have enough space so that they can dry completely.
- While you are spreading the seeds on the towel or kitchen paper, immediately notice if there is any debris between them and immediately throw it away along with any broken seeds you see.
- Make sure the seeds are completely dry before moving on to the next step.
 If you want, you can salt and roast the seeds. If you plan to eat the seeds quickly, you can salt and roast them immediately.
 - Soak the seeds overnight in a mixture of 2 liters of water and between 60 and 125 milliliters of salt.
- If you want to save time, you can also boil the seeds in this solution for 2 hours.
- Drain the seeds on a layer of absorbent kitchen paper.
- Spread the seeds well on an oven tray lined with baking paper. Roast the seeds for about 30 to 40 minutes or until golden brown in an oven at 150 degrees Celsius. Occasionally stir the seeds while toasting.
- Let the seeds cool completely.
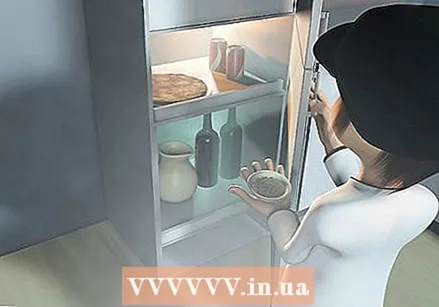 Store the seeds in an airtight container or container. Place the seeds, roasted or unroasted, in an airtight container or container and store in the refrigerator or freezer.
 - Roasted seeds are best stored in the refrigerator and they will keep for a few weeks.
- If you don't roast them, the seeds will keep in the fridge or freezer for a few months. They have a longer shelf life in the freezer.
Necessities
- Paper bag or breathable fabric
- Rope or yarn
- Sharp knife or scissors
- Colander
- Kitchen paper or thick towel
- A large pan
- Airtight box or tray


