Author:
John Pratt
Date Of Creation:
12 April 2021
Update Date:
1 July 2024

Content
- To step
- Method 1 of 3: Paraffin waxing your eyebrows
- Method 3 of 3: Wax your eyebrows with a professional resin kit
- Tips
- Warnings
Waxing your eyebrows yourself can be a bit intimidating at first. But knowledge is power and if you know what you are doing and you follow the safety precautions, then you can do it just as well as, if not better than, someone at a salon can do. Not to mention the small fortune you save yourself in doing so! Before you start waxing, make sure you determine the ideal shape for your eyebrows.
To step
Method 1 of 3: Paraffin waxing your eyebrows
 Prepare the following items. Two tablespoons of brown sugar, one teaspoon of honey, one teaspoon of water, a butter knife or popsicle stick, and fabric strips to pull the mixture off.
  Combine the brown sugar, honey and water in a microwave safe container. You can also heat it up on the stove if you don't have a microwave.
  Heat the mixture until bubbles form and it turns brown. However, you have to find the right balance. If you don't heat it long enough, it will become too soft and sticky. If you heat it for too long, it will turn into hard candy. You may need to practice a few times until you get it right. In general, 30 to 35 seconds is okay.
 - If you use the stove, it will take longer to heat up.
 Let it cool down. This part is also important. You won't know if you've been heating it for too long until after it cools down. If it is too thick, dilute it with a little water.
  Apply the sugar resin with the stick or flat knife between or under your eyebrows. For safety reasons, only do one eyebrow at a time. And if you feel you are shaking, stop and have someone else apply it for you. Do not forget that you work in a small place.
 - Be careful not to accidentally get resin on the freshly finished area! Should this happen, it's not the end of the world either - just dab on a little baby oil and take it off.
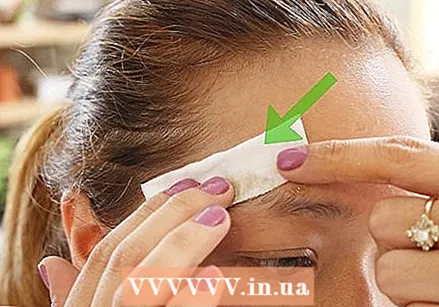 Place a fabric strip on the eyebrow. Press it and iron in the same direction as the hair growth. Let it sit for a few seconds. Then pull the fabric off in the opposite direction of the hair growth. Know in advance that sugar resin is not as painful as paraffin can sometimes be!
  Apply vitamin E cream or another moisturizing product to the waxed areas. Don't skip this step as it will reduce swelling and redness in minutes. Wait a few minutes and then wipe it off.
  Repeat the same steps to do the other eyebrow. Take your time. Of course you want to make sure that it matches the other eyebrow as perfectly as possible. You could end up with two different eyebrow shapes otherwise! Fill in any empty spots with pencil or powder; epilate any remaining hairs.
Method 3 of 3: Wax your eyebrows with a professional resin kit
 Check the resin kit to make sure it has everything you need. Most resin kits include a pre-resin cleaner, a resin applicator, paraffin wax, resin warmer, and fleece or muslin strips. In addition to these items, it's also good to have baby powder, eyebrow tweezers, scissors and baby oil, which is great for removing wax should it get on anything other than where you want it!
  Put your hair back. Shape and trim your eyebrows. If your eyebrows are shorter than half an inch, they probably aren't long enough to wax.
  Wash both brows with the pre-wax cleaner. Wipe the cleaner with a damp washcloth. Also put a little baby powder in the palm of your hand, squeeze a little and sprinkle some on both eyebrows. This absorbs any excess moisture, so that the strip and the resin can adhere well.
 - Draw your eyebrow with powder or with an eyebrow pencil. You need to highlight the desired eyebrow shape to make waxing easier. You can use a makeup brush to highlight the shape with powder, or you can use an eyebrow pencil. Just color in the shape of your eyebrow.
 Heat the resin for the time indicated in the directions. If the kit doesn't come with a heating element, you can heat it up in the microwave or in a pan on the stove.
  Start waxing your first eyebrow. For obvious safety reasons, do only one eyebrow wax at first so that you can focus on what you are doing at the time. If you feel you are shaking when doing it on your own, stop and have someone else apply it for you. Apply the wax with the applicator in the same direction as the hair growth. Make sure the whole area is covered with it; however, it is also not necessary to apply it too thickly.
 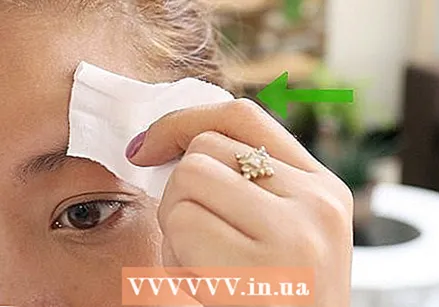 Cover the area with one of the supplied strips. Leave an extra set aside to aid in removal. Rub your fingers across the strip in the same direction as the hair. Let it sit for a few minutes.
  Remove the strip with a single pull in the opposite direction to the hair growth. Don't pull it up, though. Just pull it straight out. If some hair remains, replace the strip and pull again. Be prepared that if you are not used to the feeling of plucking it can feel a little painful.
 - To combat redness, apply an emollient and moisturizing cream to the eyebrow. Aloe vera works great for this. Wipe it off after a few minutes.
- Epilate any unnecessary hair. If there is any unnecessary hair, remove it with eyebrow tweezers. If there is some resin left, remove it with baby oil. Follow the same steps to wax the other eyebrow.
Tips
- If you think it may be painful, you can buy an anesthetic spray to apply it to the area before you begin.
- Actually, you should only wax between or under your eyebrows, except in rare cases where you have a low forehead with excess forehead hair.
Warnings
- For safety reasons, you should perform the procedure in front of a large mirror and not with a small hand mirror.
- Going over the same area more than twice can be painful and also damage the skin. If after two waxes you see that there are some hairs left, use eyebrow tweezers to remove them.
- Pull the strip in the opposite direction of the hair growth. This may be more painful, but it will guarantee that virtually all hair will be removed. Epilate the remaining hairs.


