Content
- To step
- Method 1 of 3: Thoroughly clean your pantry
- Method 2 of 3: Preventing another plague
- Method 3 of 3: Check the pantry for signs of an infestation
- Tips
- Necessities
Flour moths are also called Indian flour moths. It is no fun finding out that you have a flour moth infestation in your house. Fortunately, there are easy ways you can get flour moths out of your home and dry foods. By throwing out contaminated food, thoroughly cleaning the pantry and taking measures to prevent a new infestation, you will no longer be bothered by these pests.
To step
Method 1 of 3: Thoroughly clean your pantry
 Get everything out of your pantry. In order to be able to thoroughly clean the pantry, it must be completely empty. Throwing away the contaminated food will not be enough to eradicate these pests.
 - This applies to all opened and unopened packaging with food, pottery and any cooking utensils that you may keep in the cupboard. All items on top of a shelf will have to be removed from the closet before you can start cleaning.
 Discard affected and contaminated food. Discard any food that shows obvious signs of contamination. You do this with food that contains flour moths, as well as all other opened packages with dry foods. Flour moth eggs are difficult to find in dry foods, so throw away opened containers and buy new food.
 - If you are hesitant to throw away food that you don't see adult flour moths in, you can put the dry food in the freezer for a week. The low temperature will kill all eggs that you cannot see with the naked eye. After a week, you pass all the food through a sieve, after which you can eat it again.
- If you see holes in unopened food wrappers that you didn't make yourself, chances are flour moths are the culprit.
 Remove all closet paper and clean the areas underneath. Remove all the old closet paper and vacuum the spots underneath. Replace the old closet paper with new closet paper, if you wish.
 - If you're not putting new closet paper in your closet, wipe the old closet paper with a damp cloth and disinfectant intended for kitchen use.
 Vacuum the entire pantry. Use a vacuum cleaner with a hose and an angled, angled attachment to vacuum the walls, baseboards, and corners of the pantry or kitchen cupboard. This will remove the rest of the moths and cocoons.
 - Concentrate on areas with webs, larvae, and adult moths, but vacuum the entire closet. Also vacuum all iron parts, wire shelves and holes in the closet.
 Dispose of garbage bags with moths, eggs and contaminated food. Remove the vacuum cleaner bag and all trash bags with contaminated food from the kitchen immediately and take them outside. Try not to leave the trash bags and vacuum cleaner bag in your house longer than absolutely necessary.
 - Put the bags in your garbage container or, if necessary, put them in a place that does not share a wall with your house.
 Scrub the pantry with soap and hot water. Use a tea towel or sponge to clean the walls, floor, doors, and shelves of the pantry or kitchen cupboard. Scrub any surfaces in the closet that you can reach.
 - Make sure to clean the hinges and door frame as well, as these are the areas where larvae most often hide.
- Also scrub the areas under the shelves in the cupboard.
 Clean the pantry with vinegar, warm water, and peppermint oil. Mix 1 part vinegar with 1 part warm water and add a few drops of peppermint oil. Clean the entire pantry with this mixture.
 - Flour moths hate peppermint oil, so this works to ward off new flour moths.
"You can buy prepackaged wet wipes with peppermint oil on the Internet that are great for this job."
 Wash all storage boxes and pots from the pantry with hot, soapy water. If you have plastic storage boxes or glass jars in your pantry, empty them and wash them in the dishwasher or thoroughly clean them by hand with hot water and dish soap. Make sure to use a dish brush to get them completely clean.
 - This is an important step if there were flour moths in the storage boxes and jars, but even if they were not, it is a good idea to temporarily empty and wash the boxes and jars. Doing this also allows you to check the content more closely for signs of contamination.
 Thoroughly dry the pantry and all cleaned boxes and jars. Before putting everything back in the pantry, dry the inside of the pantry with clean tea towels or paper towels. Make sure that no surface is still damp.
 - Make sure to dry the pantry walls and door as well.
Method 2 of 3: Preventing another plague
 Place bay leaves in the corners of your pantry or kitchen cupboard. You can also stick them on the walls and at the bottom of your shelves with tape. You can also put a bay leaf in containers with rice, flour and other dry foods.
 - The bay leaf has no influence on the quality of the food. However, if you'd rather not take any chances, you can stick the bay leaf to the inside of the lid with masking tape and still ward off the flour moths.
- Know that there is no conclusive scientific evidence for the effectiveness of this method. However, there is also no evidence that it does not work. It's just a folk remedy, but one that many people say works.
 Store all new dry foods in airtight storage boxes. Use plastic, glass, or metal storage boxes to store flour, rice, and other foods you just bought. This way you prevent a new flour moth infestation in your pantry.
 - Keeping your food in airtight containers also prevents the flour moths from spreading to other foods when you buy contaminated food. They will be stuck in the box.
 Freeze new dry foods for a week to prevent another infestation. If you buy foods that already contain moth eggs, you can kill the eggs by freezing the food for a week. At this stage, the eggs are harmless and almost impossible to see with the naked eye.
Method 3 of 3: Check the pantry for signs of an infestation
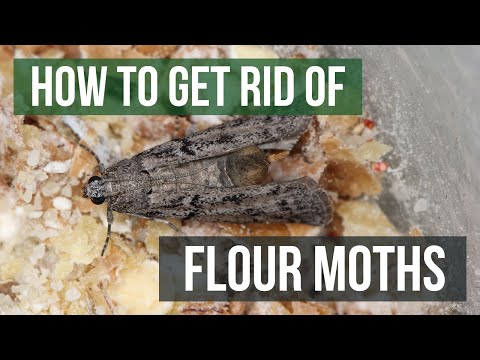
 Look for adult moths and larvae. Adult moths are generally gray in color and have red or white spots. They are about 1.5 inches long. Larvae are about 1.5 inches long and look like worms with five pairs of legs.
 - The easiest way to spot a flour moth infestation is if you see an adult moth flying through your pantry. This usually happens at night instead of during the day.
- If you suspect you have a flour moth infestation, check all dry foods in your pantry. Moths most often hide in flour, cereals, rice, and other grains, but also check animal foods, dried fruits, and other dry foods. In other words, check everything.
 Search your pantry for webs with cocoons. Look in the corners and along the inside edges of your cabinets for lumps of stringy or gritty material. Flour moths leave webs in almost all places where they come and they can lay hundreds of eggs in the cocoon.
 - The webs are usually behind where a shelf meets the wall and under cabinet paper.
 Check dry food packaging for cavities. If there are small holes in dry food packages and you haven't made them yourself, this is an easy way to find out if you have any flour moths in the house. Check all boxes, bags, and plastic packaging for signs of these pests.
 - It is not always the case that the holes only appear in the packaging when the food is in your cupboard. Sometimes the food you buy is already contaminated with flour moths, so check all packaging before buying.
Tips
- Do not buy torn and opened food packages. These packages are more likely to contain flour moth eggs.
- If flour moths continue to bother you, call a pest control agent in your area for advice and to deal with the infestation.
Necessities
- Garbage bags
- Vacuum cleaner
- Tea towel, cleaning cloth or sponge
- Dishwashing liquid
- Hot water
- White vinegar
- Peppermint Oil
- Bay leaves
- Airtight storage boxes


