Author:
Eugene Taylor
Date Of Creation:
15 August 2021
Update Date:
1 July 2024
Content
- To step
- Part 1 of 3: Connecting for the first time
- Part 2 of 3: Learning the basic commands
- Part 3 of 3: Making encrypted keys
If you're connecting to another computer through the proverbially insecure Internet, you probably want to do everything you can to keep your data safe. SSH is one way to achieve that. To do this, you will need to install SSH on your computer and then establish an encrypted connection to a server. Keep in mind that to secure the connection, SSH must be enabled on both sides of the connection. Follow this guide to make sure your connection is as secure as possible.
To step
Part 1 of 3: Connecting for the first time
 Install SSH. In Windows you will have to download an SSH client. The most popular is Cygwin, which you can download for free from the developer's website. Download and install the program. Another popular free program is PuTTY.
 - During the installation of Cygwin you have to choose the installation of OpenSSH from the Net section.
- SSH is already installed on Linux and Mac OS X. This is because SSH is a UNIX system, and because Linux and OS X are derived from UNIX.
 Start SSH. Open the terminal program installed by Cygwin, or open the Terminal in OS X or Linux. SSH uses a terminal interface to communicate with other computers. There is no graphical interface for SSH, so you will have to learn how to enter commands.
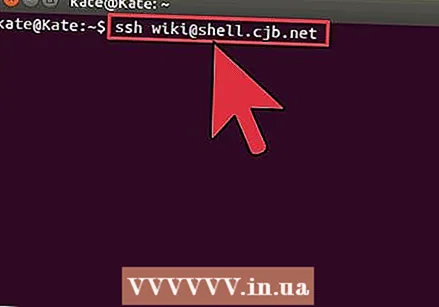
 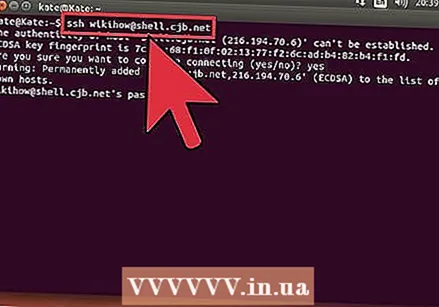 Test the connection. Before diving into secure keys and moving files, it's important to test that SSH is properly configured on your computer, as well as the system you're connecting to. Enter the following command, replace username> with the username of the other computer, and remote> with the address of the other computer or server:
 - $ ssh username> @remote>
- You will be asked for your password when the connection is established. You will not see the cursor move or any character you enter as part of the password.
- If this step fails, SSH is not properly configured on your own computer, or the other computer is not accepting an SSH connection.
Part 2 of 3: Learning the basic commands
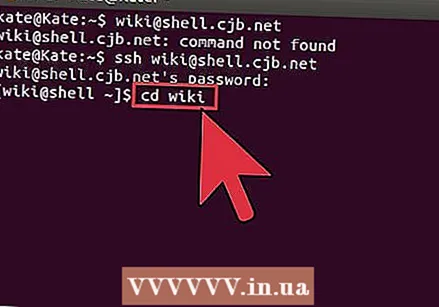 Go to the SSH shell. If you are connecting to the other computer for the first time, you should be in the HOME directory. To navigate within this directory structure, use the cd command:
 - cd ... You go up 1 directory in the tree structure.
- cd directory name>. Go to a specified subdirectory.
- cd / home / directory / path /. Go to the specified directory from the root (home).
- cd ~. Return to the HOME directory.
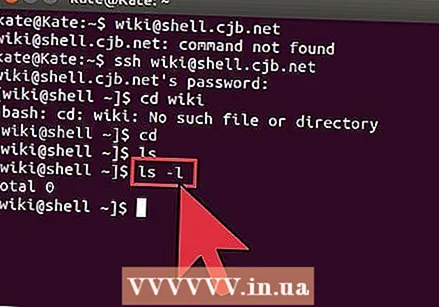 Check the contents of the current directories. To see which files and folders are in your current location, use the command ls:
 - ls. List all files and folders in the current directory.
- ls –l. List the contents of the directory, along with additional information such as size, permissions, and date.
- ls-a. List all content, including hidden files and folders.
 Copy files from the current location to the remote computer. If you want to copy files from your own computer to a remote computer, use the command scp:
 - scp /localdirectory/example1.txt username> @remote>: path> will copy example1.txt to the path> path on the remote computer. You can leave path> empty to copy the file to the root of the other computer.
- scp username> @remote>: / home / example1.txt ./ will move example1.txt from the home directory on the remote computer to the current directory on the local computer.
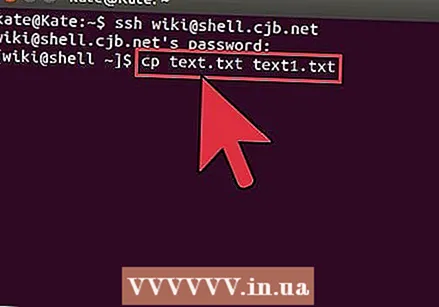 Copy files through the shell. Use the command cp to make copies of files in the same directory or in a directory of your choice:
 - cp example1.txt example2.txt will make a copy of example1.txt under the name example2.txt in the same location.
- cp example1.txt directory> / will make a copy of example1.txt in the location specified by directory>.
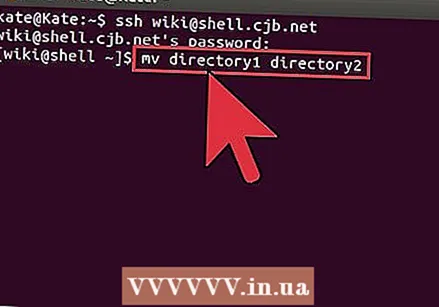 Moving and renaming files. If you want to rename a file, or if you want to move the file without copying it, you can run the command mv:
 - mv example1.txt example2.txt will rename example1.txt to example2.txt. The file is not moved.
- mv directory1 directory2 will rename directory1 to directory2. The contents of the directory will not be changed.
- mv example1.txt directory1 / Will move example1.txt to directory1.
- mv example1.txt directory1 / example2.txt will move example1.txt to directory1 and rename it to example2.txt
 Erasing files and directories. If you need to delete something from the computer you are connected to, use the rm command code:
 - rm example1.txt will create the file example1.txt.
- rm –I example1.txt will delete the file example1.txt after asking for your confirmation.
- rm directory1 / will delete directory1 along with its contents.
 Change permissions for your files. You can change the read and write permissions of your files with the chmod command:
 - chmod u + w example1.txt will add the read (modify) permission to the file for the user (u). You can also use the g modifier for group permissions, or the o command for world permissions (everyone).
- chmod g + r example1.txt will give read / read (access) permission to the file for a group.
- There is a long list of permissions you can use to open or block certain parts of a system.
 Learn the other commonly used basic commands. There are a few more important commands that you will use a lot in the shell interface. These include:
 - mkdir newdirectory creates a new subdirectory named newdirectory.
- pwd will display the current directory location.
- who shows who is logged into a system.
- pico newfile.txt or vi newfile.txt will create a new file and open it with the file editor. Different systems each have their own file editor. The best known are pico and vi. You need a different command for each editor.
 Detailed information about the different commands. If you're not sure what a command will do, use the man command to learn more about where to use a command and what parameters to use:
 - man command> shows information about that command.
- man –k keyword> will search all pages of the manual for the specified search term.
Part 3 of 3: Making encrypted keys
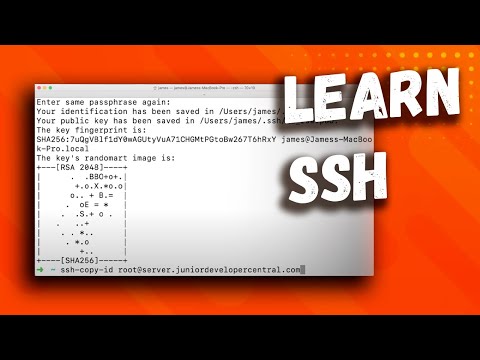
 Create your SSH keys. With these keys you can connect to a remote location, so that you always have to enter a password. This is a much more secure method, as the password does not have to be sent over the network every time.
 - Create the key folder on your computer with the command $ mkdir .ssh
- Create the public and private keys with the command $ ssh-keygen –t rsa
- You will be asked if you want to make a recognition phrase for the keys; this is optional. If you don't want to make a recognition phrase, press Enter. This will create two keys in the.ssh directory: id_rsa and id_rsa.pub
- Change the permissions of the private key. To make the private key readable only by you, use the command $ chmod 600 .ssh / id_rsa
 Place the public key on the remote computer. Once the keys are created, you are ready to put the public key on the remote computer so that you can connect without a password. Enter the following command and replace previously identified parts:
 - $ scp .ssh / id_rsa.pub username> @remote>:
- Make sure to add a colon (:) at the end of a command.
- You will be asked to enter a password before the file transfer begins.
 Install the public key on the remote computer. Once you have placed the key on the remote computer, you will need to install it for it to work properly.Log in to the remote computer first, in the same way as in Step 3.
 - Create an SSH folder on the remote computer, if it does not already exist: $ mkdir .ssh
- Add your key to the authorized keys file. If this file doesn't exist yet, it will be created: $ cat id_rsa.pub .ssh / authorized_keys
- Change the permissions for the SSH folder to access it: $ chmod 700 .ssh
 Check if the connection is working. Once the key is installed on the remote computer, you should be able to connect without being prompted for a password. Enter the following password to test the connection: $ ssh username> @remote>
 - If you connect without prompting for a password, the keys are properly configured.


