Author:
Tamara Smith
Date Of Creation:
24 January 2021
Update Date:
1 July 2024

Content
- To step
- Method 1 of 2: With a hairdryer
- Method 2 of 2: Just with a hot glue gun
- Tips
- Warnings
- Necessities
- With a hairdryer
- With a hot glue gun
Molten wax art is an easy and fun thing to do for those artistic adventurers among us.Despite it being so simple, the end result can be beautiful. No wonder the trend is in fashion! Here's How To Get Started On Your Own Masterpiece!
To step
Method 1 of 2: With a hairdryer
 Take care of your supplies. You will need a canvas (in the size you want), wax coats (which you want, taking into account the size of your canvas), a hot glue gun and a hairdryer.
 - Cover any area you think will get dirty with a little more on each side. And don't forget to protect yourself too! Hot colored wax on your skin and fancy clothes should not be part of this project.
 Sort the washcoes. Sort them the way you want. A rainbow is a popular design, so if you prefer, arrange the crayons according to the colors of the rainbow. Some people arrange their washcoes from light to dark, others use different shades of the same color. The arrangement is entirely up to you.
 - Just make sure you have enough to cover the entire top of the canvas. Repeating colors is just as beautiful.
 Hot glue each wash to the top of your canvas. Some people keep the cover on and others take it off, but both ways work.
 - Some people also prefer to take the casing off the wax cans and cut them in half. This gives a more natural look and ensures that the waxes do not remain clearly visible at the top of your canvas.
 Tilt the canvas so that the wax will drip. A common idea is to lean the canvas against the wall. If you lean it against a wall, cover the wall with some newspaper to avoid accidents.
  Use your hairdryer and blow the washcoats. It is best to point the hairdryer downwards so that the wax will drip. Note that this can get messy! However, it doesn't really matter how messy it gets, as long as your newspapers are properly laid out.
 - This will take a long time - about 5 to 8 minutes for a small portion of waxes. If you can melt three waxes in 6 minutes and you have 64 waxes, it will take more than 2 hours (unless you have a buddy to help you out). Be patient!
- You can also use a birthday candle and it is much faster - but it is a bit more dangerous as the wax is dripping everywhere. If you're more cluttered than time pressed, a candle may be a better idea for you.
- A hot glue gun is also a faster alternative and can be obtained at most hobby stores.
- This will take a long time - about 5 to 8 minutes for a small portion of waxes. If you can melt three waxes in 6 minutes and you have 64 waxes, it will take more than 2 hours (unless you have a buddy to help you out). Be patient!
 When you're done, sit down and let it dry. Clean the area and collect any dried-on pieces of wax that have ended up in less desirable areas.
  Show your artwork! Hang it on the wall, post it on Facebook or Tumblr, call a family member. Show your creativity to the world, they will love it! The kids too!
Method 2 of 2: Just with a hot glue gun
 Grab your canvas. Place it against the wall or a chair covered with a towel. That is to say, in places that you are not concerned about it will get messy. Choose the size of the canvas you think you can cover with the amount of waxes you have.
  Remove the casing from the wax coats and place the first wax co in the hot glue gun. That's right - in the hot glue gun. Did we mention this isn't really good for the device? The glue gun may not survive this project, but it will guarantee you a fast and beautiful result!
 - Once you've placed the first wax co in the hot glue gun, start pushing the second in - this will cause the first to be pushed out. You will notice as soon as color starts dripping from the end!
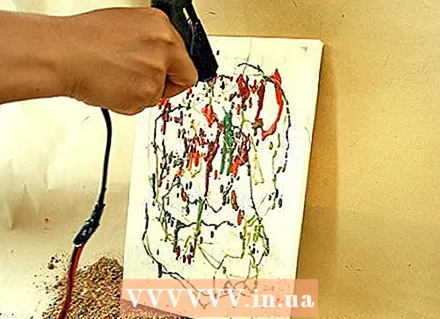 Color your canvas. With this method you have ultimate power in color control, it will go wherever you want! You can keep the standard drop look or create shapes and designs. Place the tip of the glue gun close to the canvas and start creating!
 - As soon as nothing more comes out of the glue gun, place a new washco in it. You will see the color coming out of the tip of the glue gun slowly lighten or darken as the other color makes its way out.
 Let it dry. That was a lot faster than blow drying, right? If you think your glue gun is salvageable, put a regular glue stick in it and work with it until the liquid coming out of the glue gun is gluey, not colored and waxy.
 - If you're not happy with a part of your painting, this method makes it very easy to redo (or add) an area.
Tips
- Turn the hairdryer on the highest setting to speed up the melting process.
- Some people write words on the canvas and let the colors drip through. Common words are: imagination, innovate, create, smile, etc.
- Wear an old T-shirt so your clothes don't get dirty.
- Arrange your crayons in different shapes for trendy designs (hearts, circles, etc.).
- Do it outside. The wasco smells terribly!
- Use a brush or sponge to create a softer look. You can also add masking tape to make patterns or designs.
- Do it outside so that the washers don't make a mess all over your house. You don't need the hairdryer on a hot, sunny day. Let the sun do the work.
- Also provide a towel or cloth, in case the newspapers are not enough.
- Ask a friend to help you with a hairdryer. This will make the process much faster.
- A candle or hot glue gun will also work (instead of the hairdryer).
- Make sure your canvas is thick enough so that your waxes don't melt through it.
- You can stick the waxes to the canvas so that it looks like the colors are dripping OUT of the waxes.
Warnings
- Make sure that the wax does not drip on the furniture or on the carpet, because it does extreme will be difficult to remove it.
- Be careful not to touch your art immediately afterwards, because you will burn yourself.
- Be careful with the hot glue gun! It is very hot and it can burn you.
Necessities
With a hairdryer
- Canvas
- Wasco's
- Hot glue gun
- Hair dryer
- Old clothes and newspapers / tarpaulins
With a hot glue gun
- Canvas
- Wasco's
- Hot glue gun
- Old clothes and newspapers / tarpaulins


