Author:
Eugene Taylor
Date Of Creation:
13 August 2021
Update Date:
1 July 2024

Content
- To step
- Method 1 of 4: Prepare for breeding
- Method 2 of 4: Choosing the eggs to hatch
- Method 3 of 4: Let the hen incubate the eggs
- Method 4 of 4: Hatch the eggs themselves
- Tips
- Warnings
Breeding chickens is a great way to build a sustainable flock, and every chicken farmer and hobbyist should learn this. Watching the process is also a great learning tool, thanks to the short incubation period. Follow this guide to start raising chickens yourself.
To step
Method 1 of 4: Prepare for breeding
 Find out if you are allowed to keep chickens in your area. In some areas it is illegal to keep chickens, while in others there are rules regarding the keeping of roosters and the number of chickens. To avoid fines, it is best to ask the municipality about the rules in your area.
  Make sure you can provide shelter for the new chickens. Many people fail to consider that when you breed chickens, you will end up having more chickens than what you started with. Make sure your coop is ready for the new additions to your flock.
 - Have spare hutches and materials within reach so you are prepared to take roosters or fighters out of the flock. Sometimes you just won't have enough room to keep all the hens in a flock, or you'll end up with more roosters than hens, who also act aggressively towards each other.
 Decide if you want to run the risk of getting more roosters. Breeding chickens will give you a result of about 50% male chicks. Roosters will not contribute to your egg production, are less tasty to eat, eat larger amounts of food, and will increase the noise level of your flock. Be aware that breeding with chickens always results in you dealing with roosters. If you don't want to run the risk of having more roosters, carefully choose the more rounded eggs to incubate (make sure they are fertilized). With eggs that are more pointed, you have a greater chance that they will contain roosters.
 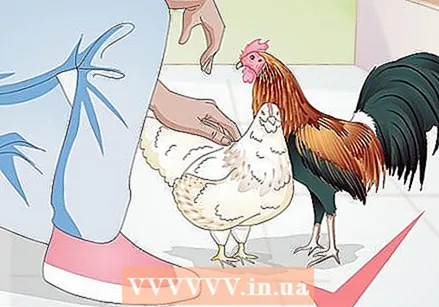 Get a rooster. To fertilize your hens' eggs, you will need a rooster that is in excellent breeding condition. In order to mate, the rooster does not have to be of the same breed as your hens. You need one rooster for every ten hens.
 - Look for a rooster with a good pedigree pedigree. His eye color should be even and his feet free from deformation. The rooster's comb should look like the standard comb of its breed.
- Be prepared for a lot of noise. Roosters are noisy animals, and many cities and inhabited areas have rules against keeping roosters because of the noise. Make sure you can legally keep a rooster. If you don't have that option, you will have to buy fertilized eggs to hatch.
- Some breeds can be very aggressive. Make sure to pick a rooster that is even-tempered, especially if you have kids.
 Start breeding in the spring. While you can raise chickens for most of the year, spring-raised chickens are often stronger. Chickens born in the spring will start laying eggs in the fall.You don't have to do anything special to breed your chickens, just put the rooster by your flock and let nature take its course.
 - Make sure that both your hens and your rooster eat good quality food. This will ensure that their reproductive system is as strong as possible.
- If you are going to breed second or third generation chickens, be very wary of inbreeding. Try to identify your chickens so that you know which ones are related to the rooster. You can keep the rooster separate and only leave the hens that you want to breed with. You can also consider getting a new rooster every year.
 Decide between hatching the eggs themselves or letting them raise their chicks. If you are counting on your hens to lay eggs, then you have to realize that if you let the hen hatch the egg, no eggs will be laid for 21 days. You also need to have a “broody” hen, which means she is willing to sit on the egg for the entire incubation period.
 - Most hens are bred from broods to keep them productive. Some of the most brooding varieties are: Brahma, Jersey Giant, New Hampshire Red, Sussex, and others.
- If you have a lot of eggs to hatch, or if you are hatching for sale, it may be worth the investment to purchase an incubator.
Method 2 of 4: Choosing the eggs to hatch
 Collect your eggs regularly. Even if you let the hens incubate their eggs themselves, you will still want to collect them and choose the best one to hatch. Collect eggs two to three times a day to keep the eggs from getting dirty or starting to develop.
 - If it is very hot outside, collect the eggs more often than usual, up to five times a day.
- Use a soft basket to put the eggs in while you collect. This will keep them from getting damaged. A little straw in a basket makes for a perfect egg basket.
- Handle the eggs gently to avoid disturbing the membrane and other internal parts.
- Clean your hands well before you start collecting eggs. This will prevent you from transferring bacteria to the egg.
 Keep the nest clean. While you should always keep the chicken coop and nest coops clean, it is even more important when brooding. Mud and poo can increase the amount of harmful bacteria, decreasing the egg's chances.
 - Make sure that hens always have clean nesting material.
 Choose the eggs you want to incubate. Choosing the right eggs will greatly increase your chances of a successful brood. You'll want to avoid eggs that are noticeably larger or smaller. Large eggs often have difficulty hatching and small eggs often produce chicks that are too small to live.
 - Do not pick eggs that are cracked. Also avoid thin-shelled eggs.
- Do not choose eggs that are clearly misshapen.
- Keep only the clean eggs. Washing or wiping dirty eggs removes a protective layer that makes them more vulnerable to bacteria.
 Mark your eggs. If you are going to hatch a lot of eggs, or if you keep different types of chickens, it can be helpful to mark the eggs with the dates or breeds so that you can keep a close eye on them. You can use a pencil, marker, or stamp for this.
  Save the eggs. Eggs can be stored for up to seven days after laying before you start hatching. Eggs should be stored for at least 24 hours before you start hatching or they may not hatch.
 - Try to keep the temperature constant at 13 degrees Celsius and the humidity high.
- Store the eggs pointed side down.
 Turn the eggs daily. During the storage of the eggs, they must be turned once a day to prevent the membrane from sticking on one side. You can do this by placing a piece of wood under one side of the box and moving it to the other side every day as you turn the eggs.
Method 3 of 4: Let the hen incubate the eggs
 Look for your broody hen. You can use fake eggs as a test to find hens that are more brooding than others. If you want them to sit on the fake eggs for 24 hours, she will likely hatch eggs successfully which takes her 21 days to complete.
 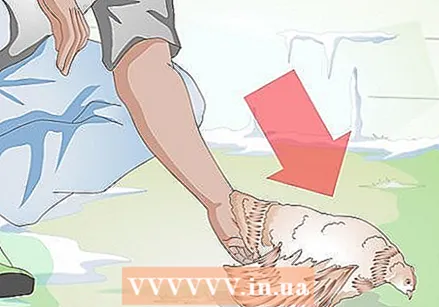 Secretly tuck the eggs under the hen. This will be easiest at night when the hen is sleeping. Depending on the breed, she will be able to hatch up to twelve eggs. Smaller breeds often can only shed six eggs. It should be possible to cover all the eggs when she goes to sleep.
  Keep the broody hen and her eggs separate from the other hens. If possible, keep the mother and her eggs separate from the rest of the flock to prevent the eggs from getting dirty or damaged. If you are not willing to relocate them, leave them where they are.
 - If you can't take them apart, try to keep the other chickens from disturbing the new mother as much as possible.
 Keep the mother well fed. Make sure the mother hen has good food and plenty of fresh water. You can transfer the hen to chick rearing food so that the chicks can get the right food straight away. The hen will not eat as much as usual.
 - Let the hen hatch the eggs. When the eggs start to hatch, don't disturb them. She will help the chicks hatch from their eggs. Eggs start to hatch around the 18th day, and the process can take up to three days. Most of the eggs will hatch at about the same time. Once hatching has started, remove any eggs that have not hatched after two days.
- Let the mother raise the chicks. If you have chosen to hatch naturally, the mother will provide all the necessary warmth and care to the chicks, and you will not have to put the chicks in a brooder.
- Try to keep them separate. For the first six weeks, try to keep the chicks and mother separate from the rest of your flock. This will allow them to orient themselves without being pecked by the other chickens.
- Provide a breeding area where the hen can go in and out, but where the chicks cannot leave. This will keep them out of trouble.
 Provide plenty of clean water and fresh food. Chicks need special food mixes to grow up healthily, so make sure you have plenty of them available. A number of brands will recommend that you switch foods after a certain amount of time, usually after 6 weeks or 3 months.
 - Introduce the chicks to the flock. After about 6 weeks, the chicks will be ready to be introduced to your flock. Allow them to get used to them slowly, and make sure everyone gets along before you let them move in permanently. The mother hen will help to keep the other chickens in check during this transition process.
Method 4 of 4: Hatch the eggs themselves
 Provide an incubator. You can build an incubator yourself, or you can buy one at an agricultural store such as a Welkoop. If you buy one, make sure that the temperature and humidity are good and easy to adjust, and that there are good options for turning the eggs.
 - One of the most important factors when choosing an incubator is the number of eggs you want to hatch. Usually no more than 50-70% of the eggs you want to hatch will actually hatch, and half of that will be roosters.
 Set up your incubator in a temperature-controlled area. A stable room temperature will make it much easier for the incubator to maintain a stable internal temperature. Do not place the incubator next to a heater or a window or door.
 - You will have to check your incubator often, so make sure you have easy access to it.
 Mark your eggs if you haven't already. If you did not mark your eggs when you collected them, you should do so now before placing them in the incubator. This will help you know if an egg has already been turned or not.
  Preheat your incubator. Let the incubator run for a few hours before putting the eggs in it. This will ensure that the incubator has reached the heat and humidity they need. If your incubator has a fan, it should maintain a constant temperature of 38 ° C. If it doesn't have fans, keep the temperature at 39 ° C.
 - During the first 18 days the humidity should be around 60%.
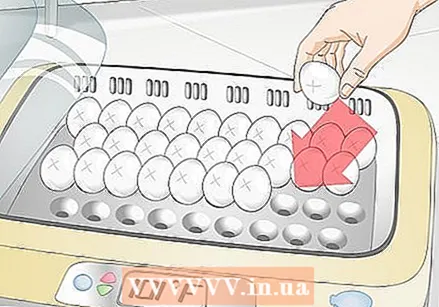 Place your eggs in the incubator. Eggs should always lie with the larger end up, or horizontal, with the larger end slightly lifted. The narrower end should never stick up, otherwise the eggs will not develop.
  Turn the eggs. Eggs should be turned about five times a day. Turn the eggs over carefully to avoid damaging the embryo. They are not turned over during the last three days before hatching.
  Watch your eggs. By examining the eggs you can see if any embryos are growing in the eggs or not. For this you need a bright flashlight and a dark room to view the eggs. Hold the egg with the larger end up and shine the flashlight through it. You should now be able to see blood vessels that are starting to develop and the air sac at the top.
 - After a few days of brooding, you may start to see blood vessels.
- After seven days you should be able to see a developed embryo.
- Discard any undeveloped eggs after the first week.
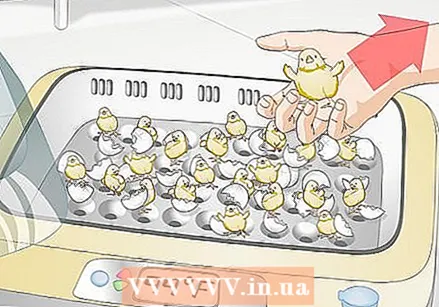
 Hatch the eggs. The hatching process can take up a large part of the day. As soon as you start to see any breakout, increase the amount of oxygen in the incubator by opening ventilation holes. The newly hatched chicks will not eat or drink for 24 hours, so keep the incubator running while the last chicks hatch.
 - Don't help the chicks hatch. Chicks that cannot hatch themselves will most likely not live long.
 Move the chicks to a breeding mother. Once hatching is complete and the chicks have dried up, you can move them to a breeding mother where they can continue to grow up. You can make your own artificial mother or buy one from an agricultural store.
 - A 40-watt light bulb in a bedside lamp is a good source of heat. Use a red light bulb to hide injuries so the other chicks won't attack an injured chick.
- Place the tray where there is as little draft as possible, and use wire to prevent cats from gaining access.
 Provide a constant supply of fresh water and food. Your chicks will always need to have a minimal supply of water and feed. Chicks need a special feed formulated for chicks. As they mature, they can switch to standard chicken feed.
 - Make sure the water dishes are shallow, as chicks can easily drown in their own water dish.
- Introduce the chicks to the flock. After about six weeks, the chicks will be ready to be introduced to your flock. Do this slowly, and make sure everyone gets along well before you let them move in permanently.
Tips
- There are many pros and cons to using a hen to hatch eggs, rather than an incubator. Hens themselves provide the correct humidity, egg turning, etc., so it takes less of your time, but there are many other factors that can kill the growing chick, such as the hen giving up the eggs. It happens more often, and if you decide to intervene, do it quickly and put them in the incubator or find a foster hen.
- If you have uncommon eggs, it is better to hatch them yourself instead of using a hen. Then you have a greater chance of success.
- Seek advice from experts like PoutryOne.com if you want to cross incompatible chicken breeds.
- Think about what will happen to the chicks when they grow up! Do you keep them to breed more? Do you know a place where you can sell them? Do you know someone who wants to take them? As with breeding with any other animal, make sure you have plans for the chicks' future.
- Avoid contact with incubated eggs as much as possible.
- Keep an eye on your hens' breeding line to avoid genetic problems.
- Talk to people who have done this before; it's more work than you might think!
- Chickens have a certain "pecking order", which means that there is also occasional unrest.
- Ask your neighbors if they have any problems with raising chickens. Chickens (and especially roosters) will make a lot of noise, which may disturb your neighbors.
Warnings
- If the eggs don't hatch, get rid of them properly - rotten eggs give off a foul smell!
- Make sure to always clean your incubator thoroughly, after and also before hatching a new clutch, to avoid transmitting germs.
- Use chicken wire to create a sturdy fence around an outdoor scratching area to keep predators away. You can make very big and long runs this way. Also make sure that hens and chicks go back to the sleeping house every night before sunset and close the door.
- Be careful with a broody hen - she is often moody and does not want to be messed with.


