Author:
Frank Hunt
Date Of Creation:
15 March 2021
Update Date:
1 July 2024
Content
- To step
- Method 1 of 3: Using the Gmail app
- Method 2 of 3: Using a Gmail account in Mail
- Method 3 of 3: Fix connection problems
- Tips
- Warnings
Previously, Gmail on the iPhone was configured for POP, not IMAP. Changing your Gmail account to IMAP was very difficult at the time. Fortunately, Google has changed this so that using Gmail on your iPhone now feels much more natural and intuitive. Use one of the following methods to set up and configure your email on your iPhone.
To step
Method 1 of 3: Using the Gmail app
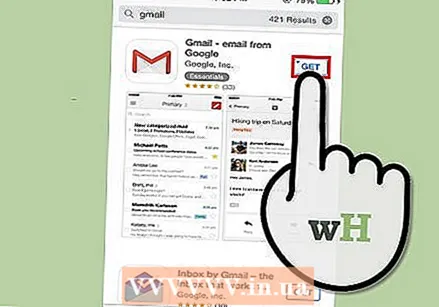 Download and install the free Gmail app. Search for Gmail in the App store. Install the app directly on your iPhone or download the app on your computer and sync your iPhone with your computer to install the app.
 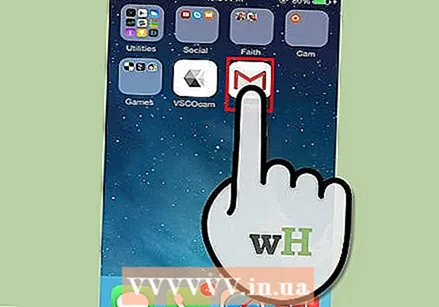 Open the app on your iPhone and sign in with the credentials of an existing Gmail account. Now you have direct access to your Gmail account, including all sent, received and saved emails. with the app you can access your email on all your devices, you can even start composing an email on your phone and then finish it later on your computer. However, you cannot access your contacts from within the app, but you can type in the name of a contact and send them an email.
 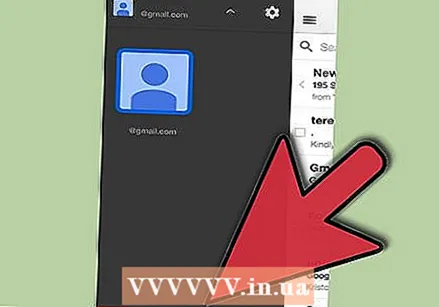 Log in to other mailboxes within the app. In your inbox, tap the three horizontal lines in the top left corner. Now you will see a list of your different folders. Tap "Manage Accounts" at the bottom to view all the accounts you are currently logged into. Tap "Add another account". Enter the email address and password of the account you want to add. Tap "Login" to login.
 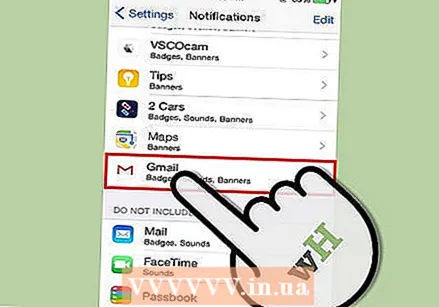 Set up Gmail notification. To configure that you automatically see messages from Gmail on your iPhone, go to "Settings" → "Notifications". Tap Gmail in the apps list and swipe the button next to "Allow Notifications" to the right. You can then set the way you want to receive messages: with sounds, badges and on your lock screen.
  From now on, use the Gmail app for all your email needs. You will now have to use the app instead of the default email program Mail. For example, if you wanted to send a photo, you would normally go to the photo within "Photos" and then hit the share button to choose Mail. But if you want to send photos from the Gmail app, you have to open the app, compose a new email and attach the photo from this email.
Method 2 of 3: Using a Gmail account in Mail
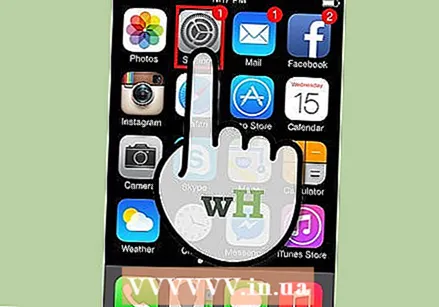 Open Settings. On your iPhone, open Settings and tap "Mail, Contacts, Calendar". Under "Accounts", tap "New Account", then tap the Google logo.
  Fill in the necessary information. Mandatory are your name, your e-mail address and your password. The description will automatically show "Gmail account" if you do not change it yourself. When you are done, tap "Next". Now the entered information is checked and you go to the next screen.
 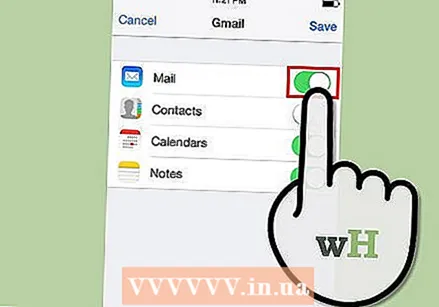 Choose which Gmail features you want on your phone. You can choose to synchronize your mail, your contacts, your calendars and your notes from your account on your phone.
 - If you choose contacts and calendars, you will be asked what you want to do with the contacts and calendars currently on your iPhone. You can delete or keep it.
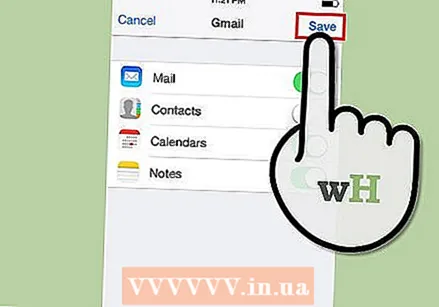 Tap "Done" at the top right of the window. Now your account will be added, after which you will return to Settings. Press the Home button to exit Settings.
 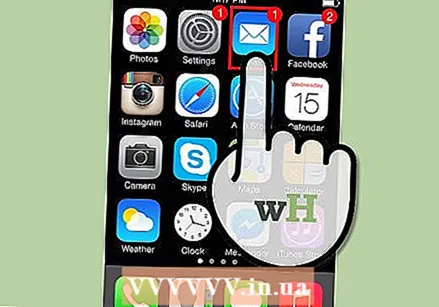 Tap the Mail icon to go to the Gmail inbox. Your e-mail will now appear within Mail in your inbox. View your folders or other accounts by tapping the arrow in the top left. You should now be able to read, write and send emails from the Mail app.
 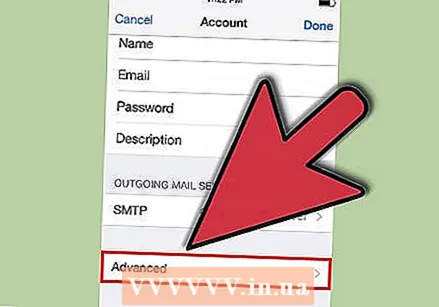 Adjust the settings of your account. Go to Settings → Mail, Contacts, Calendar. Tap Gmail under Accounts and tap the account you just created. Now tap on "Advanced". Here you can adjust the behavior of your mailbox to your personal wishes.
 - Tap "Drafts" to choose where the drafts are saved. You can keep them on your iPhone or on the server.
- Tap "Deleted" to choose where deleted emails are kept, and "Archive" to choose where archived emails are kept. Also choose here whether you want to keep them on your iPhone or on the server.
- Decide whether deleted messages should be deleted or placed in the archive.
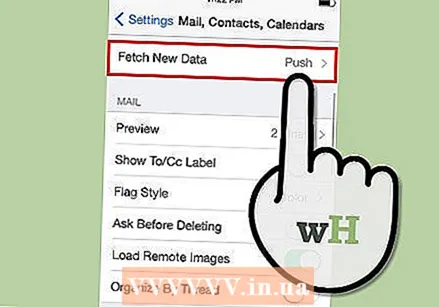 Adjust the "Push" settings. Go back to "Mail, Contacts, Calendars" and tap "New data". Here you can set how often Mail checks for new e-mail. Turn on "Push" to do this automatically. If "Push" is off, you can choose how often your iPhone checks for new email. Choose less often or manually to save your battery.
Method 3 of 3: Fix connection problems
 Allow your iPhone to access your Gmail account if "2-step verification" is activated. Google has a security system that requires you to enter a second randomly generated password on an unknown device to access your account. This creates an extra layer of security, but it can cause problems when using Mail's settings on your iPhone. You need a password that only needs to be entered once:
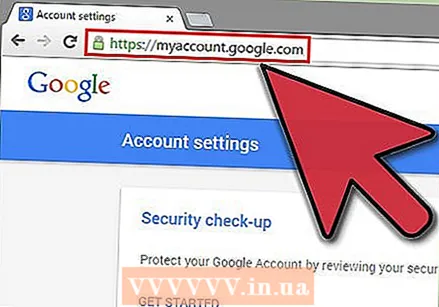
 - Open the Google security page. The fastest way to get there is to enter this address: "www.google.com/settings/security". Log in with your account details.
- Click on "Select app" at the bottom of the screen.
- Select "Mail" from the dropdown menu on the left. Select "iPhone" from the dropdown menu on the right or enter a different name.
- Click Generate. A new window will open with the app password.
- Open Settings on your iPhone and tap Mail, Contacts, Calendar. Select your Gmail account.
- Replace the password with the password just created. Leave spaces out. Now you can reconnect to your account. Don't write down the password, don't worry, you don't have to remember it and you will never need it again.
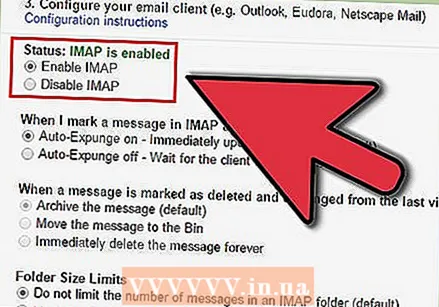 Check Gmail IMAP settings. If Gmail is not properly configured for the IMAP protocol, you may have connection problems when trying to load messages on your iPhone. To check this, log in to a browser on your computer.
 - Click the gear icon and click Settings.
- Click on the "Forwarding and POP / IMAP" tab.
- In the "IMAP Access" section, look for the "Status:" section. Next to it should say "IMAP is enabled". If not, click on "Enable IMAP".
- Click on "Save changes" if you have made any changes.
Tips
- If you have linked certain folders to the "Drafts", "Sent" and "Deleted" folders, these folders will no longer be visible in the "All Folders" list. Instead, you choose what you linked to.
Warnings
- Check if the settings are working properly. See if the messages you delete on your iPhone are still visible when you view your Gmail on a browser.


