Author:
Tamara Smith
Date Of Creation:
20 January 2021
Update Date:
29 June 2024

Content
- To step
- Method 1 of 3: Close with a water bath
- Method 2 of 3: Close with vacuum
- Method 3 of 3: Seal with wax
- Necessities
- Finish with a water bath
- Close with vacuum
- Finish with wax
In glass jars you can store dry, wet or non-perishable materials in a cool, dry place. The water bath method of preserving food is probably the most common way to seal preserving jars. However, you can also use vacuum attachments or use the aesthetically pleasing wax seal.Sealed jars preserve food for up to a year.
To step
Method 1 of 3: Close with a water bath
 Prepare your pots. Before you can begin the process of sealing with a water bath, you need to prepare the pots. First, inspect the jars and lids for signs of breaks, cracks, and sharp or uneven edges. Check both the inside and outside of the lid. Make sure each jar has a suitable lid. Inoperative pots should not be used. Once you have made sure that all the jars are safe for use, wash the jars and lid in warm, soapy water. After you have thoroughly washed them, let them dry on a drying rack or clean kitchen towel.
 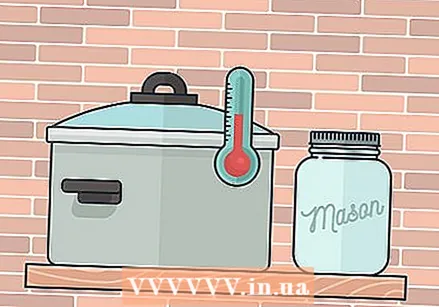 Sterilize your jars. Place the pots in a large saucepan filled with water. The water should be hot at first, but not boiling yet. The pan should be large enough to cover the pots completely with water. Bring the water to a boil. Leave the pots there until they are ready to be used.
 - If you regularly seal jars with a water bath, consider purchasing a sterilization device. This is a specially designed device for immersing jars in water for sterilization. However, it is primarily a convenience device. If you don't have such a device, a large pan will work just as well.
 Prepare your recipe. When using a water bath method for sealing jars, make sure that the food is naturally acidic or that acid has been added. This is the only way to ensure that no bacteria builds up in your preserved food. While the jars are being sterilized, you can prepare the recipe.
 - Acidic foods include fruits, fruit juices, jams, jellies and other fruit blends, salsas, tomatoes with added acid, pickles, spice blends, chutneys, sauces, vinegars and spices.
 Prepare the water bath. First, turn off the heat under the pan and remove your sterilized jars with tongs. You can also buy special devices to remove pots from hot water called pot lifts. Using these is slightly safer than pliers. Place the pots to dry on a drying rack or a clean kitchen towel. Then bring the water in the large pan to a boil.
 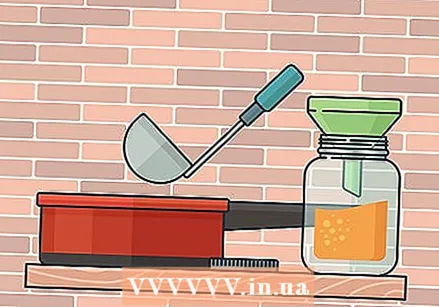 Fill the jars. Set the boiling water aside and fill your pots. For the best effect, use a pot funnel, which allows you to easily transfer liquid substances to your pots.
 - Make sure to leave some room for air. For soft spreads, such as jam and jelly, you should leave about 0.60 cm free space. For solid foods, such as fruits and pickles, leave about 1/2 inch of free space. Place the lid on the jar and screw it on.
- Tap the side of the jar with a wooden spoon to remove air bubbles.
- Repeat with the other pots.
- Do not overtighten the lid or excess air cannot escape.
 Place your jars in the canning rack. The canning rack is a device that goes on the sterilization device or in the pan and ensures that the glass jars do not touch the bottom and break. Make sure you have a canning rack before the closing process begins. Never place multiple layers on the rack. You may need to seal the jars in parts, depending on the size of your canning rack.
 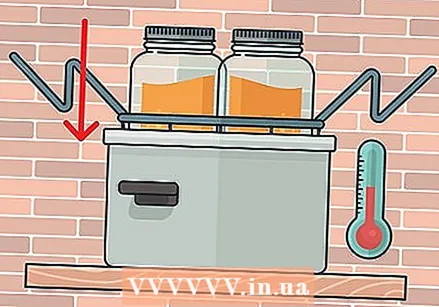 Place the jars in the boiling water. Place the canning rack with the jars in the boiling water. Process them according to the instructions in your recipe. The processing time (cooking time) varies per recipe.
 - The processing time starts when the pan water comes to a boil.
- Make sure there is about 1 inch to 5 cm of water above the lids of the pots. Add more water if necessary before bringing the water back to a boil.
 Remove the pots. Remove the rack of pots and place them on your countertop overnight to cool. Wear oven gloves when removing the rack to avoid injury. Use tongs or pot lift to carefully remove the pots from the rack.
 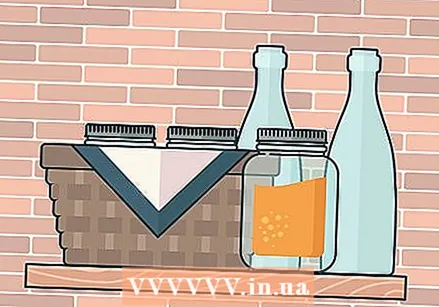 Once cool, store the pots in a cool, dry area. If the lid is not dented, then it is not closed. Eat the contents immediately instead of putting it away, or reseal the jar with a new lid. Check the jar for cracks before doing this.
Method 2 of 3: Close with vacuum
 Gather the necessary resources. You need a vacuum packing machine. You also need a glass jar attachment for your vacuum sealer. This is a special device that fits over glass jars, such as weck jars, and seals the jars with a vacuum.
  Sterilize your jars before closing them. It's a good idea to sterilize any jars you use as a precaution. You can boil them or put them in a very hot dishwasher. When you cook them, put them in a pat of water that covers the pots completely. Bring the water to a boil, then turn the heat to low, leaving the pots like this until you are ready to use them.
  Fill the jars. While you wait for the jars to be sterilized, you can prepare the food to be preserved in them. For example preparing a recipe for jam or jelly. However, many people salvage fragile food that cannot be bagged in vacuum-sealed jars. For example, you can store sweets and nuts in vacuum-sealed jars.
 - When you have finished preparing the food, you can remove the jars from the boiling water. Use pliers or pot lift. Let them dry and then add the food.
- Leave some space now too. Leave about 0.6 cm space for soft spreads, such as jam or jelly. For solid foods, such as nuts or sweets, you should leave 1/2 inch of free space.
- Use a non-metal spoon to remove air bubbles. Do this by moving the wooden or rubber spoon along the inner surface of the jar and pressing down gently.
 Prepare the vacuum. Once the food is prepared, you can start preparing the vacuum. Place the lid on the jar that you are going to close. Leave out the lid ring, if there is one, for now. Attach the vacuum packer hose over the jar. Make sure the attachment is secure so that it doesn't fall off when you vacuum the jar.
  Turn on the vacuum device. You must process the jar according to the specific instructions of your device. In most cases, however, you can simply turn the device on until it tells you that the jar is closed. You should hear the lid click when it's done. The machine may also indicate that the process is complete with a sign, such as a green light.
  Now screw the ring onto the pot. Remove the hose from the attachment and remove the attachment from the pot. Screw the ring tight on the pot. Store the pot in a cool, dry place.
Method 3 of 3: Seal with wax
 Gather your materials. To seal your wax jars, you'll need a ceramic wax-sealing dish, strapping tape, scissors, a tea candle, a lighter, and a bottle of sealing wax. You should be able to find many of these materials at a local craft store or supermarket. However, if you can't find them near you, you can also order them on the internet. This process is best for thin neck glass jars and bottles.
  Install the ceramic wax sealing dish on a table. If you have a wax-sealing dish that has a built-in spot for the candle underneath, you can just place the sealing disc on the table. If not, you should place it on a small rack so that you can place a candle under it.
  Light a candle. Light a tea candle. Then place it under the wax heating dish.
  Heat the laundry. Add wax granules of the desired color to the ceramic disc. As the wax melts, add more wax until the liquid wax reaches about two inches from the top of the saucer.
 - The wax takes about 20 minutes to melt. Blow out the candle when it is ready.
 Pour any craft or alcohol into the bottle. Twist the cap on the bottle. Make sure the cap is tight. If it is not a food, you can also use a cork.
  Stick the strapping on. Wrap the strapping around the cork or cap where it joins the bottle and until it overlaps. Cut the tape. Bend the end that sticks out against the rest of the tape. The bent end is the part that must be pulled to break the seal.
  Dip the pot. Turn the jar upside down. Dip him right in the wash. Lift it for a moment then let it go straight up. Turn it over as soon as you take it out of the wash to prevent unwanted dripping.
  Print your seal. This step is optional. Press your engraved wax seal into the wax immediately after dipping. A monogram or symbolic wax seal is a great way to personalize your project. Allow to dry completely before transport.
Necessities
Finish with a water bath
- Large pan
- Dishwasher
- Soap
- Water
- Glass jars
- New lids
- Funnel
- Kitchen tongs
- Wooden spoon
- Dishcloth
- Drying rack
- Canning rack
Close with vacuum
- Vacuum machine
- Attachment for pots
- Glass jars
- New lids
- Dishwasher or large pan
- Wooden spoon
Finish with wax
- Wax sealing dish
- Wax granules
- Pot with screw lid or cork
- Tea candle
- Lighter
- Scissors
- Strapping band
- Glass jars


