Author:
Roger Morrison
Date Of Creation:
28 September 2021
Update Date:
1 July 2024

Content
- To step
- Part 1 of 3: Making a plan for your timetable
- Part 2 of 3: Filling in your timetable
- Part 3 of 3: Using the grid
- Tips
A study schedule is a handy, inexpensive tool that allows you to take more control over your study time. It provides an overview of what you have to achieve and how much time you have for it. If you want to become more organized and motivated to do your work to the best of your ability, try putting together a personalized study schedule.
To step
Part 1 of 3: Making a plan for your timetable
 Make a list of responsibilities. You need to think about all your responsibilities and write them down so that they can be easily classified in a list. By thinking about all this in advance, before filling in the timetable, you will be able to make the timetable work more smoothly.
 - Consider all the classes you take, your job, your duties, sports and training, and anything else you do regularly in the time you might spend studying.
- Don't forget birthdays and major holidays.
- You probably won't be able to think about everything in advance, but that's okay - you can add more things later.
 Collect all information about lessons / assignments. This will likely involve collecting all syllabi and assignments for theses or projects, and perhaps looking online to see if you can find a place for your classes (such as Blackboard or another course management system).
  Consider the ideal time of day to study. Spend some time thinking about when you can - or could - study best. Are you an early riser or a night owl? Thinking about this now is the best way to schedule important study time during those hours you need to do most for your studies.
 - When you are done with this step, try not to think about your other responsibilities (such as your job, etc.); just write down the best times for you, as if you had nothing else on your plate.
 Decide which format to use. You can create your timetable on a sheet of paper or in digital form, such as a spreadsheet or an app on your mobile.
 - Spreadsheet programs, such as Microsoft Excel or Apple Numbers, are obvious solutions. Many word processors have templates you can use for whatever you want to achieve.
- You could also opt for an online solution. One program with good reviews is My Study Life, and it has an app and web interface.
- Even if you are often online or regularly use a mobile, a paper timetable can still be best for you. This is the case, for example, if you are not allowed to use mobile devices in the classroom.
- Both paper and digital study schedules each have their advantages. A digital timetable can be easier to set up and make major changes, while you can easily make minor changes to a paper timetable that you can keep with you. A printed version can also be more convenient (or at least a lot more fun) to color in and to add a personal touch.
- You can also choose to combine a paper and digital version: use your computer to create a grid with days and times, then print as many of it as you need (depending on the number of weeks you want to plan ahead) and then fill it in by hand.
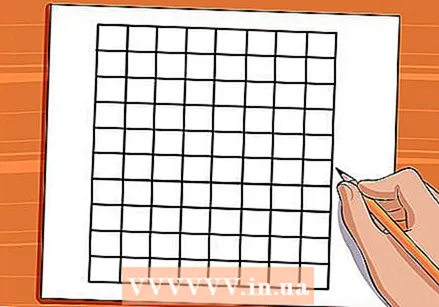 Draw the grid. A schedule should be a table with the variables “date” and “time,” with the days of the week at the top and the times at the side.
 - If you make a grid on paper, you will have to draw the grid yourself. You can use regular lined paper or blank paper for this. Draw your lines with a ruler to make it look neat.
- Probably the biggest drawback to the paper-and-pencil method is how difficult it is to make changes later on. Even if you use pencil for everything, it can be a huge challenge to adjust the number of rows or columns. In addition, you will have to do this all over again every time if you need multiple pages, such as one for each month.
Part 2 of 3: Filling in your timetable
 Choose a fixed or modified timetable. You can use a fixed schedule that is the same for every week. Or you can create a custom version for each week, depending on that week's requirements. You can create all your modified versions of the timetable at the same time.
 - Start the other way around for a modified weekly schedule. Do the big assignments or final exams first and work backwards from there. Your study schedule will have to change depending on what big assignments are coming up.
- Don't forget to fill in everything you brainstormed about before. Do this before you start planning your study time. This also includes all recurring obligations, such as training for sports. You will need to do this first so that you know when you have time to study.
- If you create a custom weekly schedule, don't forget the exceptions, such as birthdays and holidays.
 Divide your study time into blocks. Try to put together study blocks that are moderately long, such as 2–4 hours at a time. This will help you get into a study rhythm and make sure you are more productive about your time.
 - Just because you don't have a lot of time in a row doesn't mean you can't schedule a study period. If you feel like scheduling 45 minutes here or an hour there could be helpful, then absolutely go ahead.
- You will have to schedule more time for the subjects that are more difficult.
 Make a schedule for breaks. Breaks are essential to your success. You're not a robot, so you can't work non-stop for hours on end. Overall, you will do better if you allow yourself regular study breaks.
 - Many experts recommend that you work 45 minutes an hour, and then take a 15-minute break. Everyone is different, so experiment to find what works best for you.
 Be as specific as possible. You remember collecting all your assignments and syllabi? Now is the time to take advantage of it. You can schedule time blocks for certain courses and also schedule assignments, giving yourself a certain amount of time to work on them.
 - Things will change over time, of course, and something you planned two months ago may not apply now. But don't let that stop you. Think of this as a helpful guide, something to make sure you stay on track and break larger assignments into smaller pieces.
- If you always have a certain amount of homework for a particular subject every week, that would be great to add to your schedule. For example: if you have 20 math problems to do every week, you can use the grid to divide this up.
 Schedule multiple study topics for each session. Working on different study topics during a single session will ensure that you don't burn out studying on the same topic over and over, and as a result you run out of energy to do anything else.
 - Of course this can change when exam time is approaching, when you will have to spend all your time on a single topic!
 Make sure your timetable looks good. Using color coding for courses and tasks will make your timetable easier to use and read. You may be using this grid a lot - make it your own!
 - You can use colored pencils if you made a grid on paper. Or you can emphasize things on the computer and print it out in color. If you're using an online-only app, the timetable will already use color coding, although it may be customizable to some extent.
Part 3 of 3: Using the grid
 Stick to the schedule. It may take a while to really get used to using the timetable, but stick with it. Once it has become part of your routine it will be a great resource!
  Don't worry about it. Don't feel like you have to follow the schedule exactly to the minute. It's a simple system to help you do better in school. Base your time on it, but don't stress about not following it perfectly.
  Adjust the schedule. Check out what works and what doesn't, and if something doesn't work, adjust it! You've already spent time making the roster - there's no reason to ditch it now, when a few simple tweaks can make it work.
Tips
- If starting the other way around and creating a custom schedule that changes weekly now seems a bit too much, you can still make a standard study schedule fairly easily. Even if every week is the same, a schedule still offers loads of benefits.
- Search for images online or use Flickr or Pinterest to find examples of grids you can use for free.
- Do not forget to adjust your timetable if there are changes in your lesson times.


