Author:
John Pratt
Date Of Creation:
14 April 2021
Update Date:
1 July 2024

Content
Whether you need a bar chart for school, for a business presentation, or just because it looks cool, this wikiHow shows you how to create one in MS Word 2007, 2010 or 2013 and later.
To step
Method 1 of 2: Word 2013 and later
 Open Microsoft Word. You can also double-click an existing Word document to open it.
  Click on the "Blank Document" option. Skip this step if you are opening an existing document.
  click on Insert. This is a tab in the top left corner of the Word interface.
  click on Chart.
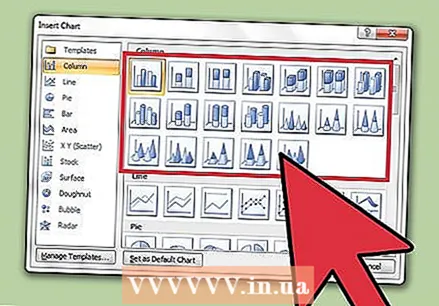
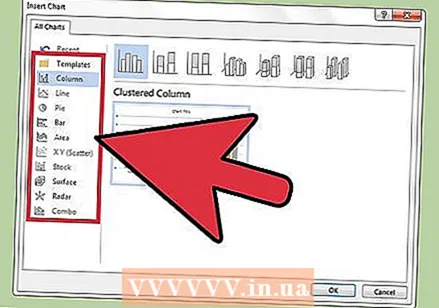 Click on a chart template. You can find this button on the left side of the graphs menu.
 - Depending on the information you want to display, your preferred format will vary.
 Click on a chart style. The style options appear above your chosen chart template.
  click on OK. A Microsoft Excel window will appear below the chart image.
  Add data to the chart. To do this:
 - Click on an Excel cell.
- Enter a data point.
- Press ↵ Enter.
 Click on the X in the Excel section. This closes the Excel window - your data will be saved in the chart.
Method 2 of 2: Word 2007 and 2010
 Open Microsoft Word 2007. You can also double-click an existing Word document to open it.
  click on Insert. This is a tab in the top left corner of the Word interface.
  click on Chart.
 Click on a chart template. You can find this on the left side of the graphs menu.
 - Some types of data work better with specific styles than others.
 Click on a chart style. The style options appear above your chosen chart template.
  click on OK. A window with Microsoft Excel 2007 data will appear.
 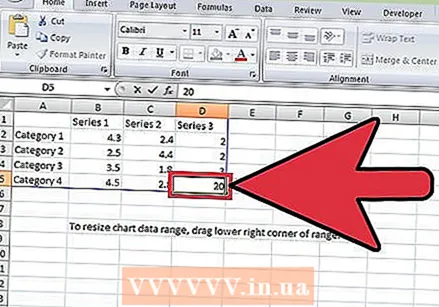 Add data to the chart. To do this:
 - Click on an Excel cell.
- Enter a data point.
- Press ↵ Enter.
 Close Excel when you are done. The graph will immediately change to reflect the entered data.
Tips
- By default, the sections of the bar graph are labeled "Category X" (where "X" is a number related to the section). You can rename these sections to something that better describes them by clicking the cell of a section and entering a new name.
- You can also add a title to the chart by clicking Template and then click Chart title in Word 2007/2010 (or by clicking the "Chart Title" at the top of the chart in subsequent Word versions).
- Some bar chart templates may work better than others with certain types of data.
- If you forget to save your document, reopen Word and the last cached version of the document will appear.
Warnings
- Save your work (hold Ctrl - or ⌘ Command - and tap S.) before exiting Word.


