Author:
Frank Hunt
Date Of Creation:
14 March 2021
Update Date:
1 July 2024

Content
- To step
- Part 1 of 3: Choosing the environment and materials
- Part 2 of 3: Planting a plumeria
- Part 3 of 3: Caring for a plumeria
- Tips
- Warnings
- Necessities
A plumeria is a fast-growing tropical tree that produces an abundance of fragrant flowers between March and October. It is a small tree that grows to about 30 feet (9 meters) when mature. Also known as frangipani, this tree requires a warm climate to grow. This plant cannot survive sub-zero temperatures, but you can plant it in a container and then bring it indoors once it gets cold outside. By choosing the right location, ensuring that the plant does not get too much water and taking good care of it all year round, your plumeria will grow into a strong and beautiful tree.
To step
Part 1 of 3: Choosing the environment and materials
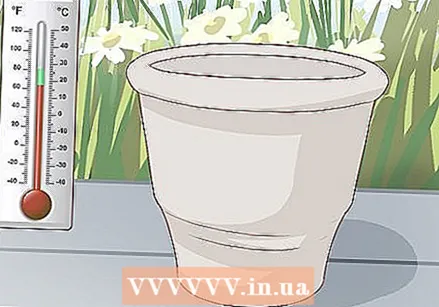 Choose a warm spot. Plumerias require a temperature of at least 18 ° C to 27 ° C. They will die when the temperature drops below 13 ° C. Any part of the plant exposed to freezing temperatures will die. That is why it is very important to choose the right place. If it often gets colder than 13 ° C in your climate, then you should not plant the plumeria outside in the ground. Instead, opt for a container that you can bring in once it gets cold.
 - Although plumerias have strict temperature requirements, they are flexible in the sense that they can thrive both indoors and outdoors.
- Plumerias can survive very warm temperatures, even above 38 ° C.
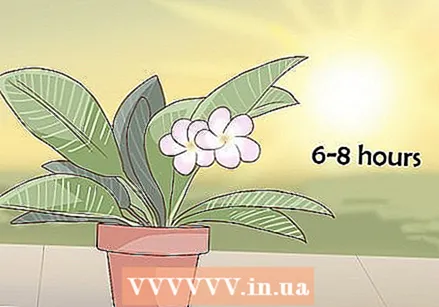 Get plenty of sunlight. Plumerias grow best in full sun and need at least 6 hours of sunlight per day. Find a spot where the tree is regularly exposed to full sun. Plumerias do well in greenhouses or, if you grow indoors, near a large window with lots of light.
  Make sure there is enough space outside. If you plant the plumeria outside, you can choose both a pot and open ground. When planting plumeria in the garden, make sure there is a space of 3 to 4 meters between them so that the roots have enough room to grow. You can plant a root ball in a hole with the same depth as the roots, but 2 to 3 times as wide. Choose a place to plant where the soil drains well and where no water remains after rainfall.
 - Avoid places where the plumeria will be exposed to heat radiated from a brick or cement wall.
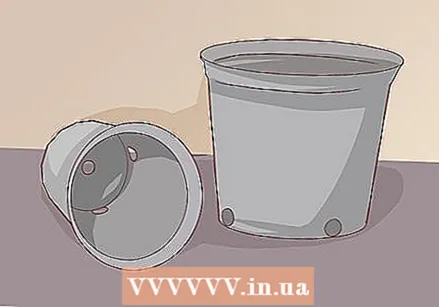 Use black containers. Planting a plumeria in a container is helpful because you can bring it inside when it gets cold. Or you can simply keep your plumeria indoors all year round. If you are planting the plumeria in a container, make sure to choose a container with one or more holes in the bottom for drainage, as plumeria do not do well when their feet are wet. Use a container with a volume of at least 5 liters so that the plant has enough space to grow. Black boxes are better than clay boxes because of the porous nature of clay, which causes roots to get stuck in the box and moisture to dissipate too quickly.
 - You can find black tubs at a garden center.
- Plastic bins are also a good option because they don't have the same porosity as clay.
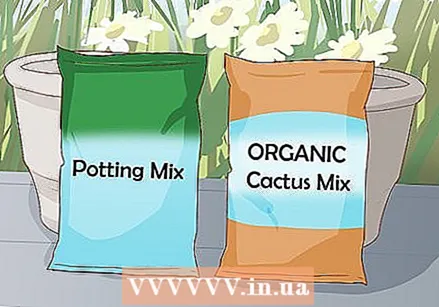 Use coarse soil. One of the biggest dangers to plumeria is overwatering, so make sure the soil is well drained. A soil mixture for cacti can be useful. If it is too dense or too fine, too much water will be retained. Coarse soil will provide adequate drainage. Choose soil with a pH that is slightly acidic, roughly between 6 and 6.7. To ensure that the soil drains sufficiently, you can mix a little perlite or sand in it. You can find potting soil in a garden center.
 - If you plant the plumeria outdoors, make sure the soil is well drained by mixing in organic matter such as manure or peat.
 Buy a pre-planted plumeria. If you don't want to plant a plumeria yourself, you can choose a specimen that has already grown. Buy a healthy plumeria from a nursery. Choose a compact plumeria with an even and bright color and a sturdy, straight trunk. Look for evenly spaced branches. Avoid plants with wilted leaves or a faded color.
Part 2 of 3: Planting a plumeria
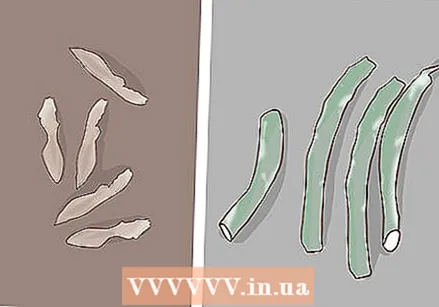 Provide seeds or cuttings. You must plant the seeds or cuttings to grow your own plumeria. Unfortunately, these are not widely available commercially. Finding them can be challenging, so the best solution is to ask someone who already has a plumeria. Maybe a neighbor or family member who wants to sell or give you some seeds or cuttings. These seeds and cuttings can be harvested in the spring or fall for propagation.
 - You can also find seeds and cuttings online at websites such as Bol.com, but be careful when buying online, as plumeria seeds and cuttings can lose viability after just a few months.
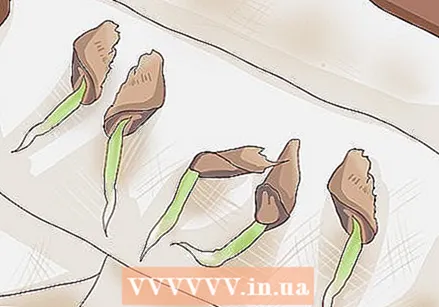 Germinate the seeds. This means that you have to place the seeds on a piece of wet kitchen paper for a full day. They will absorb the moisture and swell a bit. This indicates that they are ready to start growing. In this way, the seeds will take root more quickly. Provide a warm environment during germination.
  Plant the seeds or cuttings. To plant plumeria seeds or cuttings, fill a container with soil and insert the seeds about 5mm deep into the soil. Cuttings should be planted about 5 cm deep. Press the soil around the seeds or cuttings firmly so that they stay in place. When planting seeds, make sure the swollen end is at the bottom and the other part is slightly above the soil. Only plant one seed or cutting per pot.
 - You can plant them initially in a smaller pot (about 500ml) and then transplant them to larger pots (about 9.5 liters) when the seed has started to grow in about a week to a month. The smaller pots are known as grow pots and can be useful for plants just starting to grow.
 Wait to water the cuttings. When you first plant your plumeria cuttings, do not water immediately. New plumeria are very delicate and their root system will grow even with a minimum of water. Simply make sure there is enough light and heat for the first three weeks and then start watering gradually. Start with half a cup of water per plant per week. Specimens that have already been planted can be watered thoroughly; there is no point in waiting here.
 - Leaves will appear on the plant in about a month or two. This means that from now on you can water regularly, so every week.
- When the leaves are about 5 inches long, it means the plumeria has taken root and you can water thoroughly.
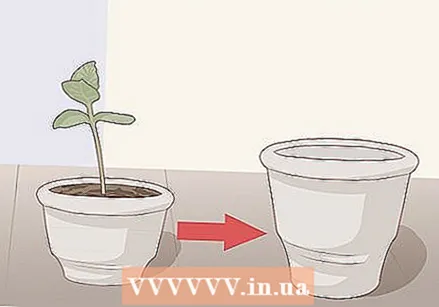 Transplant the seedlings. Once the seedling is at least 7.5 cm high, you can transplant it to a larger pot. Simply remove the seedling with the soil and put it in a larger container full of potting soil, with a capacity of at least 5 liters. Cover the roots in the new pot with soil and press well.
 - If possible, opt for a plastic pot or a black cultivation pot.
Part 3 of 3: Caring for a plumeria
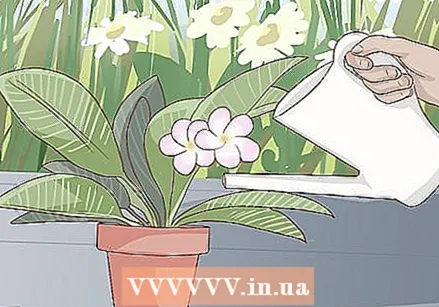 Water according to the season. A plumeria should be watered regularly, at least once a week, when the plant is in bloom, from March / April to November / December. Stop watering when the leaves start to fall and do not water during the dormancy period or when the plant first takes root. Too much water is one of the biggest dangers for a plumeria. To avoid this, make sure the soil dries out completely between watering.
 - Water enough to moisten the soil, but make sure that no puddles remain. The amount of water depends on the size of the plant.
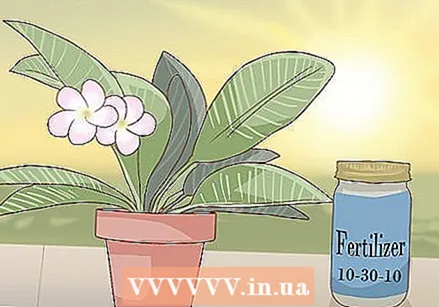 Use a fertilizer rich in phosphorus. When the plumeria is in bloom, add a fertilizer rich in phosphorus, such as a 10-30-10 (the number in the middle represents the amount of phosphorus) twice a month. Dilute the fertilizer by adding 1 or 2 tablespoons to 4.5 liters of water. Then use enough of this solution so that the soil becomes soil.
 - During the dormant period in the winter months, no care or fertilization is required.
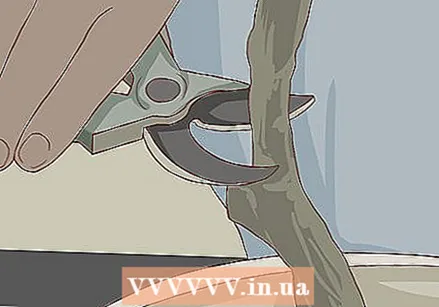 Prune if necessary. Plumerias should not be pruned often, but when the branches are getting very long, you can trim them at the end of winter. Simply cut off a third of the branches. This will benefit the health of the plant and help it grow better.
  Keep insects in check. Certain insects can damage plumeria such as mites, flies and aphids. When you notice bugs on your plumeria, use a horticultural oil or insecticide on the leaves. More than one application may be required to treat the insects effectively. In any case, follow the guidelines on the insecticide's label for best results.
 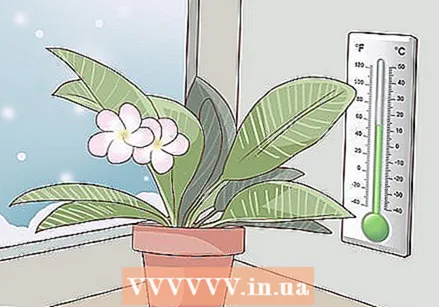 Bring the plant indoors in winter. If you keep the plumeria outside in a container, you must bring it inside for the winter. You can put the plant in a garage or basement. Make sure that the temperature never drops below 13 ° C. The plumeria should be kept dry and warm during the dormancy period.
 - In winter, plumeria can survive without light, but they will perform better the following season if allowed to hibernate in the light. You can use fluorescent lights in your garage or basement if there are no windows.
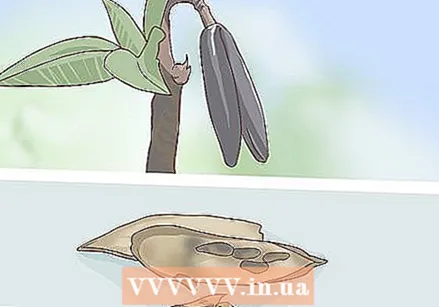 Take cuttings or collect seeds for propagation. In the spring or fall, you can cut pieces of stalk of about 12 to 60 cm. Leave them alone for about two weeks before planting. You can collect seeds when the pods burst. Make sure to keep them dry until you are ready to plant them. Dry them for at least three months.
 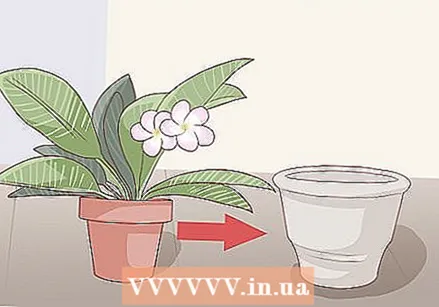 Repot when the roots have filled the container. If your plumeria is starting to grow outside of the container, then it is time to transplant the plant to a large pot. For example, if you're currently using a 4.5 liter jar, the next one should be about 11 liters. A plumeria will only grow larger if the roots have enough space to grow.
 - If the plumeria is too big to repot, you can simply remove a few inches of soil and add fresh soil.
Tips
- Make sure not to overwater as that will damage the plumeria.
Warnings
- Plumerias have zero tolerance to frost. Any part of the plant exposed to freezing temperatures will die.
Necessities
- Plumeria plant
- Sturdy container with drainage holes if you grow indoors
- Commercial soil mix for cacti or an all-purpose soil mix if you grow indoors
- Fertilizer rich in granular phosphorus


