Author:
Charles Brown
Date Of Creation:
8 February 2021
Update Date:
1 July 2024
Content
Of course, the movie industry has the right to protect intellectual property, but if you bought a DVD, you should still be able to know what you're doing with it, as long as you don't distribute the movie illegally. Read this article to learn how to rip a DVD or Blu-Ray so that you can watch the movies not only on your DVD player, but also on your computer or tablet.
To step
Method 1 of 2: Rip a DVD on PC
 Download a program to bypass DVD copy protection. Good options include DVD43, AnyDVD or DVDFab DVD to DVD.
 - Compare different products, read the terms and conditions carefully and search the internet for reviews from people so that you can be sure that you choose the best software.
- Choose a product that you can try for free, don't transfer money right away.
 Insert the DVD you want to copy into the computer's DVD drive.
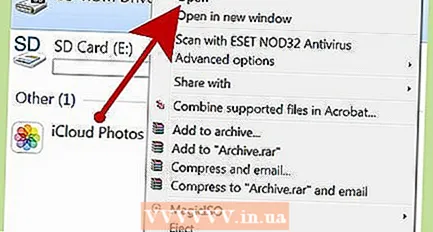 Copy the contents of the DVD to your hard drive.
- Open Start, click My Computer, right-click the DVD and select Explore.
- Look for the folder named VIDEO_TS. Drag the folder to the desired location. If you only want to watch the movie on your computer, you are now done ripping. You don't need to do anything with it anymore unless you want to resize the file or watch the movie on a mobile device.
 Download transcoding software. You can find many options on Google, but Handbrake is the best choice. Whichever program you use, first check if they support the desired mobile platform.
  Open the source file of the DVD you want to rip from Handbrake or other transcoding software. The software scans for chapter titles and markers. If the program does not recognize the titles, you can click on the Chapters or Chapters tab in the software portal and enter the titles yourself.
 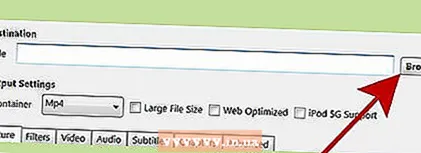 Decide where to save the movie. Many programs have a tab called Destination. Click on Browse and choose the location where you want to save the file.
 - You can also save the file as a shared file on a media server or network drive.
- Navigate to the correct folder, right click and choose "Map Network Drive" from the menu.
 Adjust the soundtrack. For example, you can keep the original Dolby Digital (AC3) soundtrack of the movie and create a backup soundtrack for devices that are not suitable for it.
 - Click on the Audio & Subtitles tab of your transcoding software.
- Choose the soundtrack you want. Select AAC from the Audio Codec menu.
- In the mixdown column you choose Dolby Digital II. Leave the values for bitrate, sample rate and DRC settings as they are.
- Go to the second audio track. Select the same soundtrack from the source list.
- Select AC3 from the list of audio codecs.
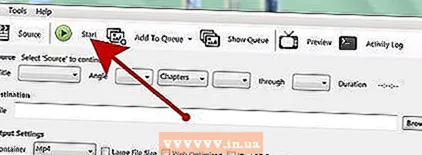 Click the start button to rip the DVD.
 Play the ripped movie in your media player to make sure the quality is good.
Method 2 of 2: Rip a DVD on Mac
 Download Handbrake transcoding software. Opt for the 64-bit version if your computer can handle that.
  Download VLC media player. If you have opted for 64 bit, you now also need the 64 bit version of the VLC player. It includes libdvdcss, a tool to undo DVD encryption so that you can play it on your Mac.
  Launch Handbrake on your Mac. A window will now appear. Choose the DVD you want to rip and click Open.
  Wait for Handbrake to scan the DVD. When the scan is complete, click the box next to Title. Choose the longest title from the pop-up menu.
 - You may see 99 titles that are all about the same length. This means that the DVD is copyright protected. Open the DVD Player program. Click on "Go" and click on "Title". Find the title with the check mark next to it. Then choose this title in Handbrake.
- If you want to rip multiple titles (for example a DVD with multiple episodes), select one title, give the title a unique name at File and click Add To Queue. Repeat this process until you have added all desired titles to the encoding queue.
 Click the Toggel Presets button at the top of the Handbrake window. You can also press command-T. Choose a "preset" for your ripped DVD based on the type of device you want to watch the movie on. You can also choose Universal, then you can play it on all Apple devices.
 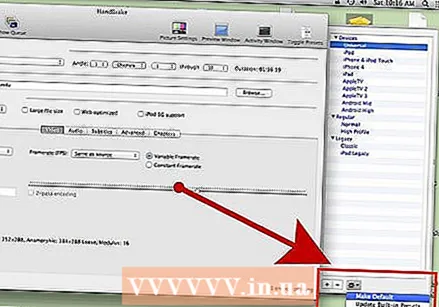 click on the gear. Choose Make Default in the menu that now appears.
  Check if the DVD contains "interlaced video". Click the Preview window in Handbrake and scroll through the frames of the DVD. If you see images with serrated edges, the DVD has "interlaced video".
 - Click the Settings button. Now a window called Picture Settings will open.
- Click on Filters. Slide the Slider between Decomb and Deinterlace all the way to the right.
- Click the drop-down menu next to Deinterlace. Choose Fast and watch the video to see if the images now look good.
 Adjust the audio to reduce the file size.
- Eliminate the audio tracks you don't need, including language tracks.
- If you are not going to use surround sound, you can delete the 5.1 track or mix the audio to stereo.
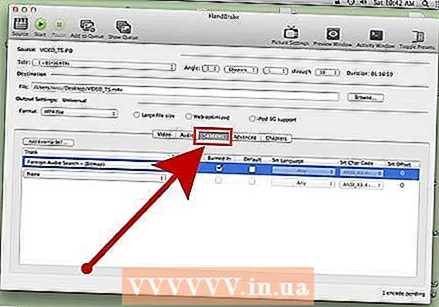 Add the subtitles to the file by clicking the Subtitles tab in Handbrake. Choose the subtitles you want to add to the file.
  Click Start and wait for transcoding to finish. This can take a while.
  Add metadata such as an image, the cast or abstracts. Download programs like MetaX, iFlicks or Video Monkey to help you with this. Handbrake sends any rips directly to MetaX.
  Drag the movie to your iTunes library and watch!
Tips
- If you want to burn the DVD to a blank 4.7 GB DVD, you will have to resize the file first, as the original is often larger than 4.7 GB.
- ripping DVDs is very demanding on your processor, so don't start ripping until you don't need your computer for other things. For example, do it at night when you are sleeping anyway.
Warnings
- Ripped movies take up a lot of space on your hard drive. A disk that is too full will not benefit the operation of your computer.
Necessities
- PC or Mac
- Copy protection bypass program (DVD43, AnyDVD or DVDFab DVD to DVD)
- A blank 4.7 GB DVD
- Transcoding software (Handbrake)
- Metadata program (MetaX, iFlicks or Video Monkey)


